In Dying Light: The Beast treasure maps are kind of clues showing the approximate location of valuable caches. However, often these drawings turn out to be uninformative, which is why finding treasures on your own can be very difficult, given the huge open world. In addition, the treasures themselves are often hidden behind solving riddles.
For this reason, we decided to show in this guide the location of not only the cards, but also the treasures to which they point, and also talk in detail about solving the puzzles associated with them.
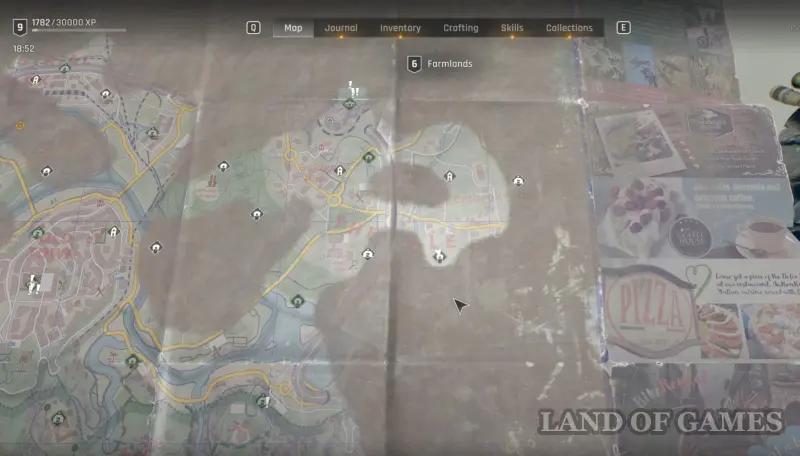
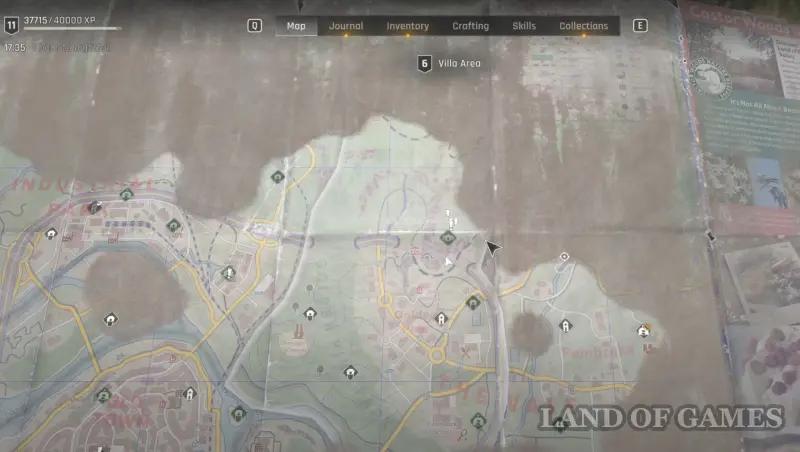
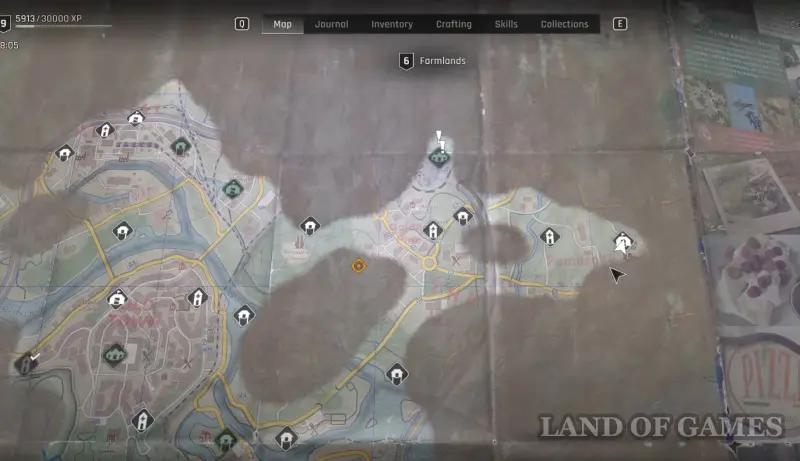
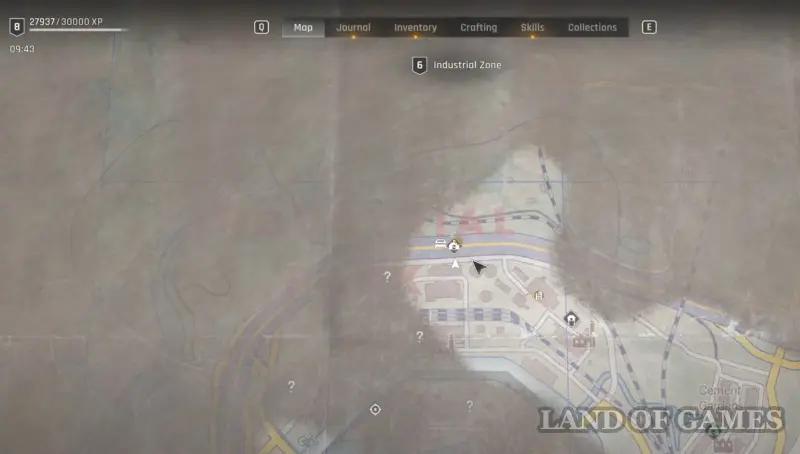
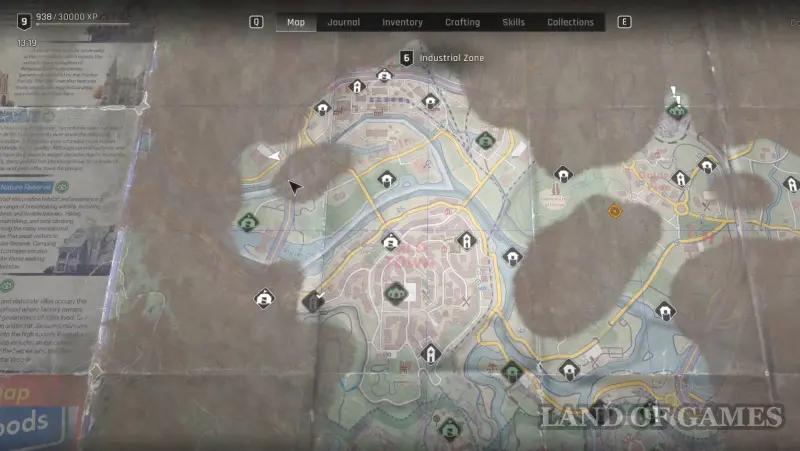
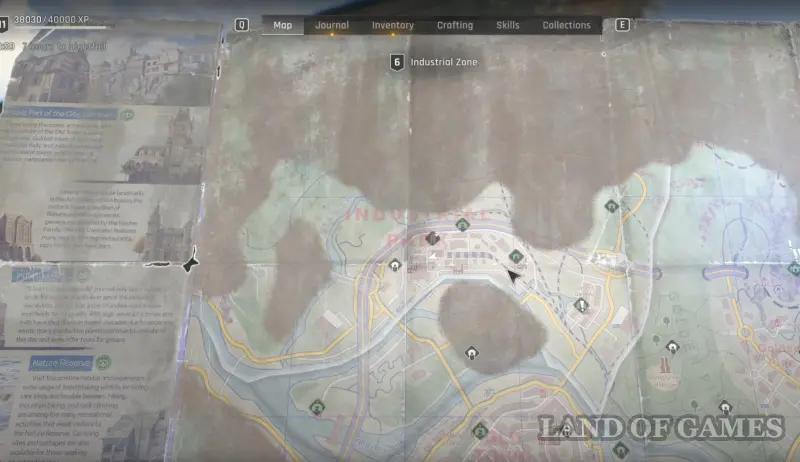
Where to find all the treasure maps in Dying Light: The Beast
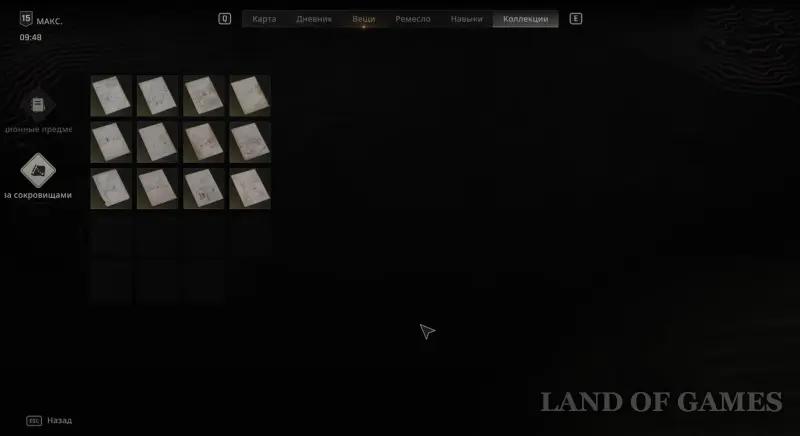
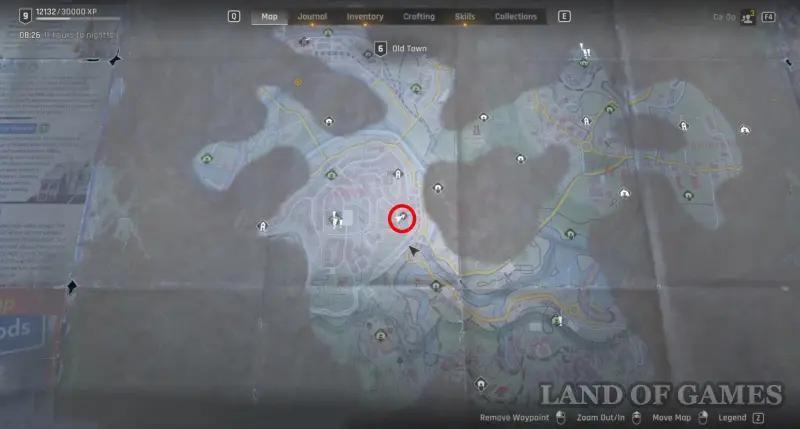
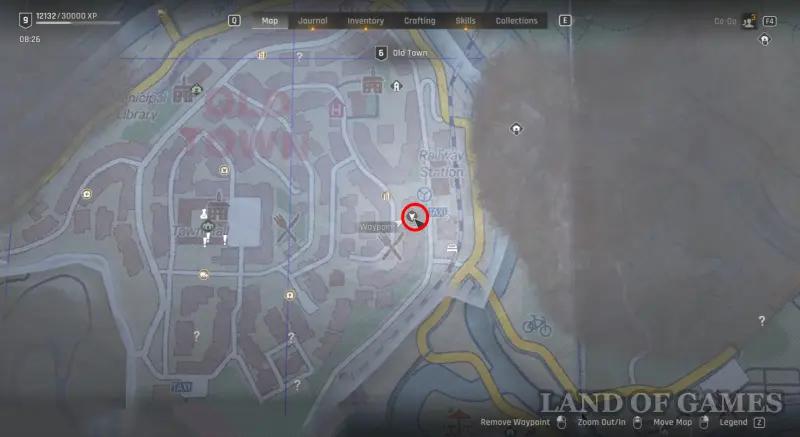
There are 20 such cards in the game. Some of them you can easily find in safe areas, while others are hidden in very inconspicuous places that you can easily miss. Once you've found a drawing, you can explore it again at any time in the Collections section, under the Treasure Hunt tab.
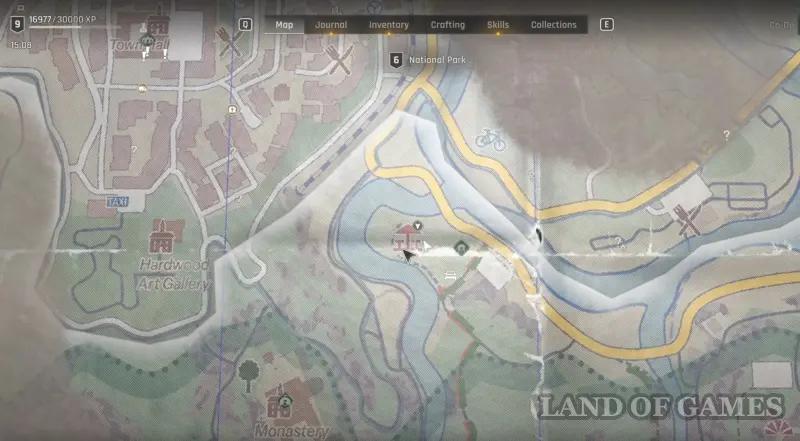
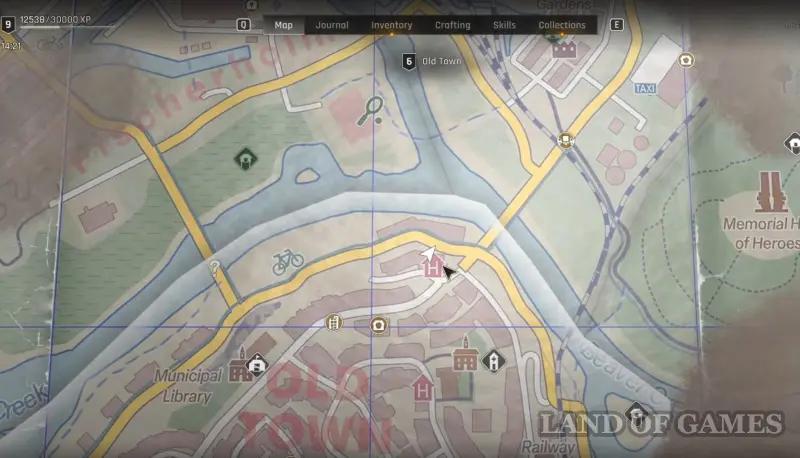
Note that we have not personally tested it, but most likely you will not be able to find the treasure without having the corresponding map with you. Next, we examined all the cards sequentially and in detail according to their serial numbers. We advise you to keep an interactive map of the world in front of your eyes to make it easier for you to navigate the area.
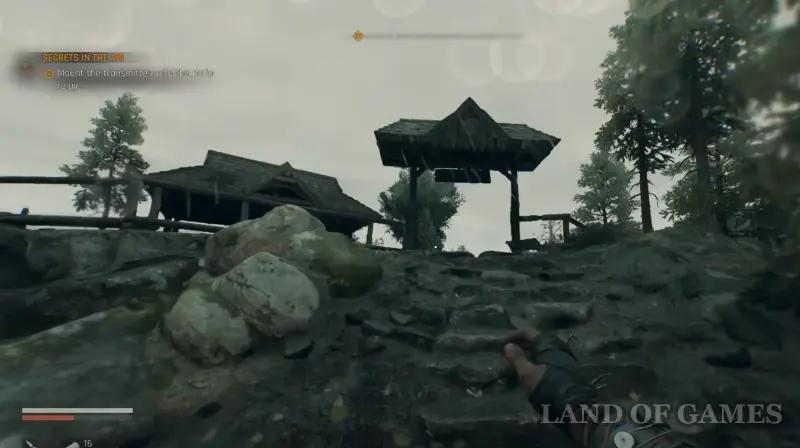
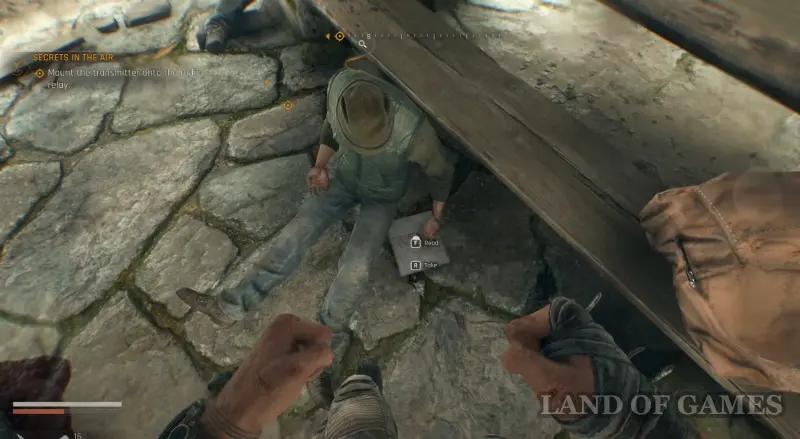
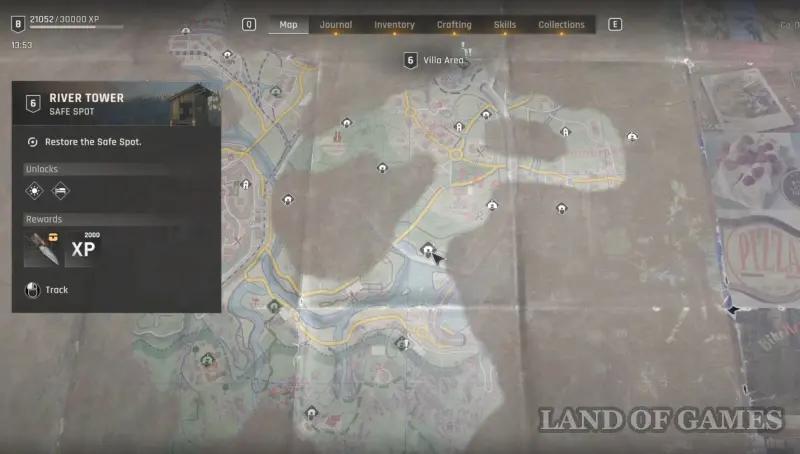
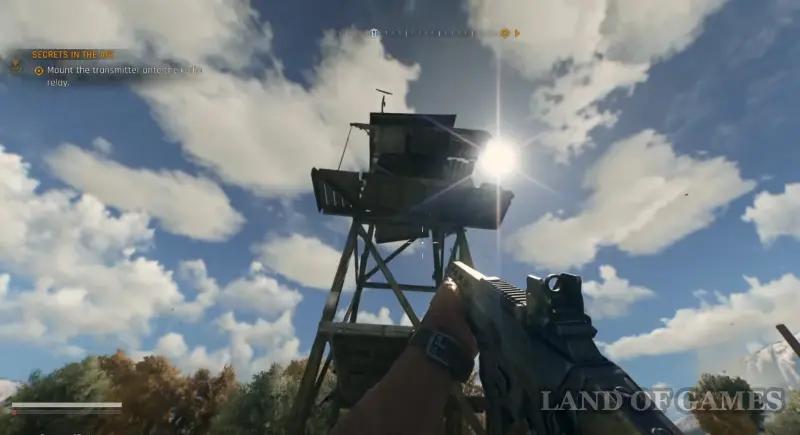
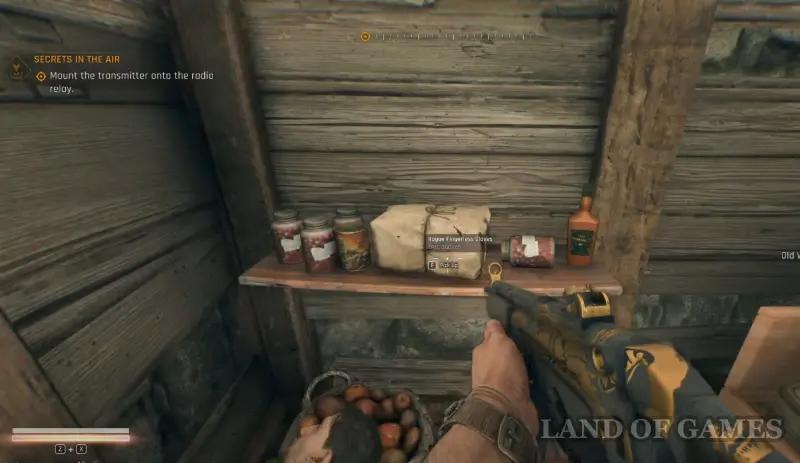
Treasure Map A1
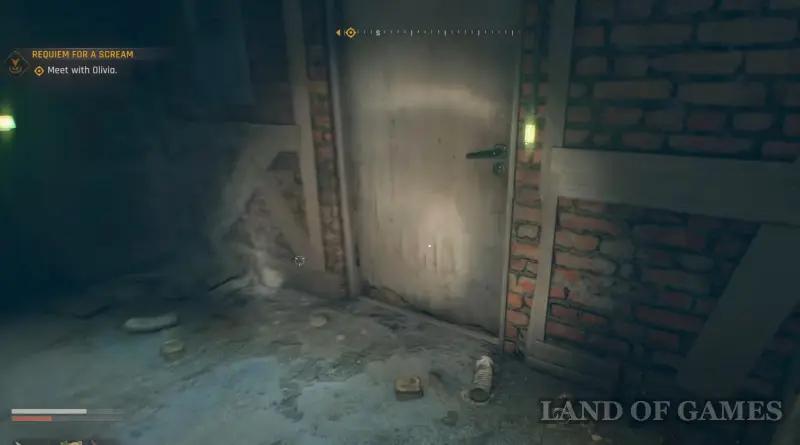
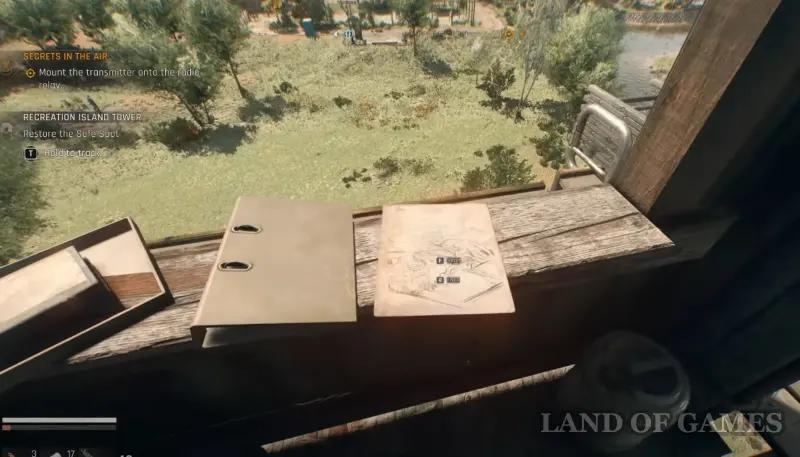
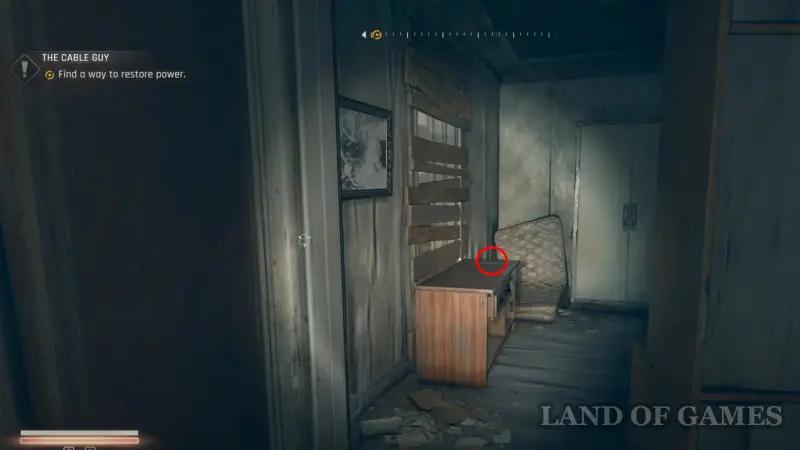
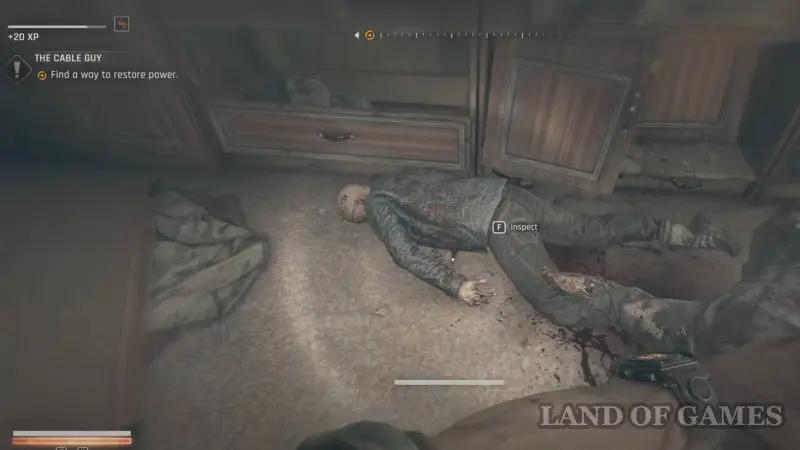
It is located not far from the place where the main story campaign starts. Head to the park area located east of the monastery. Then go up to the upper platform and enter the gazebo. Here, examine the corpse lying near the bench and select the drawing you need.
Where to find treasure A1
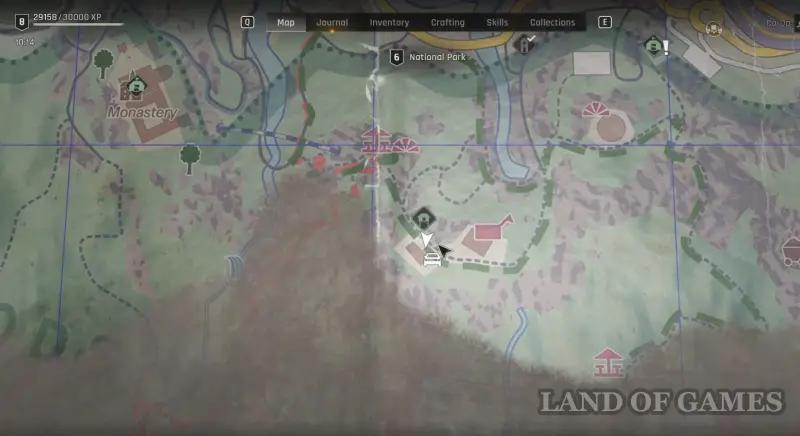
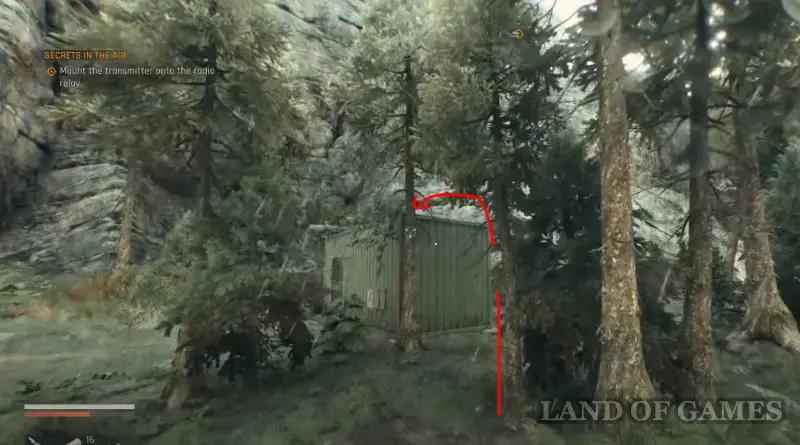
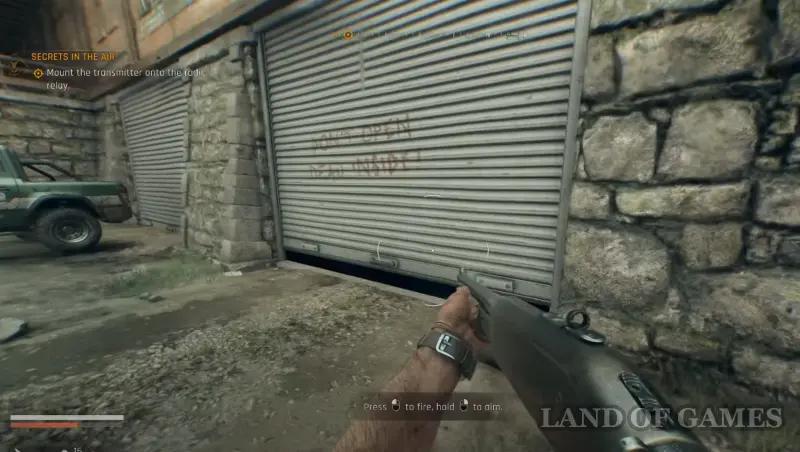
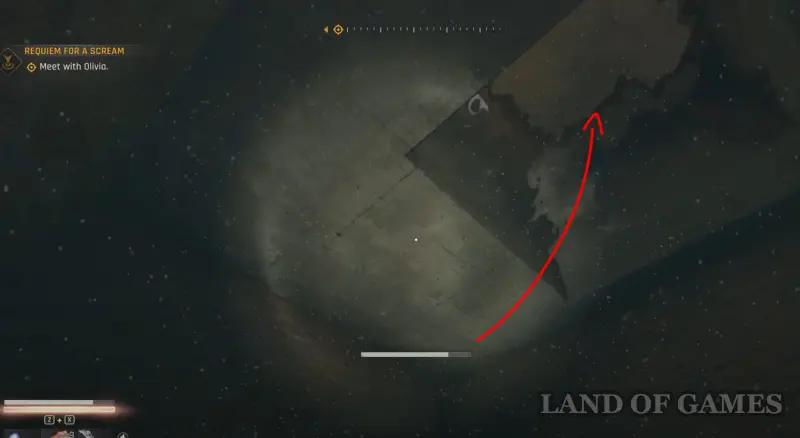
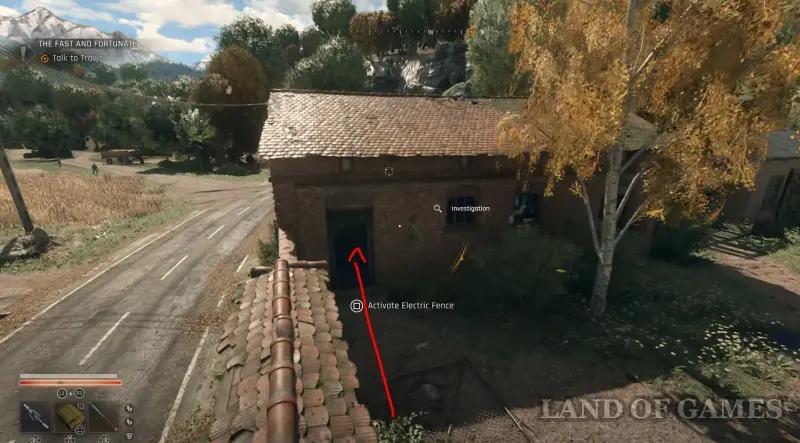
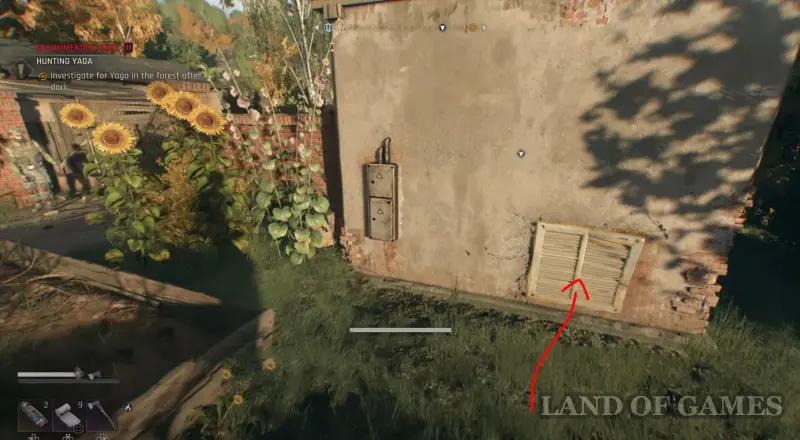
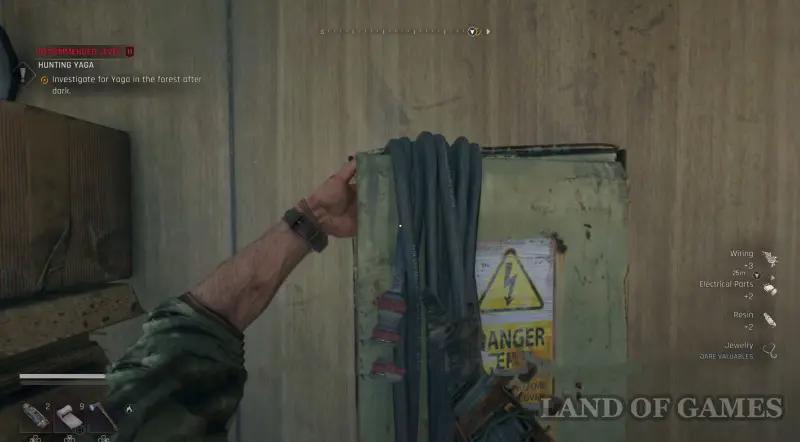
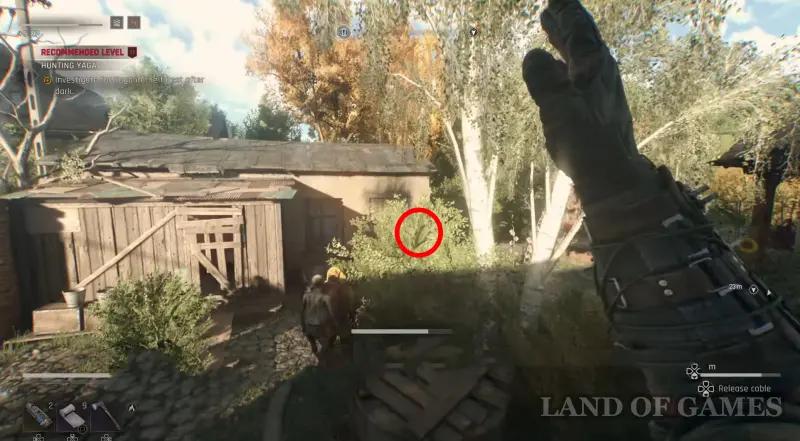
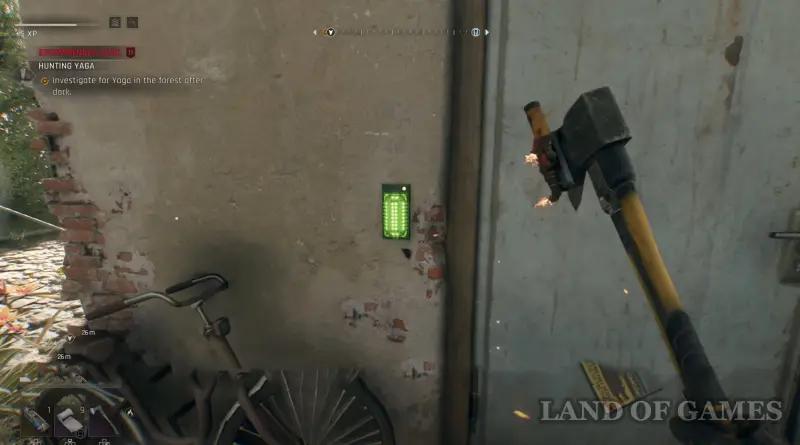
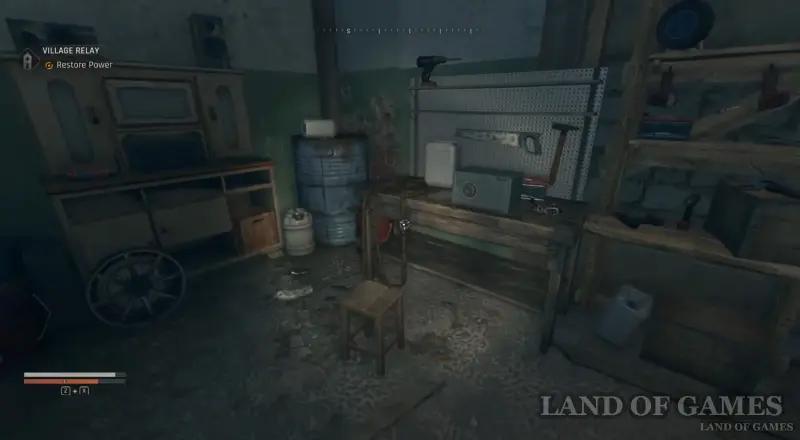
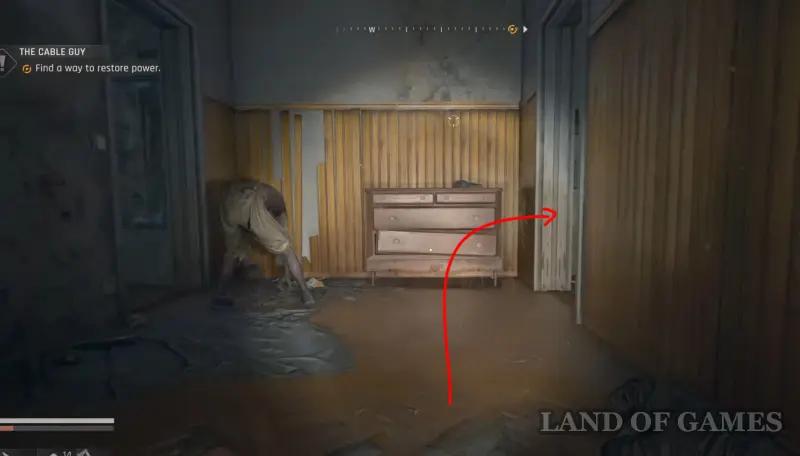
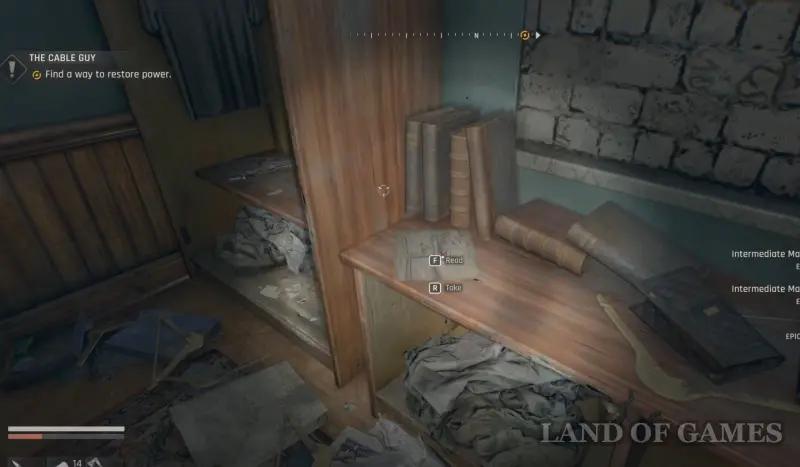
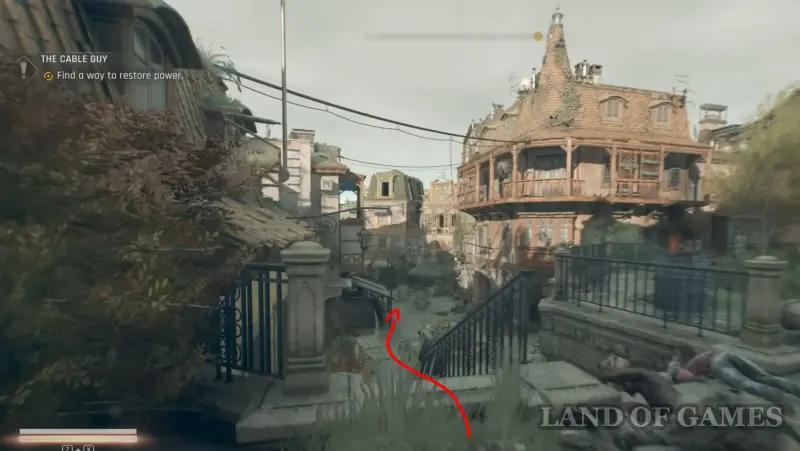
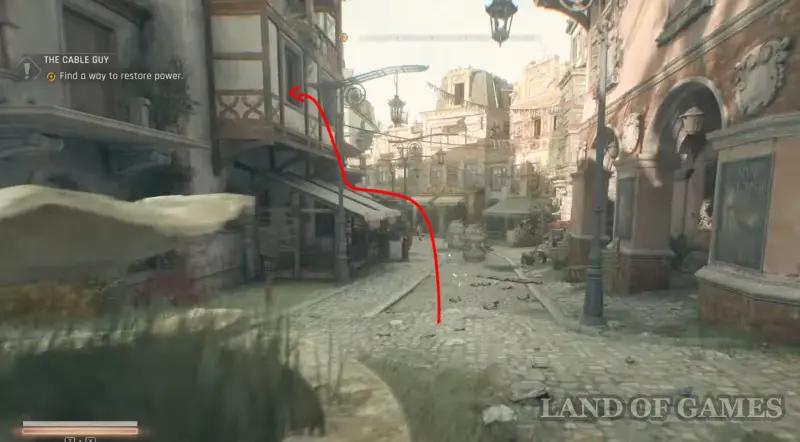
If you look at the map, you can see that a ranger post is drawn on it, located not far from the Mountain Tower safe place. Once you are near the desired house, do not go into it – instead, first climb onto the roof of the green container on the right and go inside through the hatch. Activate the generator here, and then take the cable and pull it out.
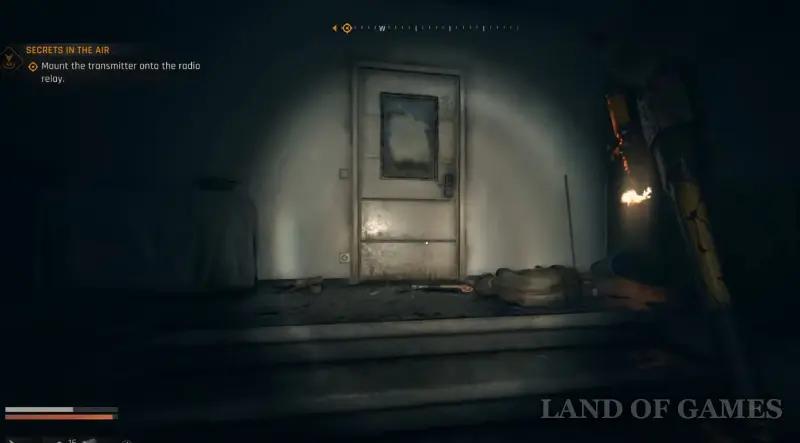
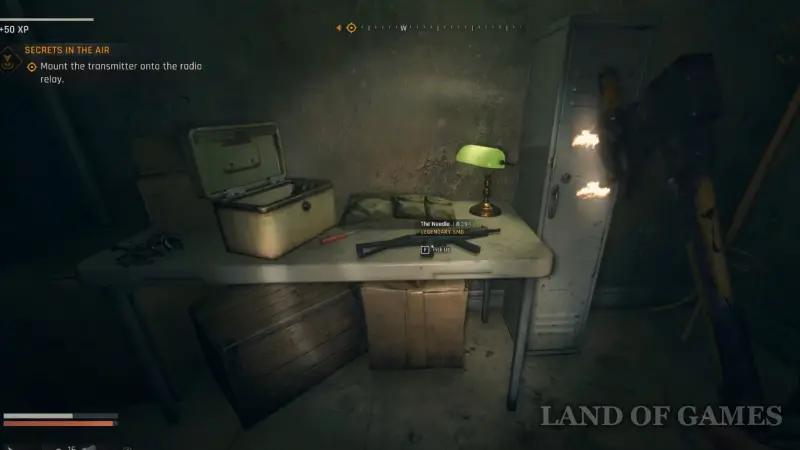
Run to the house, climb onto the metal box and connect the wire to the electrical panel on the wall. Wait for the garage door to open on the side (be careful as zombies will attack you), then go in and pick the door on the left. In this room on the table you will find the legendary Igla submachine gun.
Treasure Map A2
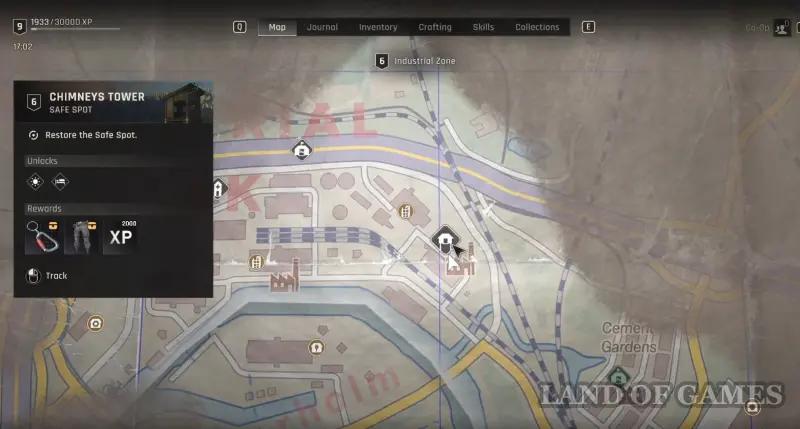
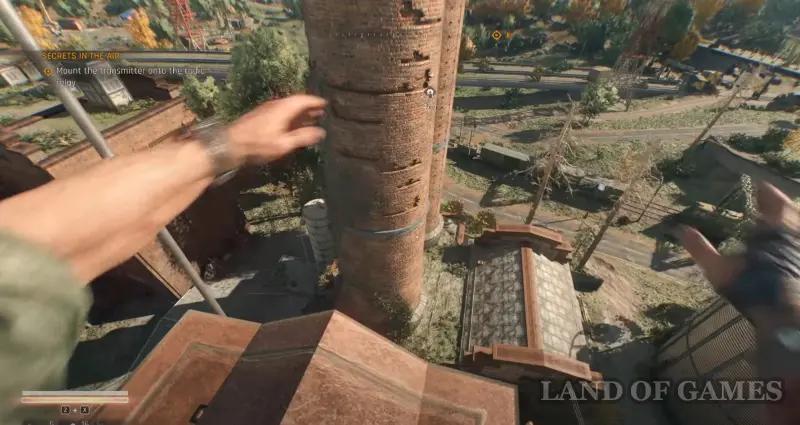
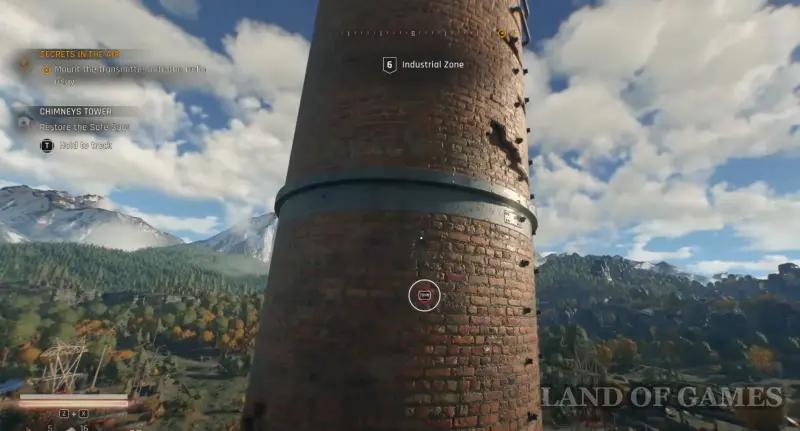
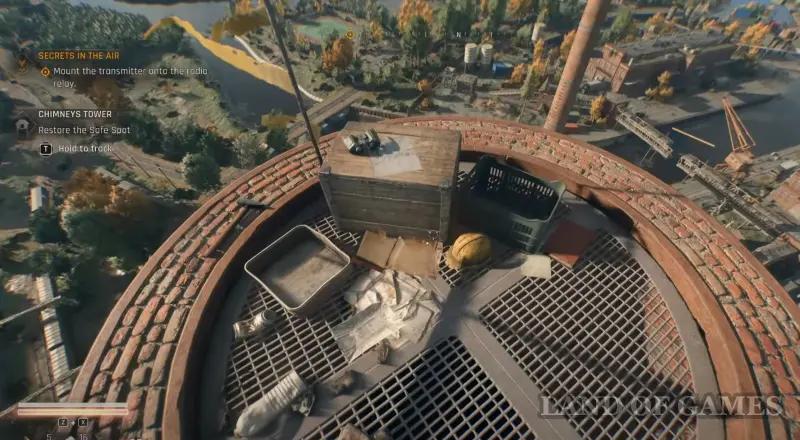
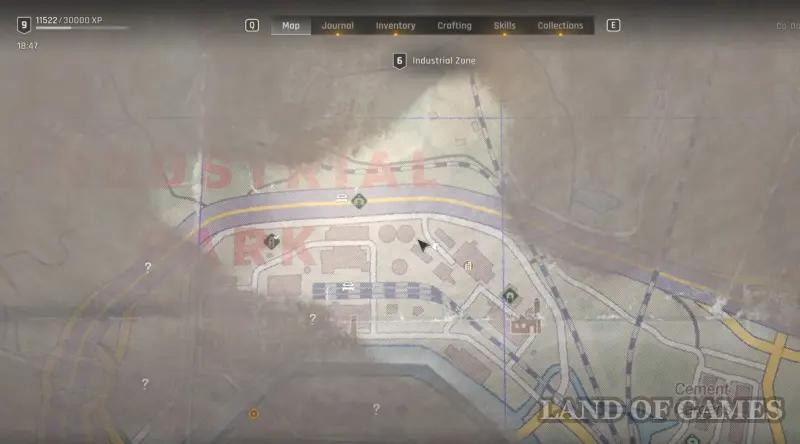
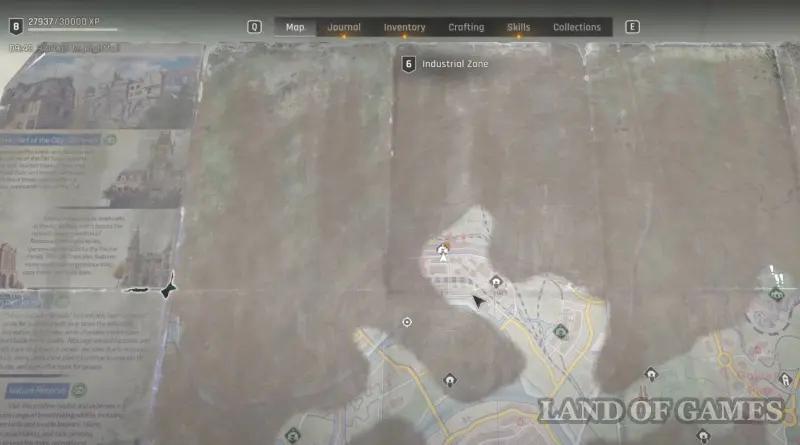
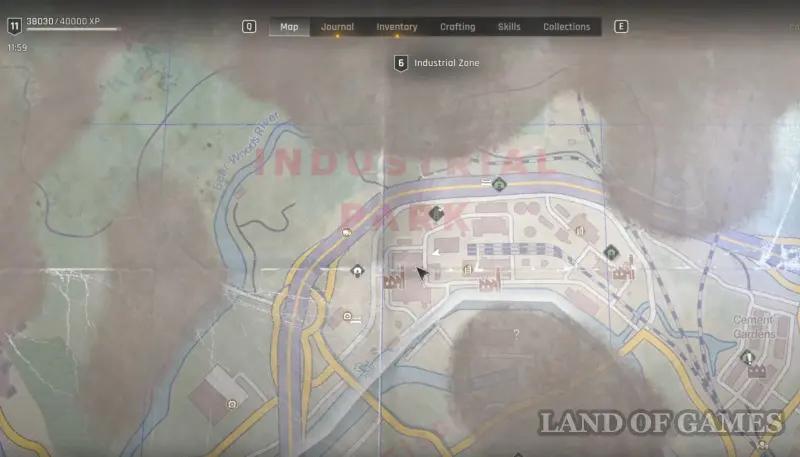
Head to the Industrial Zone and find the Chimneys safe point nearby. Climb the left tower first, climbing along the ledges, and then go to the right one along the metal beam. Continue moving from one tower to another until you reach the very top of the left tower. Here on the box you will find a drawing.


Where to find treasure A2
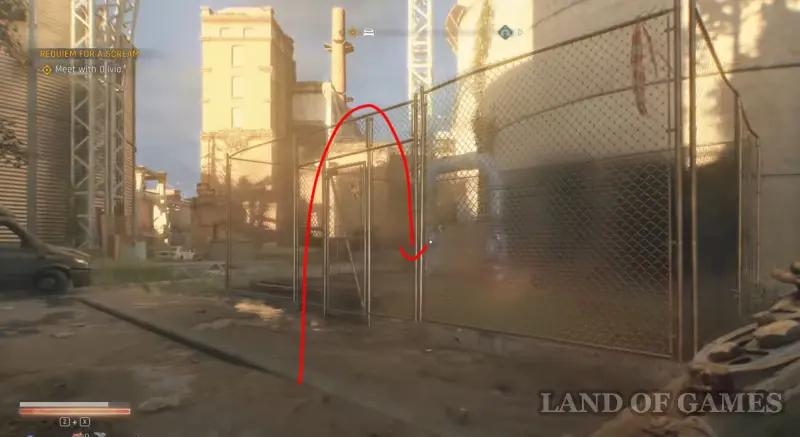
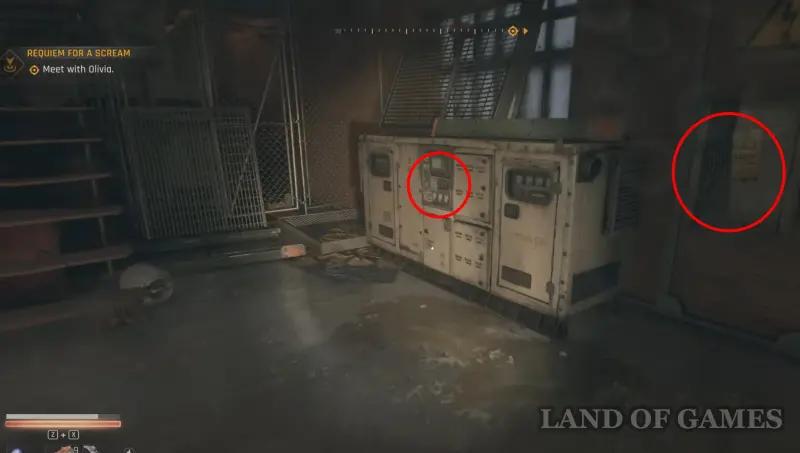
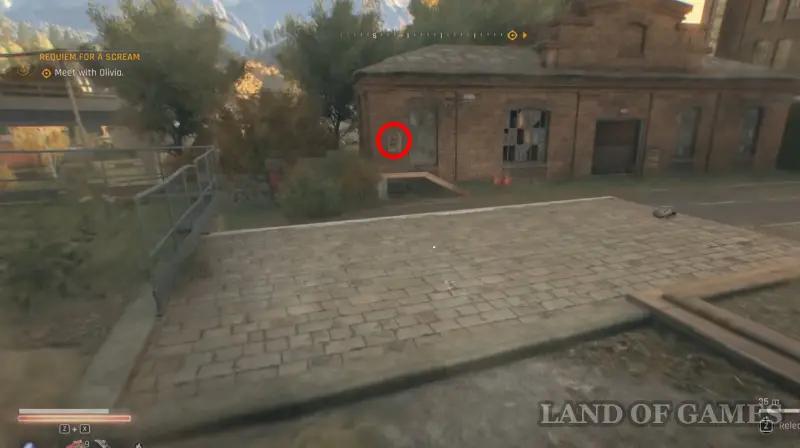
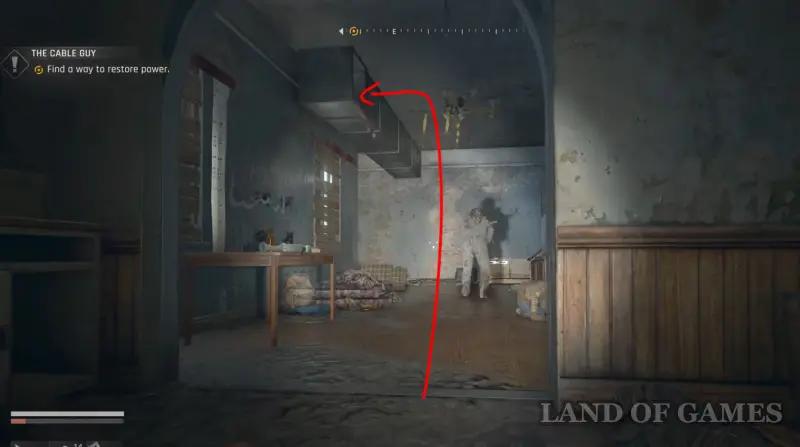
Head northwest from the chimneys to the highway. Next to the large fuel tank you will see an area fenced off with metal bars. Climb over the fence and then jump down the hole and plunge into the water. Swim through the passage on the left, and then swim into the small vent, turn left and swim out.
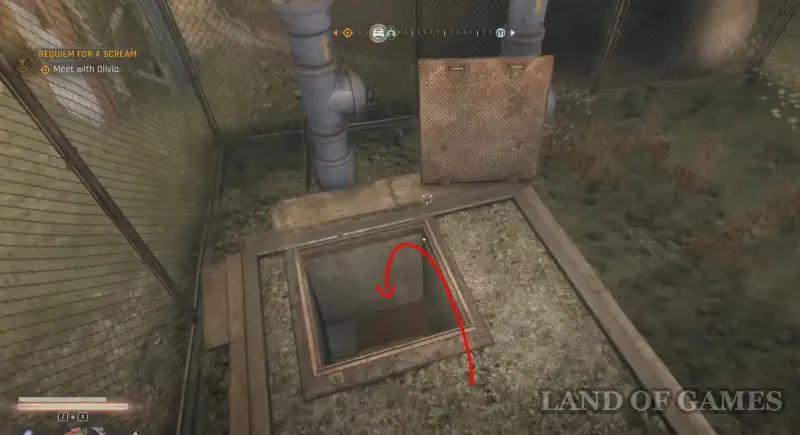
In the new room, activate the generator on the right, and then take the cable even more to the right and jump into the water again and swim back. Once outside, climb over the mesh and run to the abandoned building on the left, and then connect the wire to the electrical panel on the wall. Next, wait for the metal door to open.

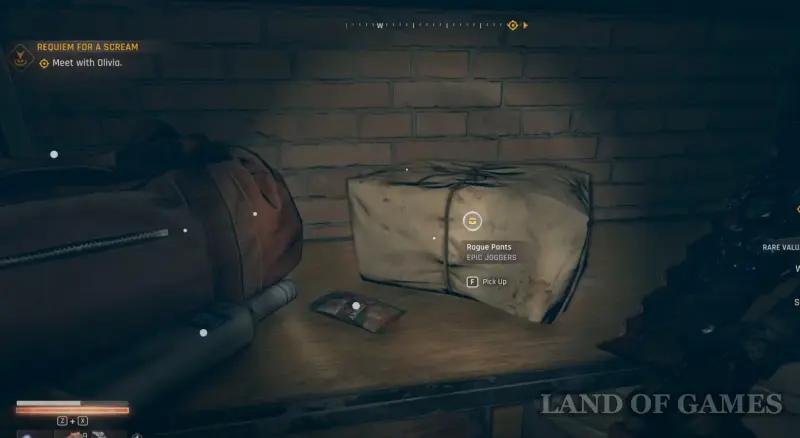
Go inside and deal with the electro zombies, then go into the room on the left. Inside you will find a lot of valuable materials and items, including Robber Pants of epic rarity.
Important: A bug may occur in this location due to which you will not be able to activate the generator or pick up the cable. In this case, we can only advise you to wait for the release of a patch from the developers.
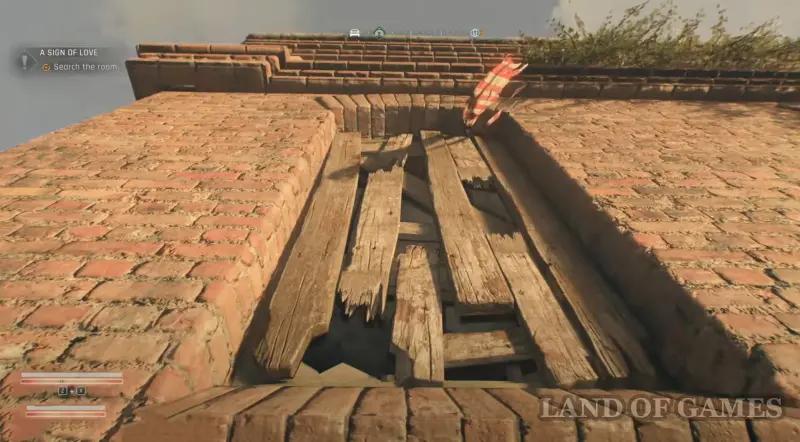
Treasure Map A3
Head to the southern part of the Farm location and reach the Farm Tower, which can be seen from afar. Climb onto it, swinging on a rope, and at the very top on the crossbar you will find the design you need, which will lie near the saw.
Where to find treasure A3
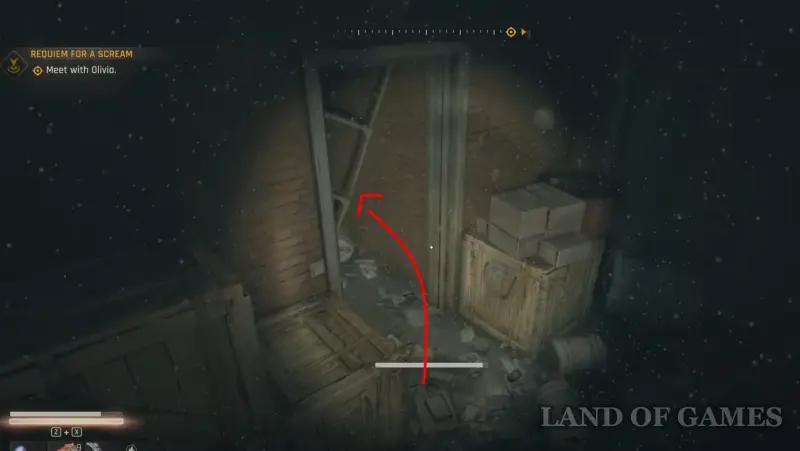
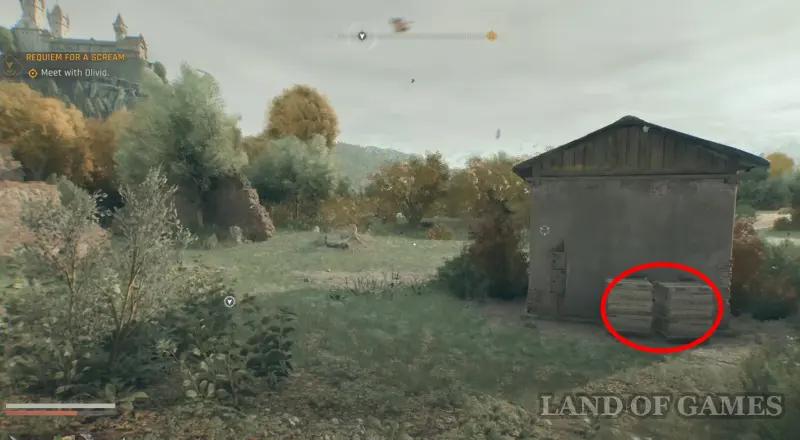
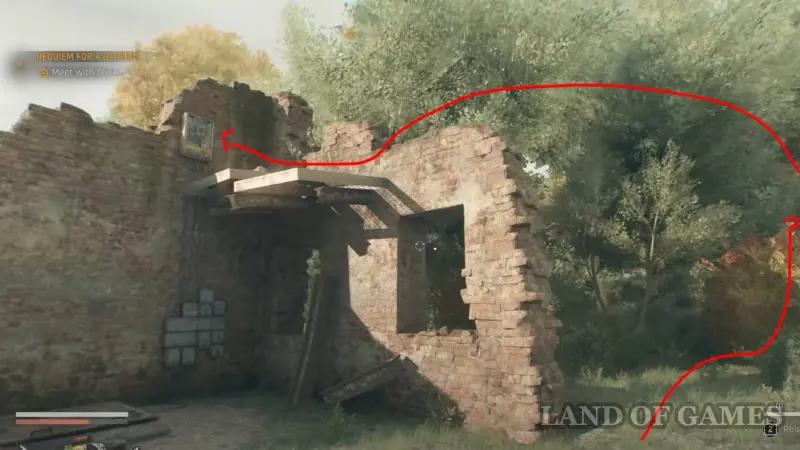
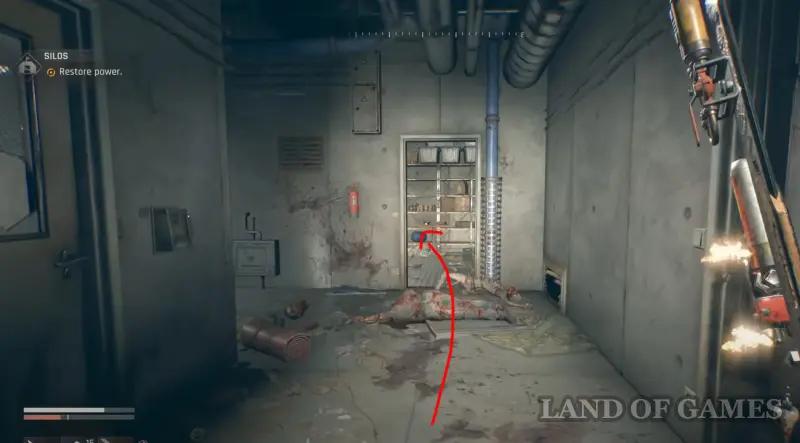
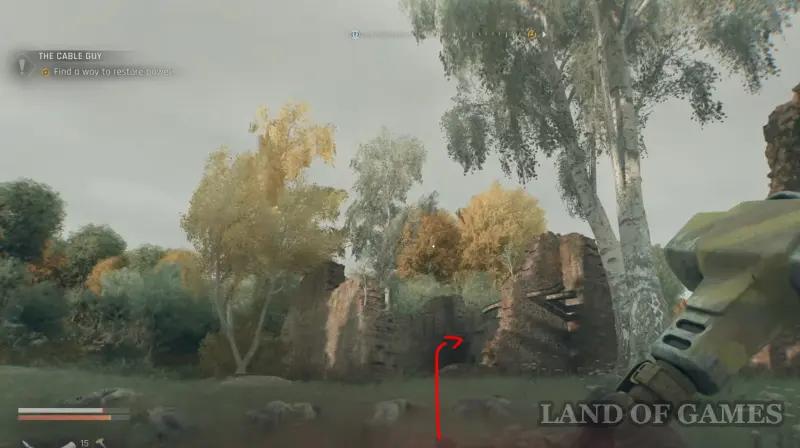
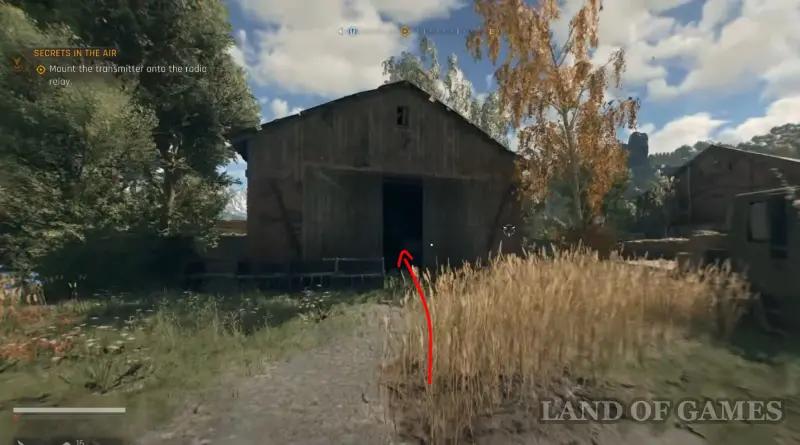
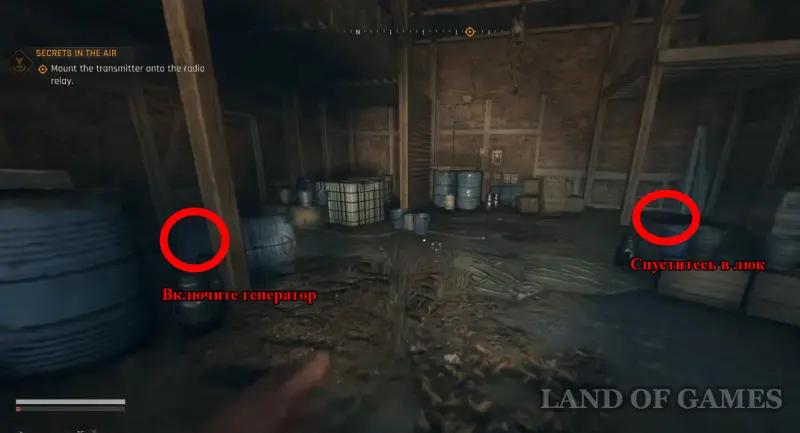
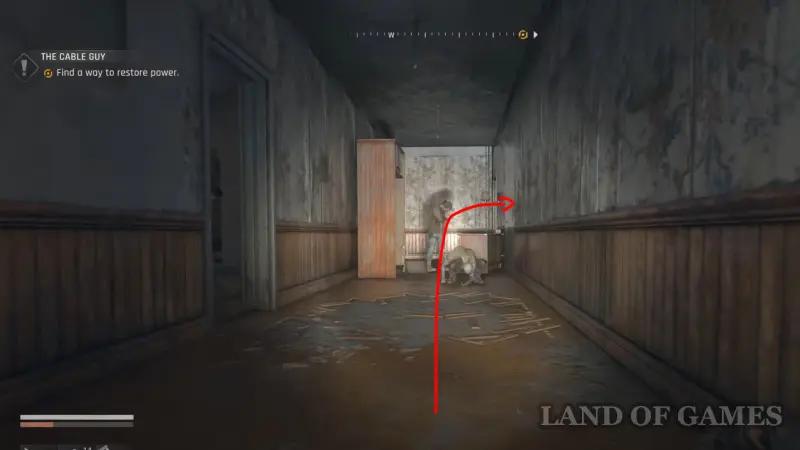
Now go to the ruins located southeast of the wooden tower. Here you will find a barn – go inside, breaking the boxes and revealing a hole in the wall. Then turn on the generator on the left and take the cable from the wall on the right.
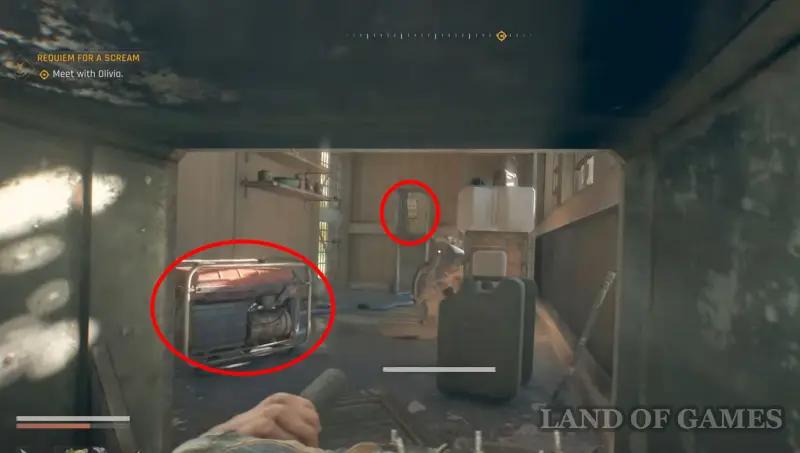
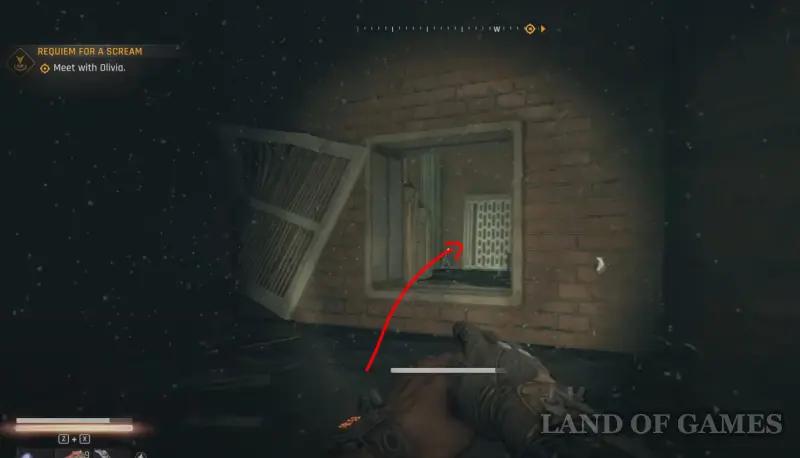
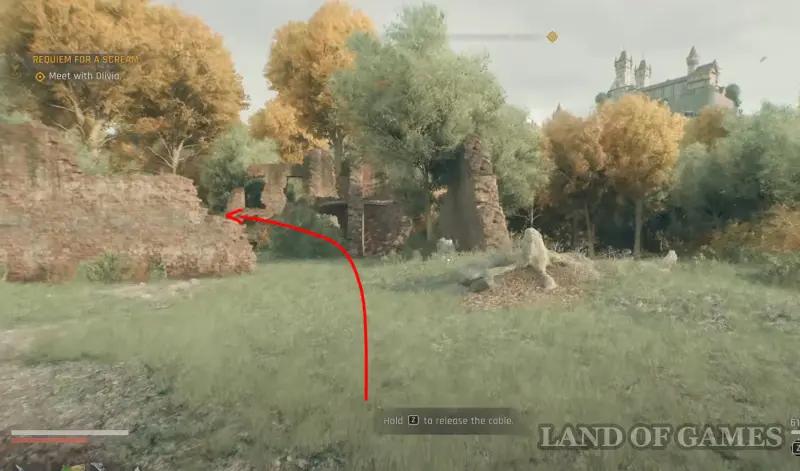
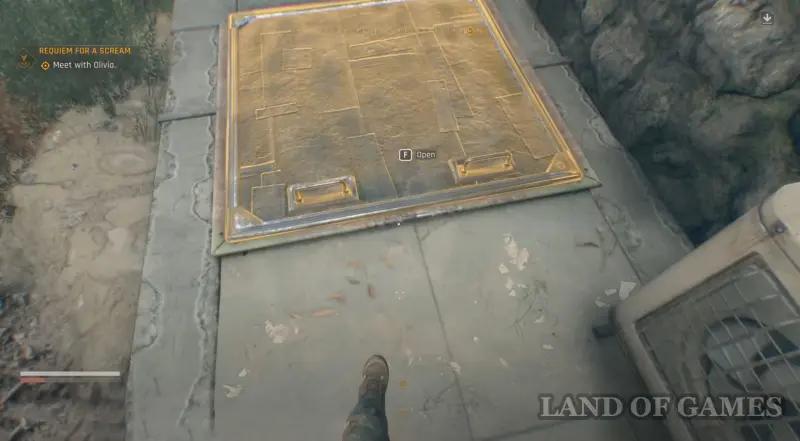
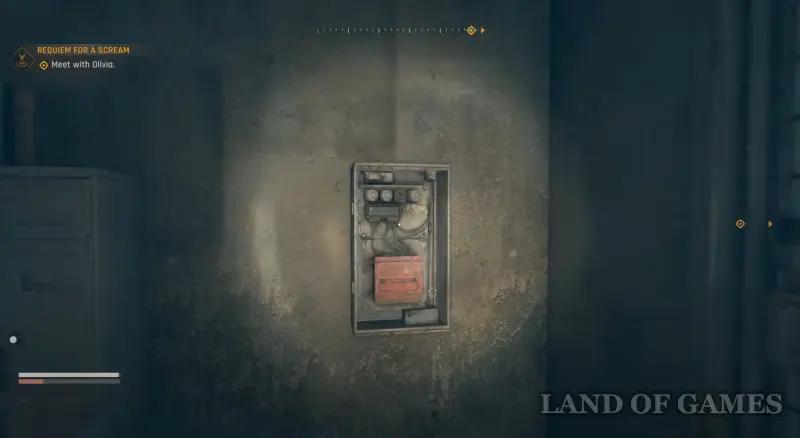
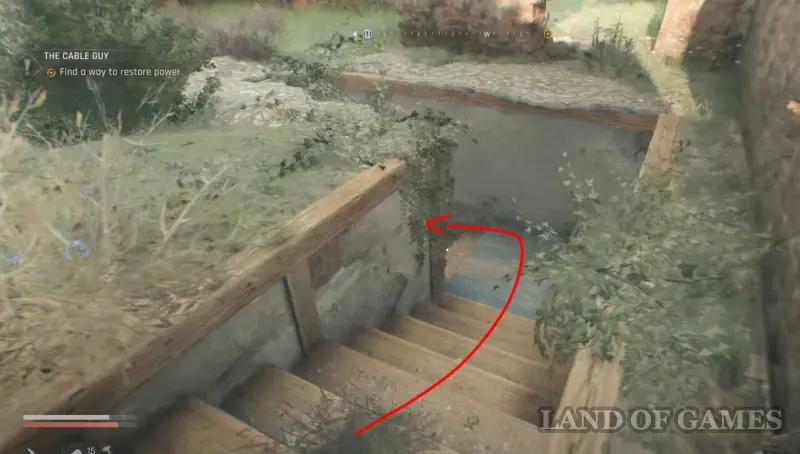
Open the door and go outside, then move towards the ruins ahead. After going through them, immediately turn left and climb onto the dilapidated wall to connect the wire to the electrical panel. Next, go down and open the hatch.
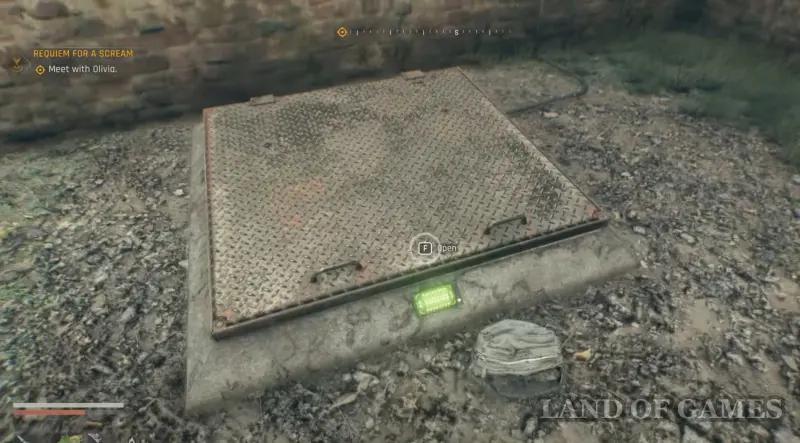
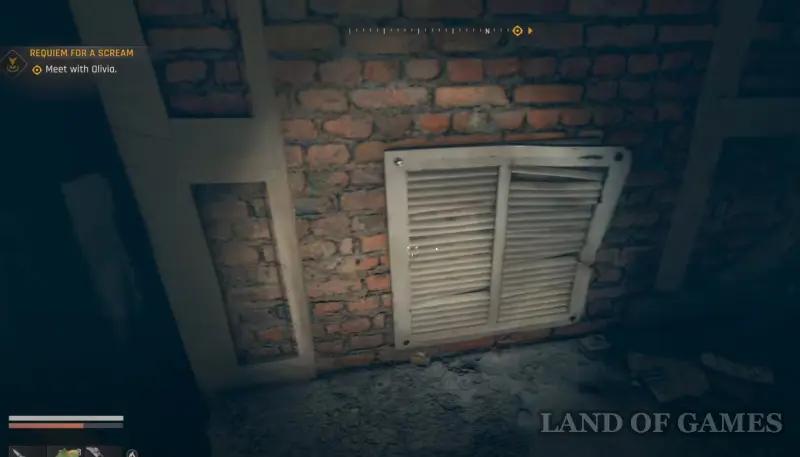
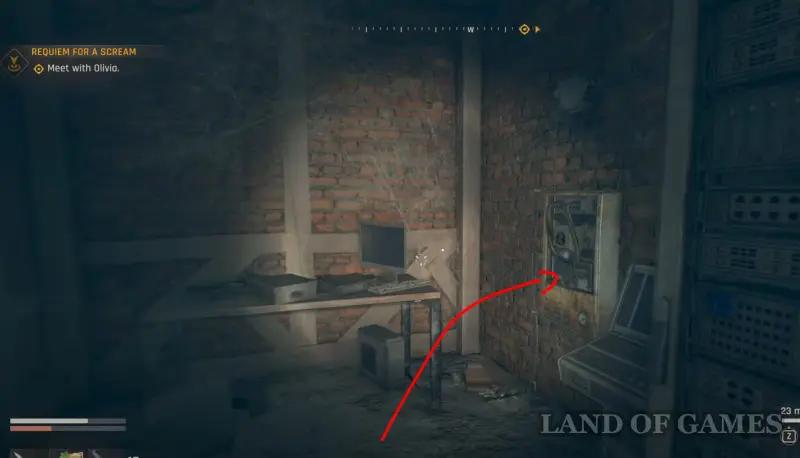
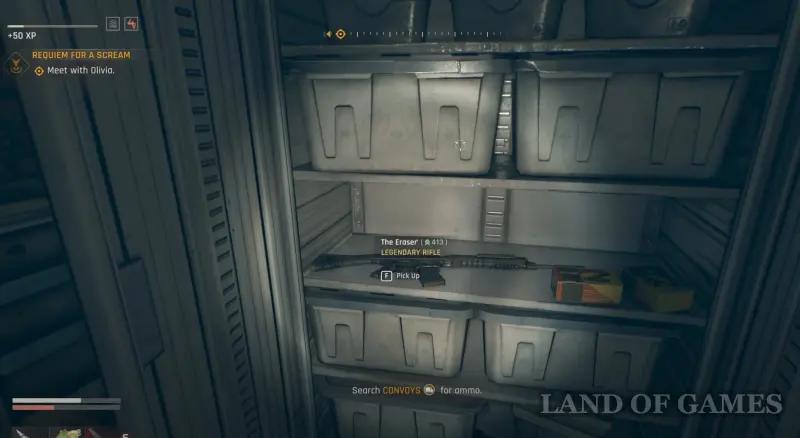
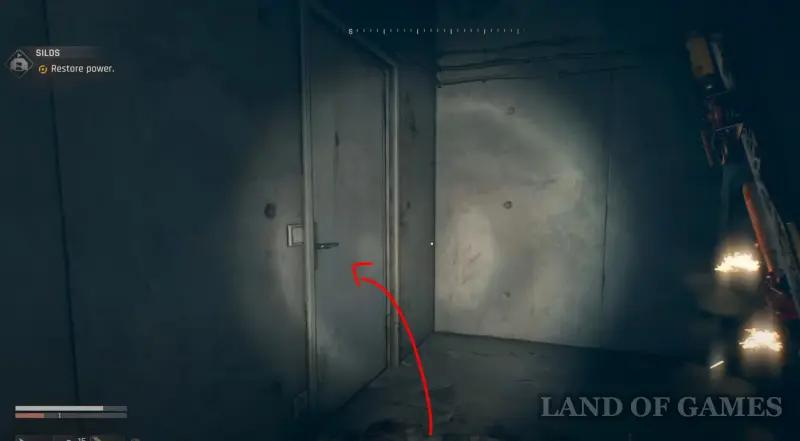
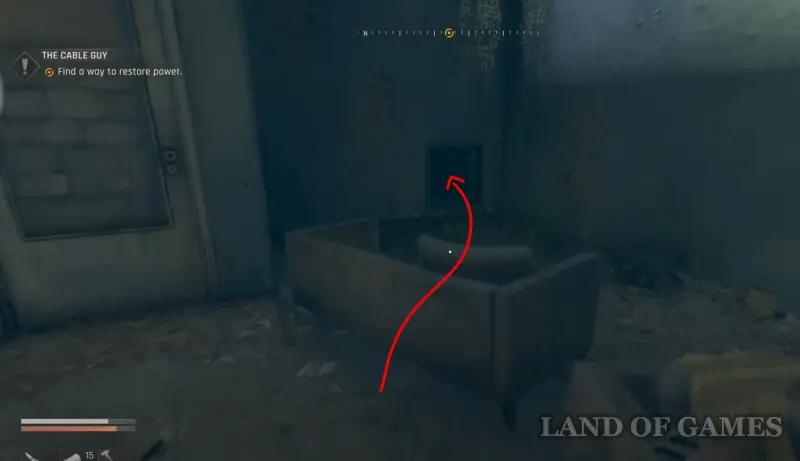
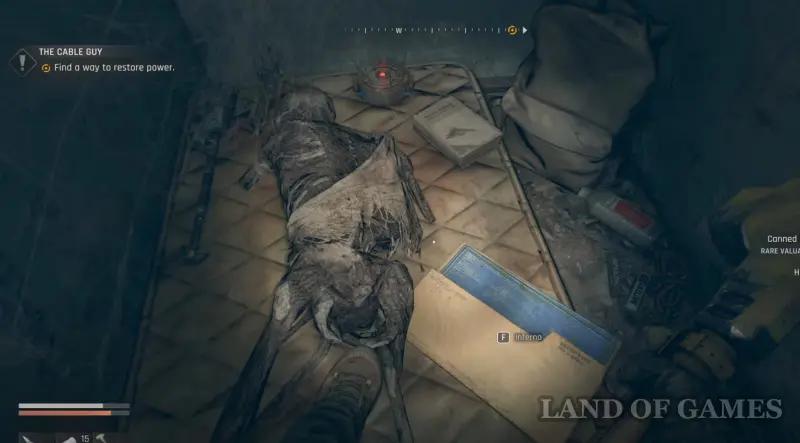
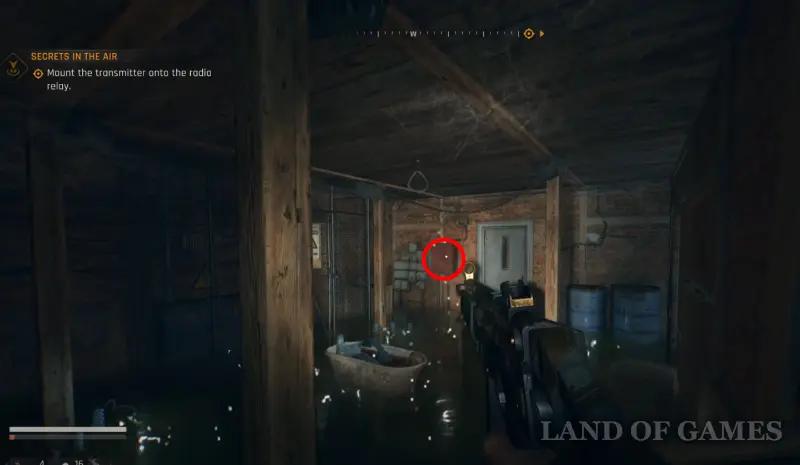
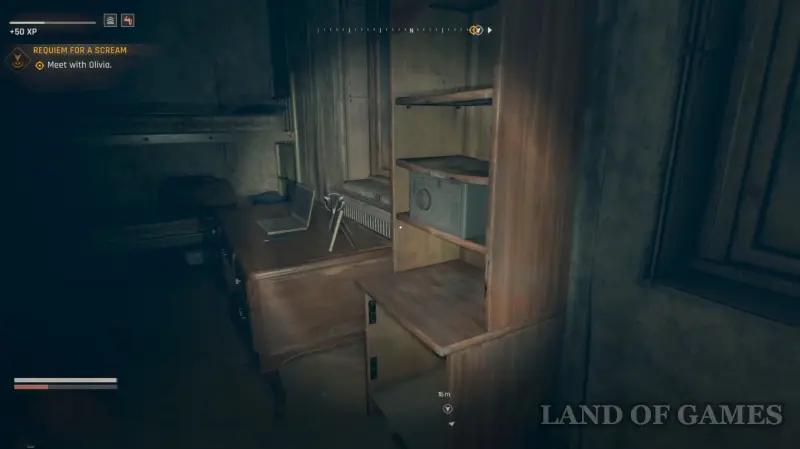
Once in the basement, move the closet aside and go into the vent. Once in a small room, you will see another electrical panel on the wall. Go back upstairs and disconnect the cable, then drag it down and connect it to the panel to open all the doors in the bunker. Inside you will find various valuable items, including the legendary Eraser rifle.
Treasure Map A4
Go west from the Hardwood Art Gallery, located in the Old Town, and start climbing the ledges until you see a wrecked car near the cliff. On the stone near the right rear wheel of the car there will be the drawing you need.
Where to find treasure A4
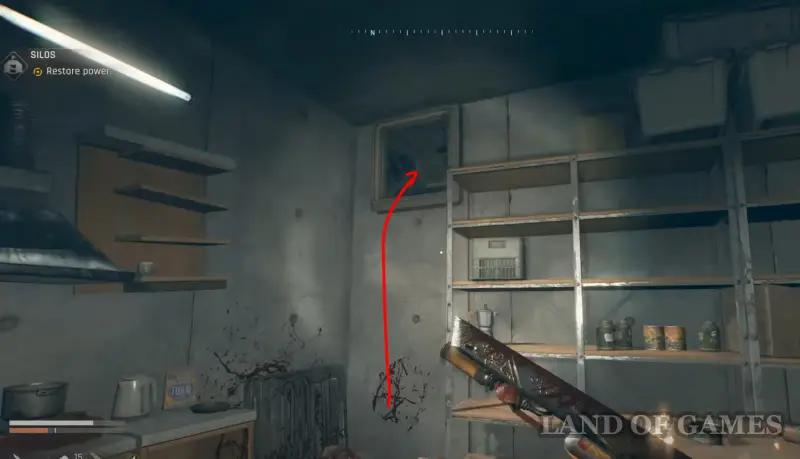
From the previous location, move southwest, climbing the inclined path, and soon you will see a protruding ventilation pipe in a small clearing among the trees. Approach it and remove the grate, then climb into the opened passage and jump down. Once down, go forward, and then immediately turn left and break open the door even further to the left.

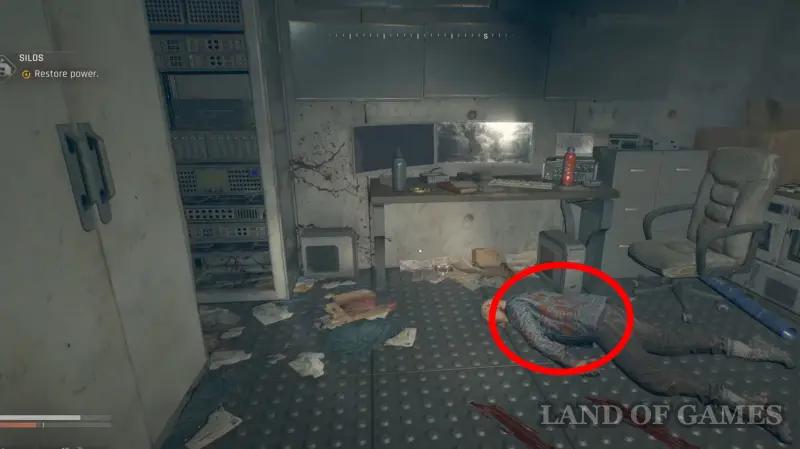
Enter the room and turn on the generator. Exit the room, turn right and enter the passage ahead, and then climb through the ventilation shaft at the top into another part of the bunker. Here you will see a corpse on the floor – move it aside to find a key card underneath, with which you can now open the door in the main corridor.

Go into the room that opens. Here you'll find the epic Rogue's Jacket chest piece and plenty of UV lamps.
Treasure Map B1
It can be difficult to find, as it is located off the beaten path. Go to the barn located on the eastern outskirts of the Farm location. Go inside this small stone structure and then look for a drawing nailed directly to the wooden beam in the middle of the shack.
Where to find treasure B1
Next, go a little northeast from the barn until you notice a couple of houses and a yard full of zombies. Go to the side of one of the buildings and break down the grate to get inside. Here, activate the generator and take the cable, then go outside again.
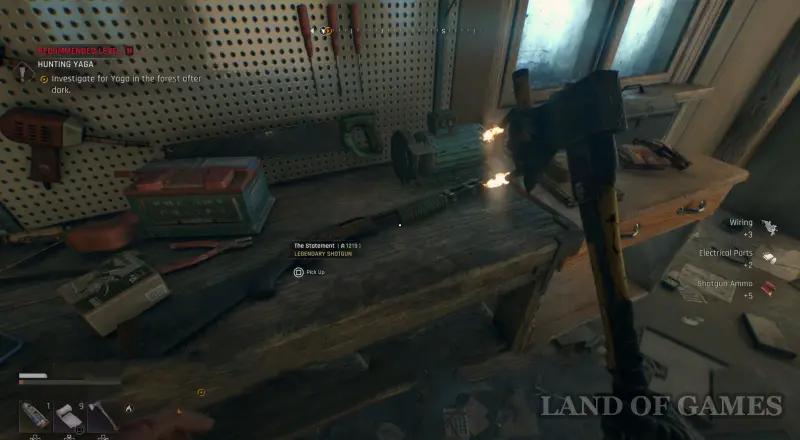
Run to the opposite house and connect the wire to the electrical panel located on the wall. Then go to the double door that was previously locked (there will be a green light on the left) and open it. Inside you will find the legendary Declaration shotgun and its ammo.
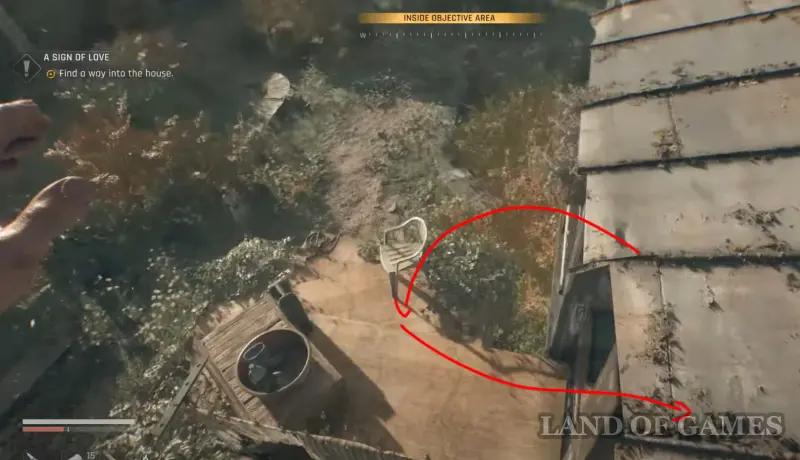
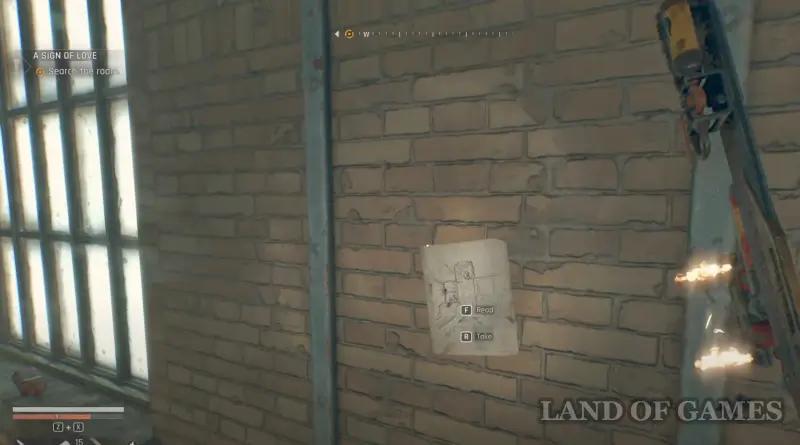
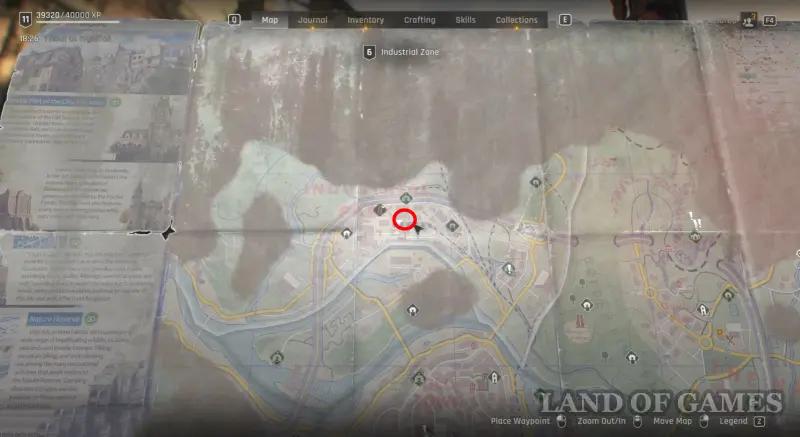
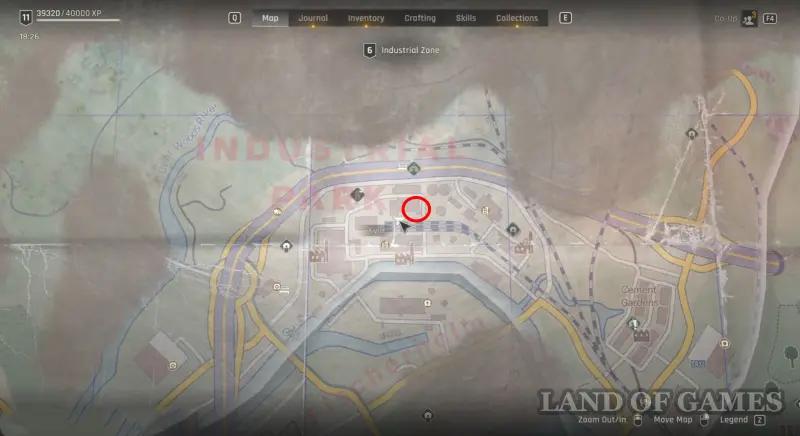
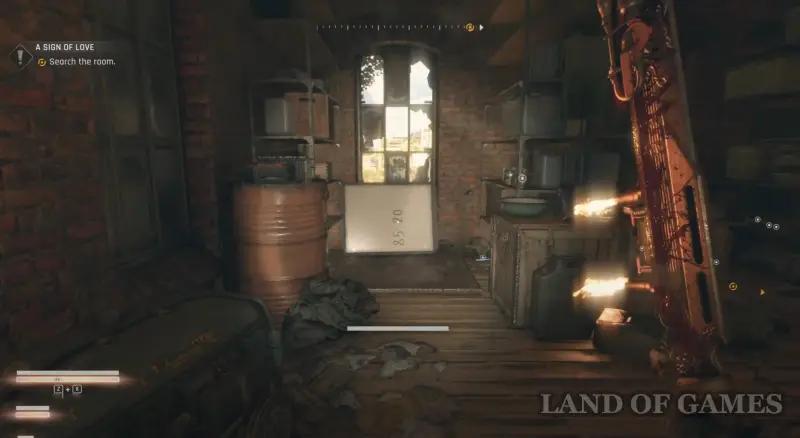
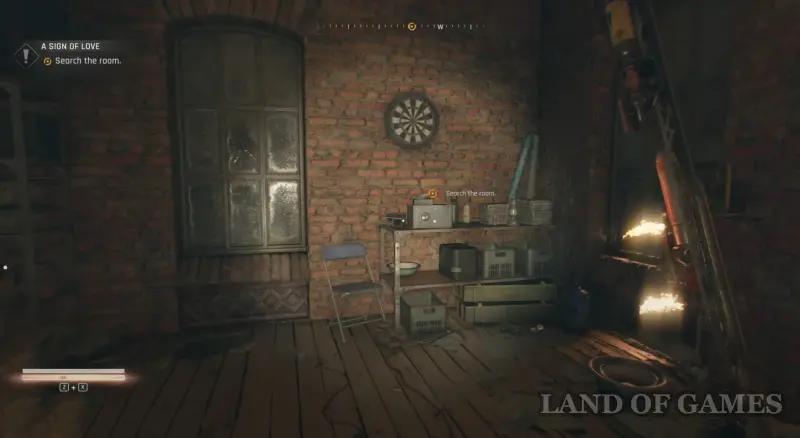
Treasure map B2
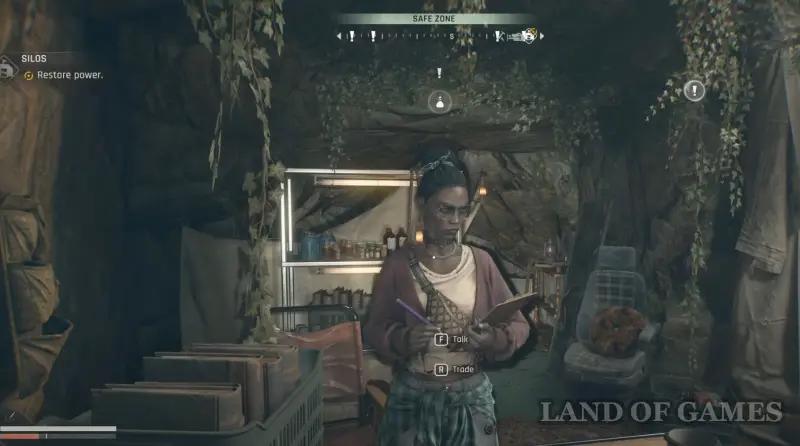
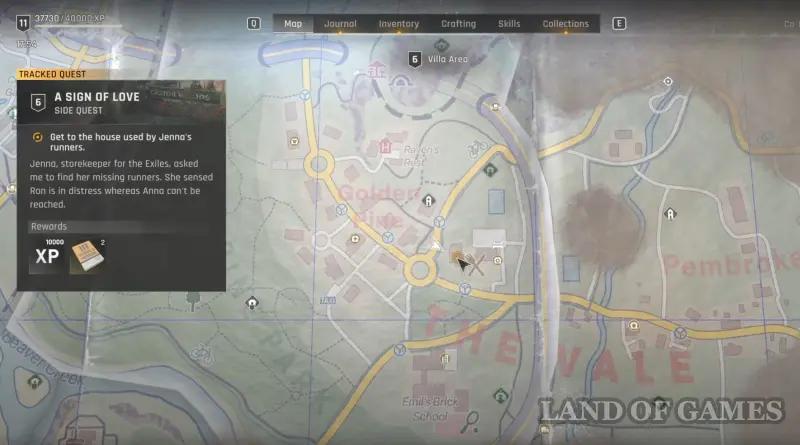
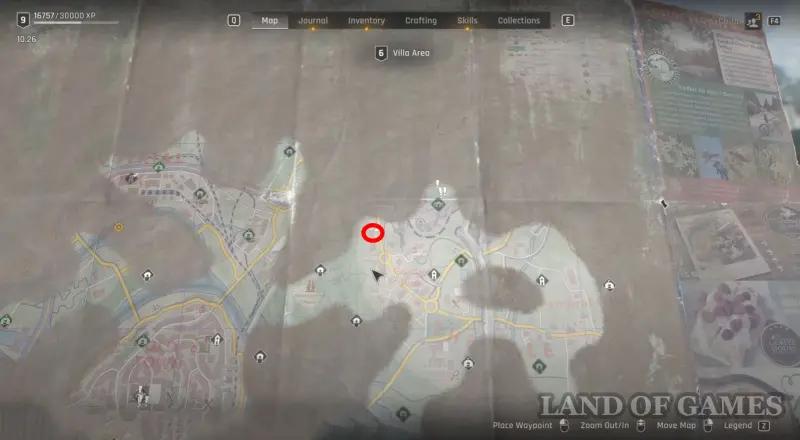
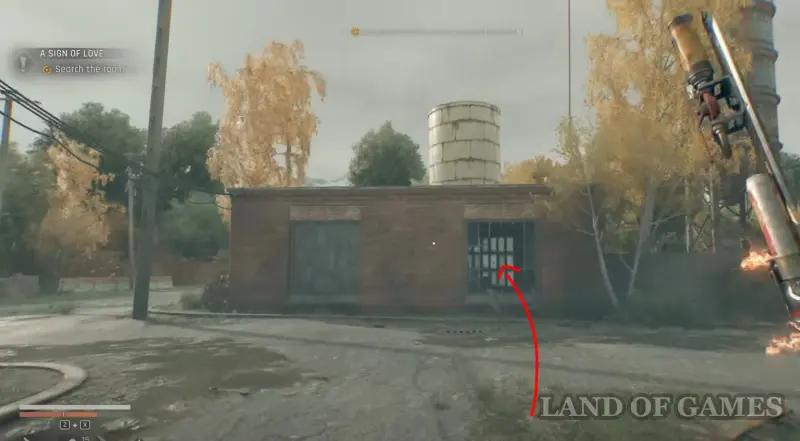
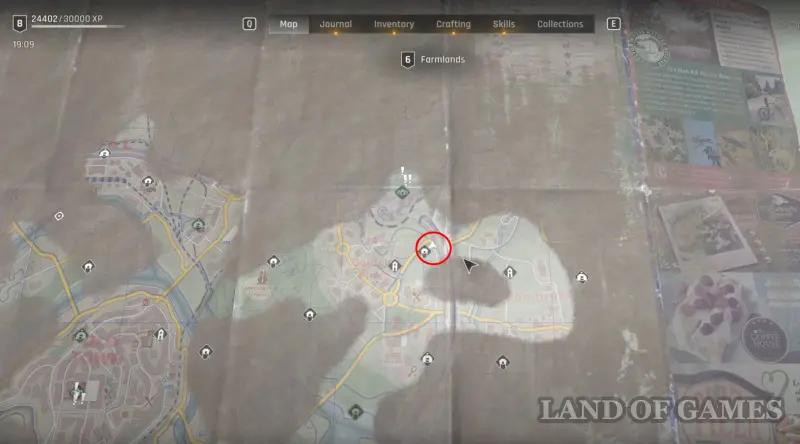
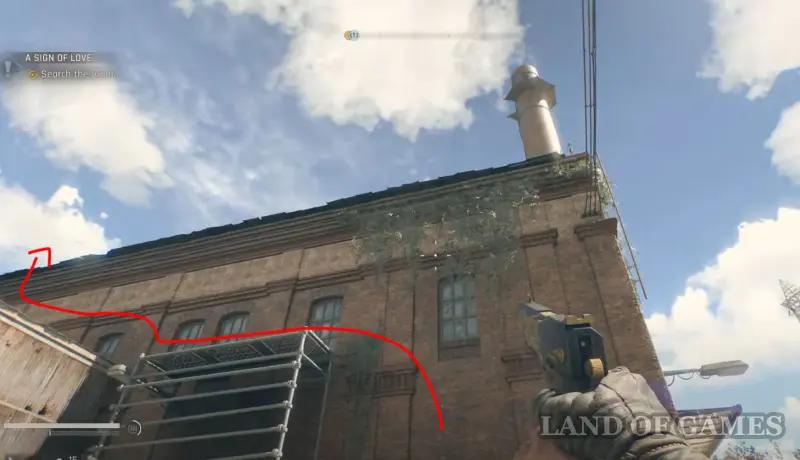
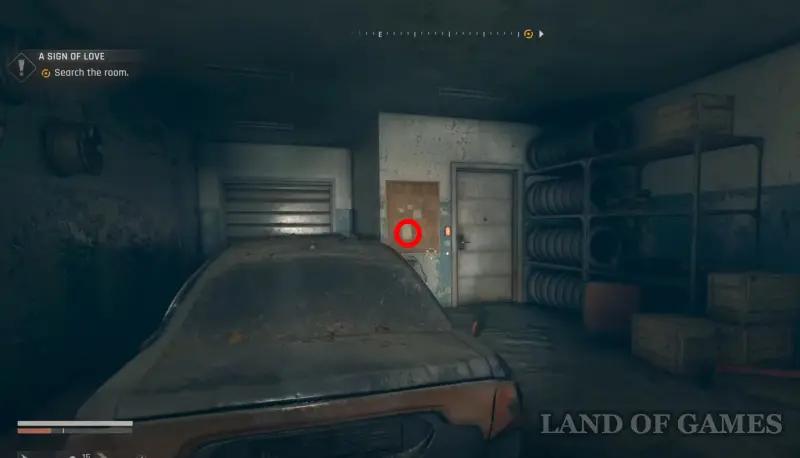
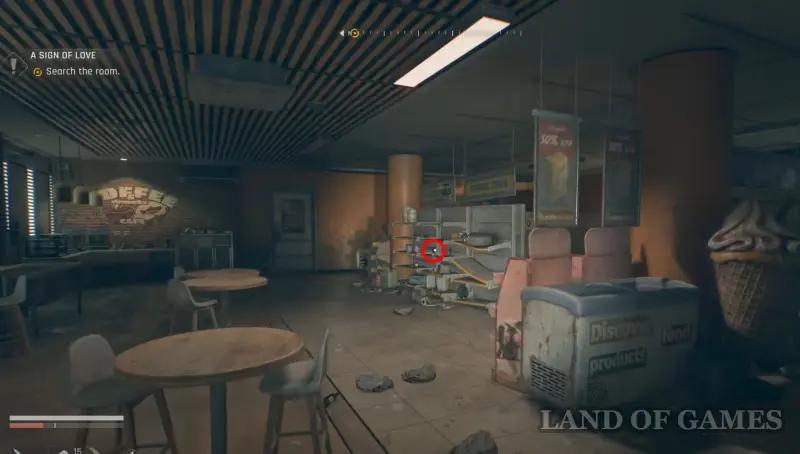
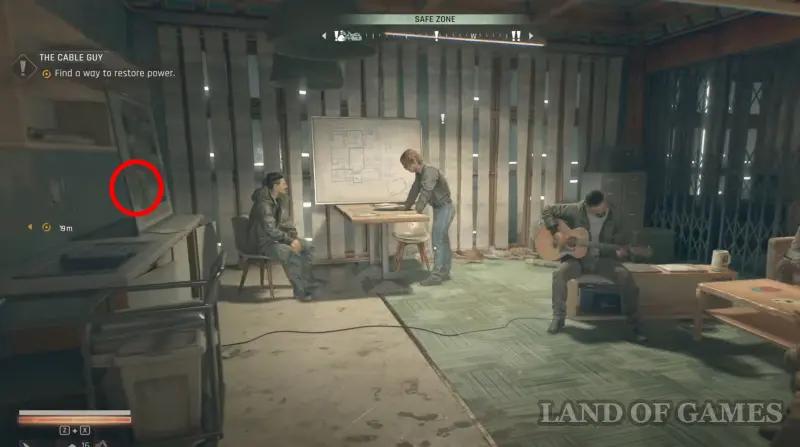
First, you will need to take on the side mission “Love Sign”, which is given by Jenna in the Cave of Exiles. In the screenshots below we showed its location. If you still don't have this task, then simply advance further in the story until it becomes available to you.
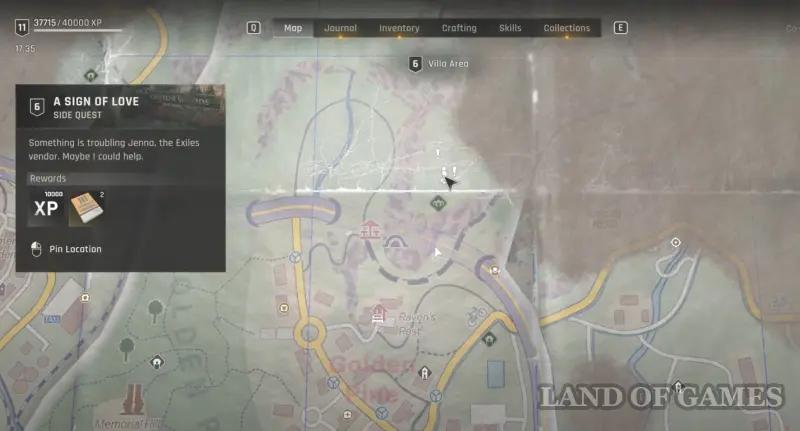
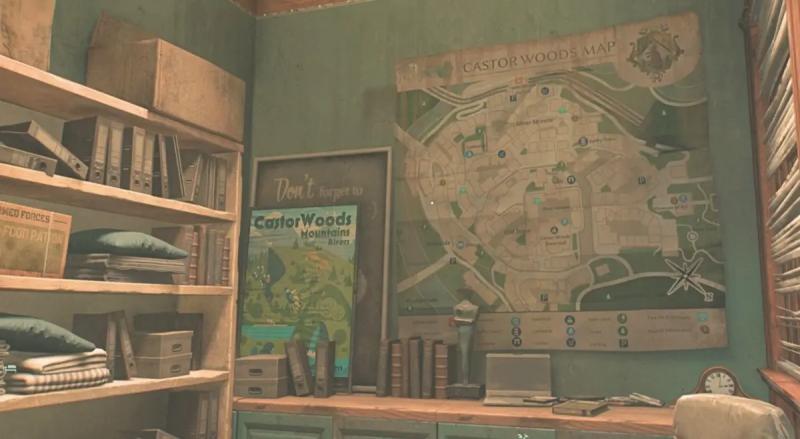
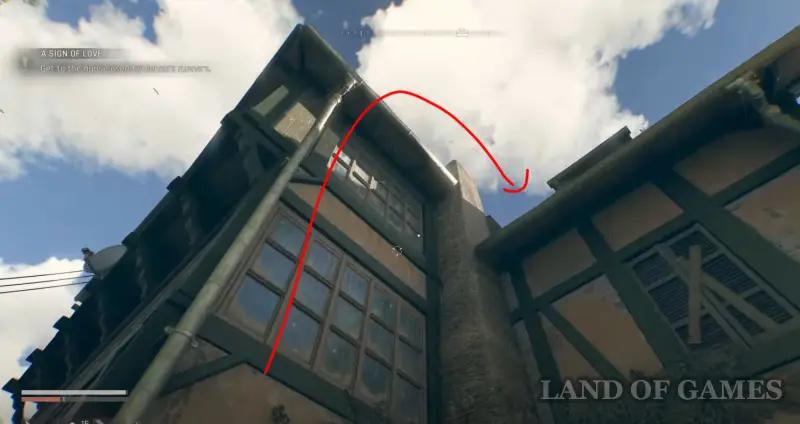
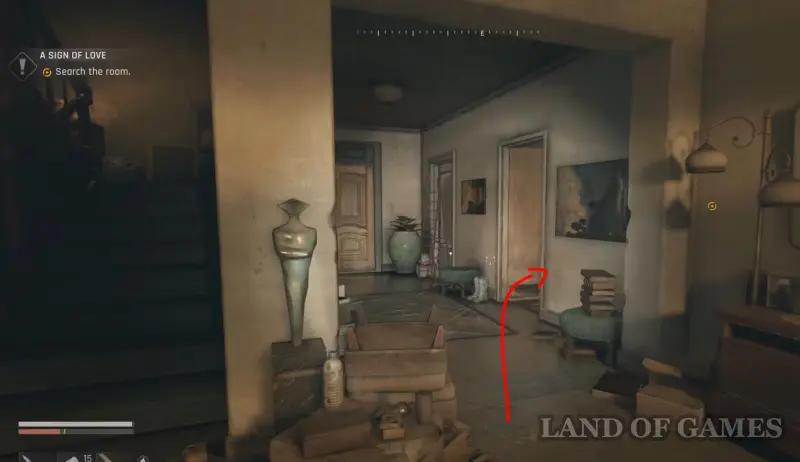
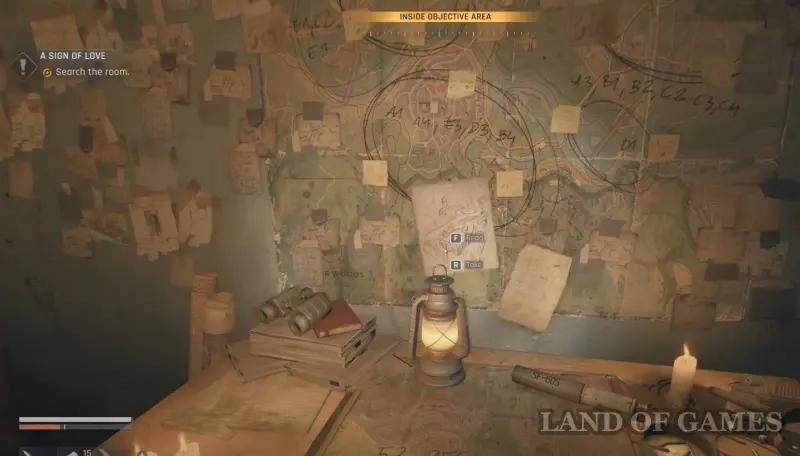
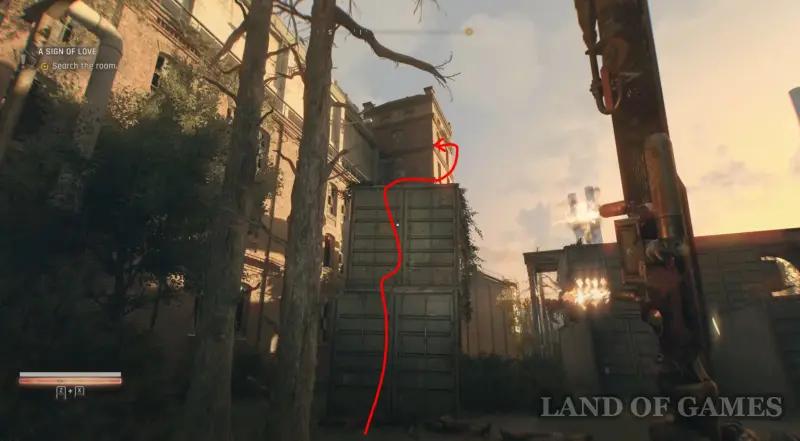
Then, when completing this quest, go to the house that Jenna mentioned. Climb onto its roof through the pipe, and then go down to the platform and open the door with a master key to enter the building. Now go to the office on the first floor, where there is a large map and other documents hanging on the wall, and tear off the drawing you need.
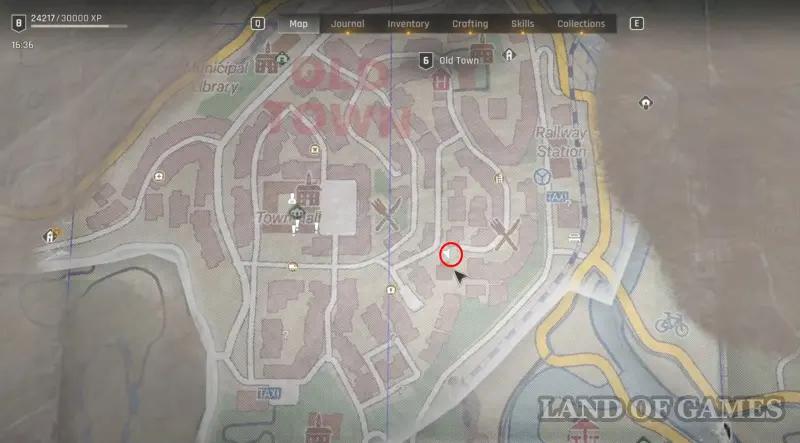
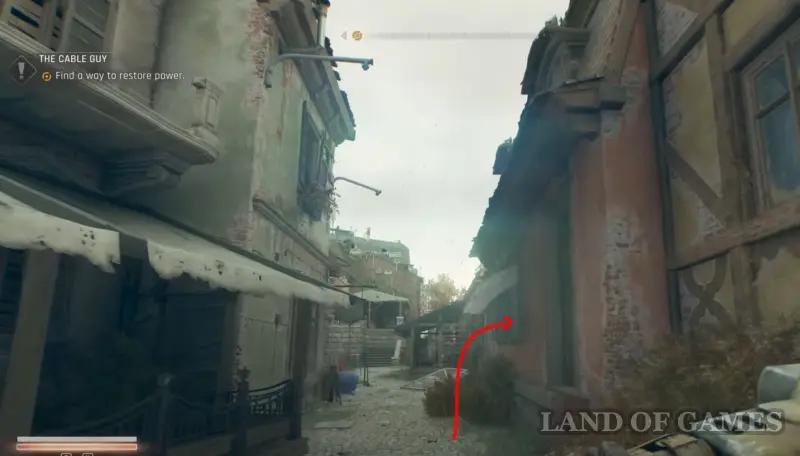
Where to find treasure B2
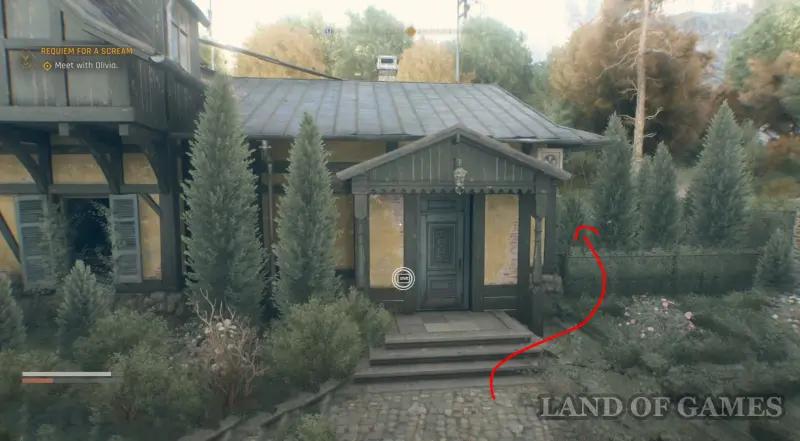
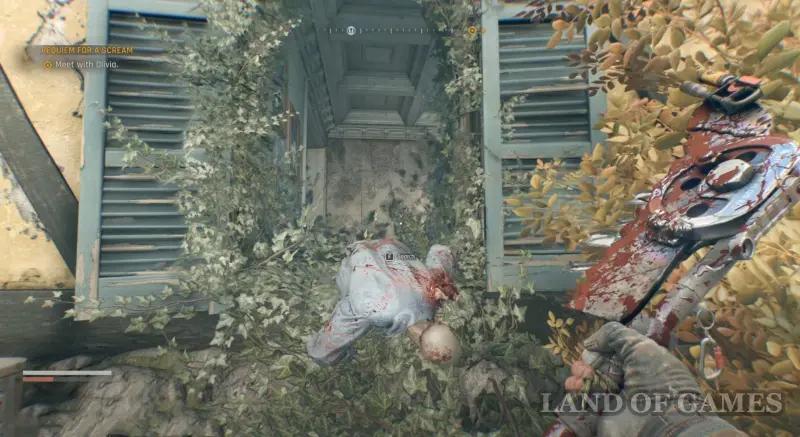
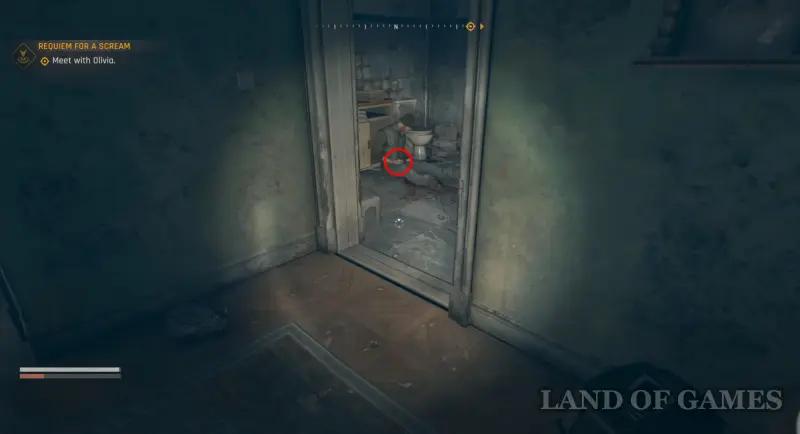
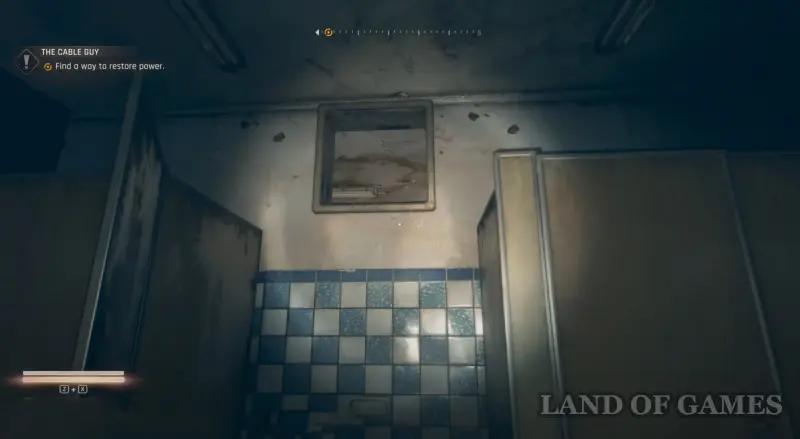
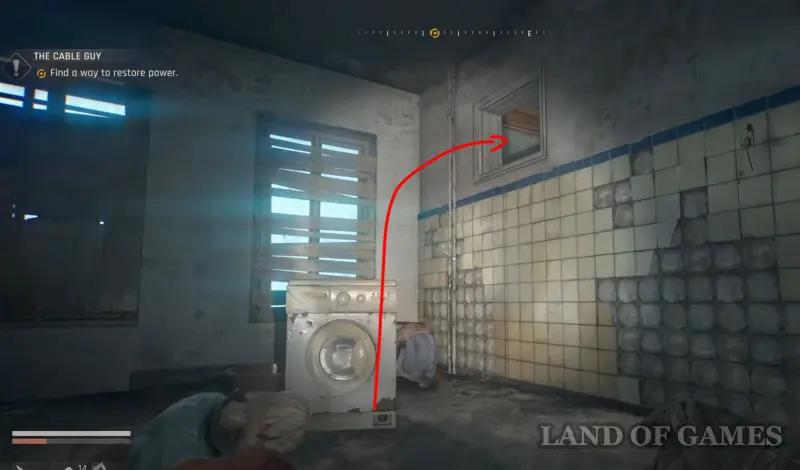
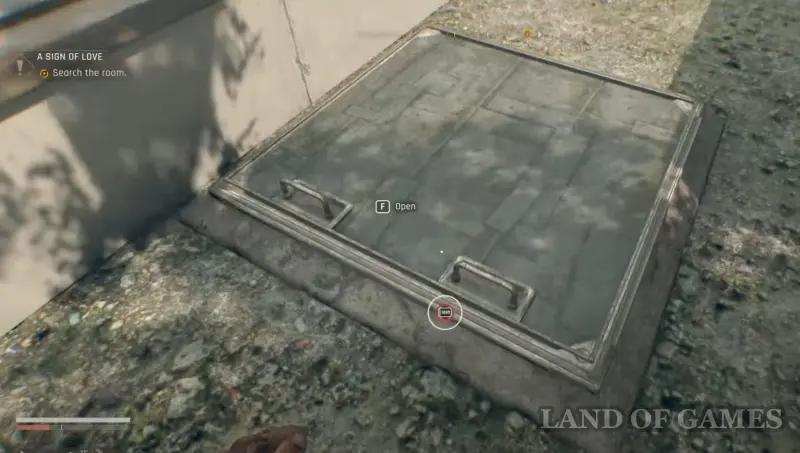
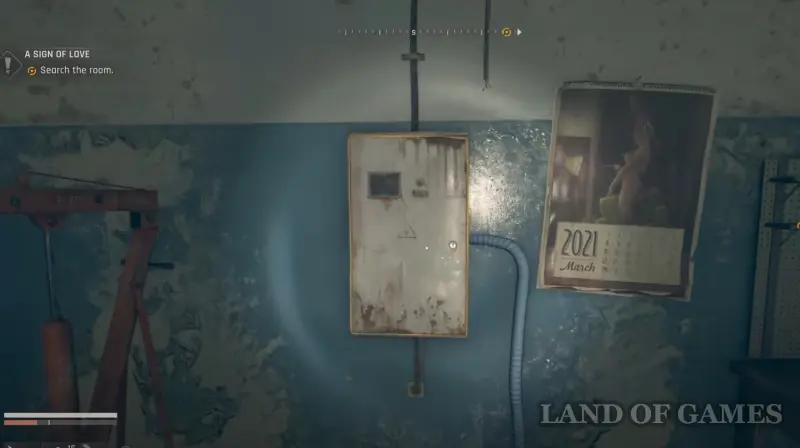
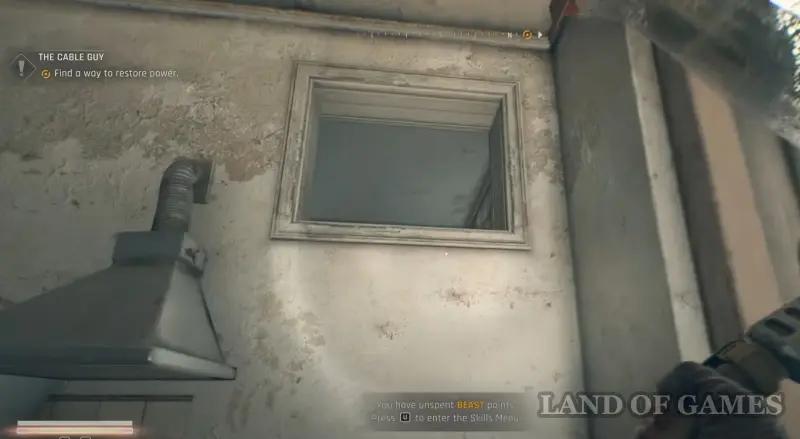
Climb over the fence near the dark Toiletry Store area, then go around the wooden house on the right side and go inside the building using the open window. Next, find the corpse in the bathroom and take the fuse from his hand. Return outside and open the hatch leading to the basement.
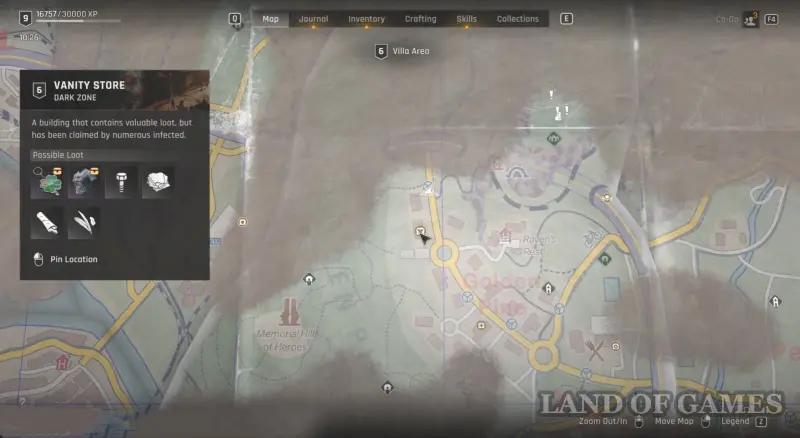
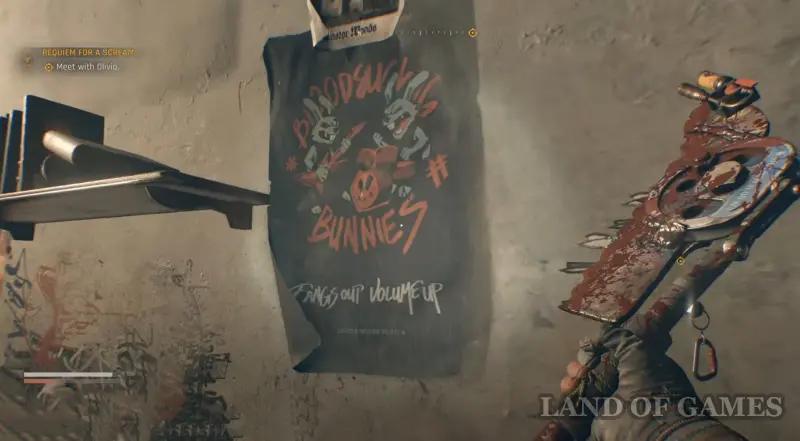
Once down, insert the fuse into the panel in front, and then open the iron door on the right. There will be a clue on the rabbit poster hanging on the wall to the right. Then go a little more to the right and in the niche below you will find a safe. Enter the code: 2-2-19to open it. It contains revolver cartridges and the legendary Sunray revolver.
Treasure Map B3
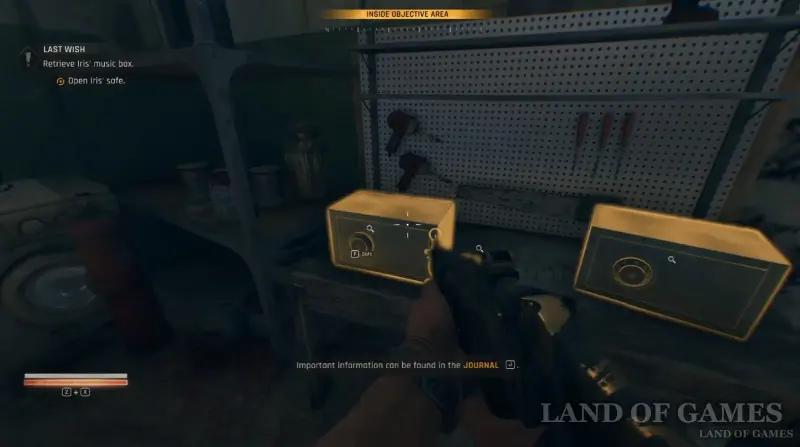
It is also part of a secondary mission – this time we are talking about the quest “The Last Wish”, which is given by Amelia and Iris in the Cave of Exiles.
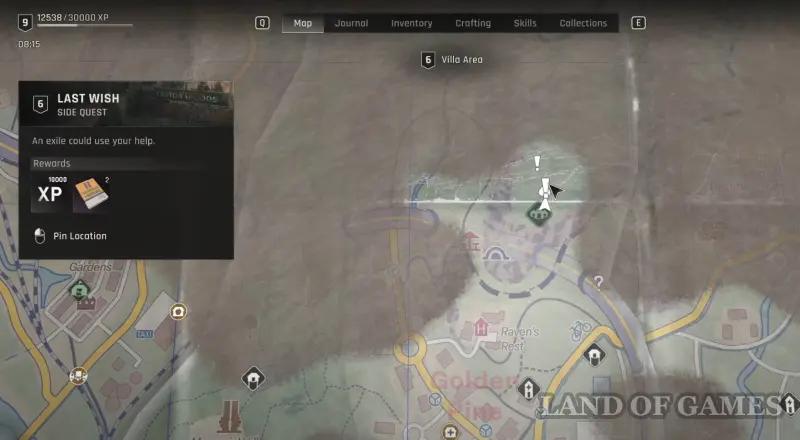
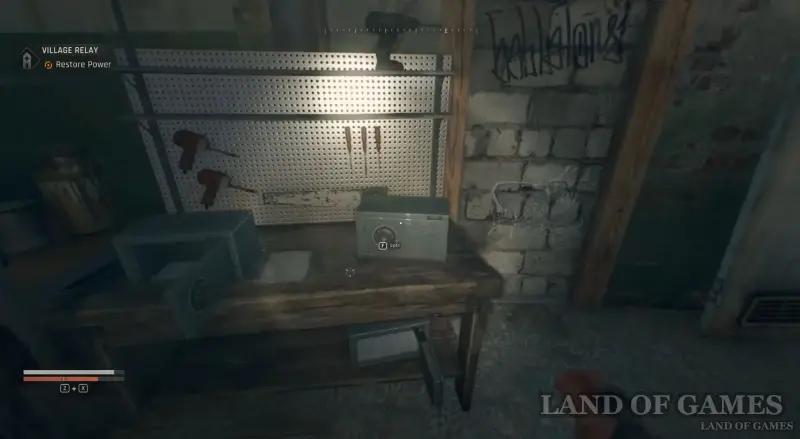
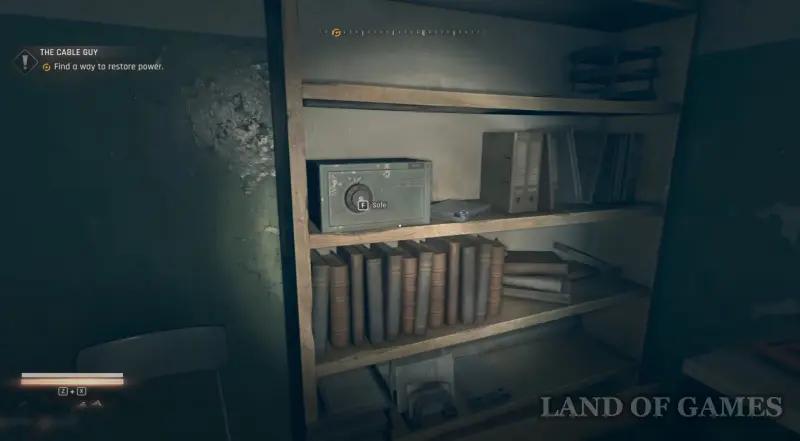
Continue to complete the indicated mission, and you will soon find yourself in a non-residential building east of the school. You will need to enter the garage next to the road – to do this, go around it on the right side, climb onto the boxes and climb into the open window. Inside on the table you will find two safes, between which there will be a treasure map.
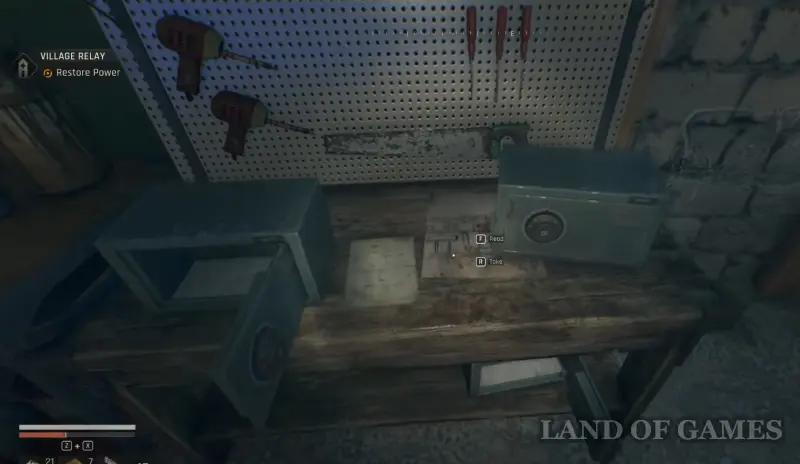
Where to find treasure B3
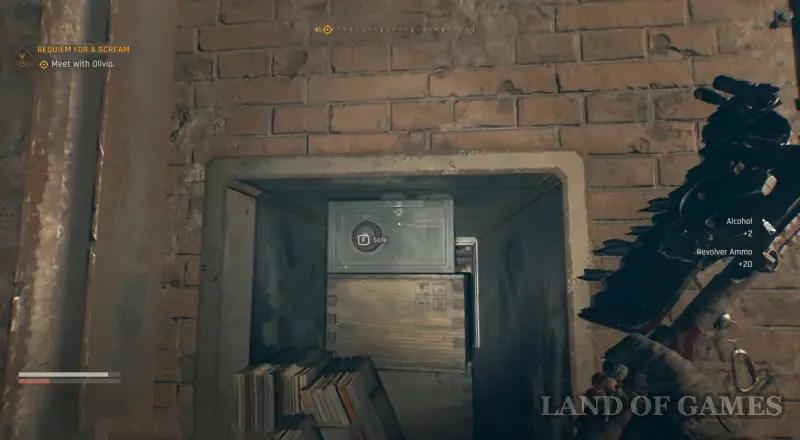
This map indicates three safes located in this garage. The codes for them look like this: 20-7-6 (the one on the left), 11-7-8 (the one on the right) and 71-61-45(stands separately on the workbench). Inside the first one is hidden Iris's music box, which you will need to complete the task, and inside the other two are jewelry.
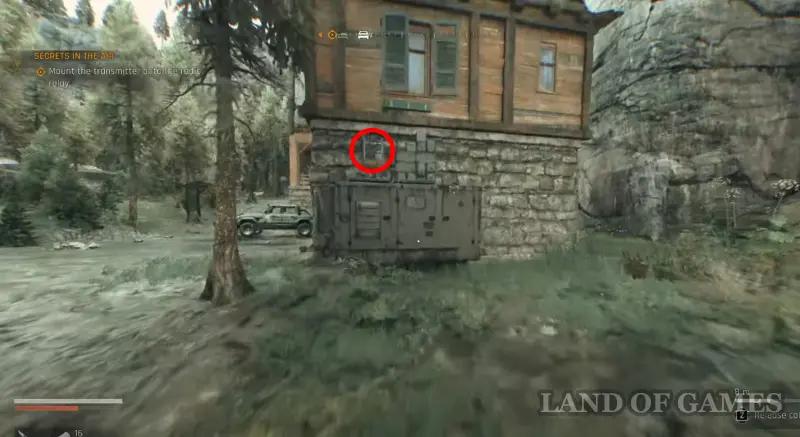
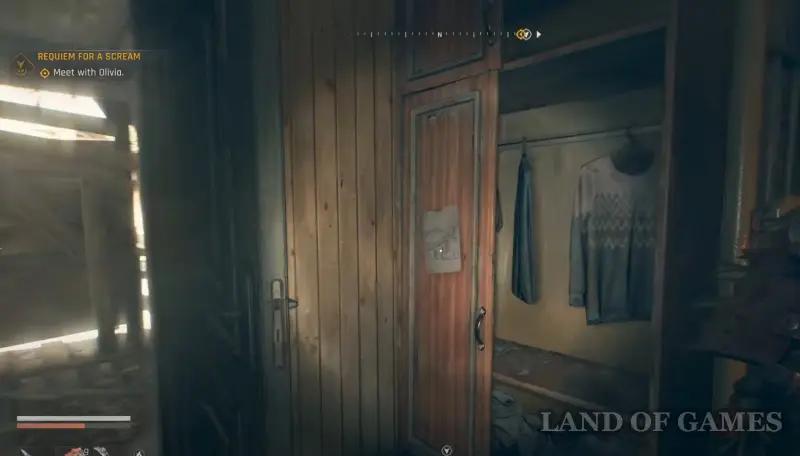
Treasure Map B4
Get to the location shown in the screenshots below and enter the abandoned shack ahead. Then immediately turn around and you will see the drawing you need hanging on the closet door.
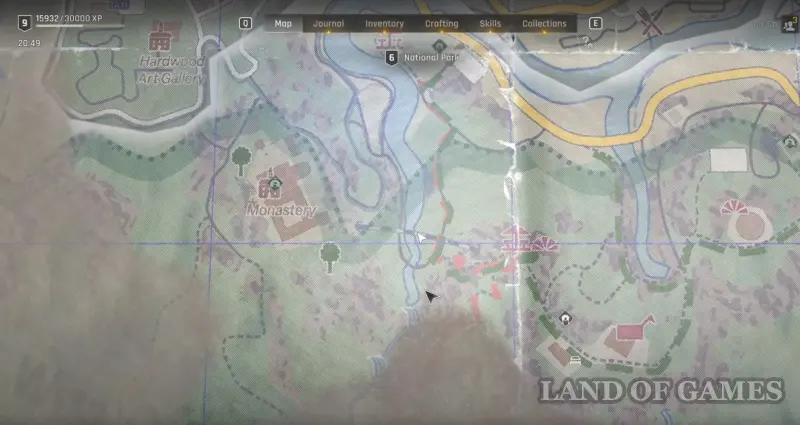
Where to find treasure B4
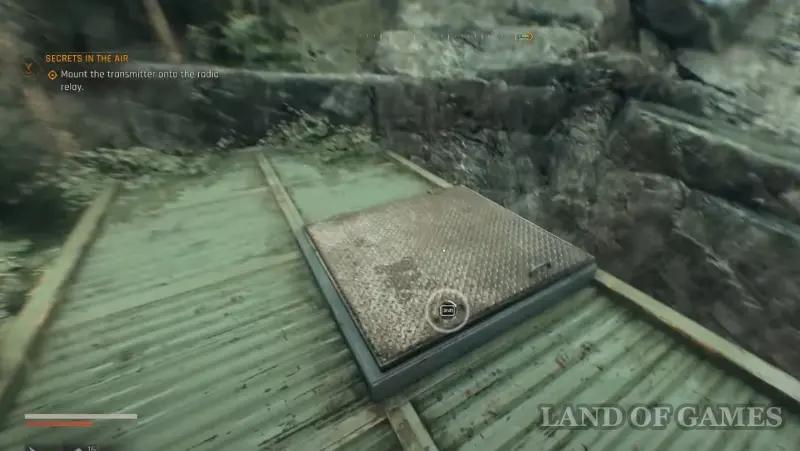
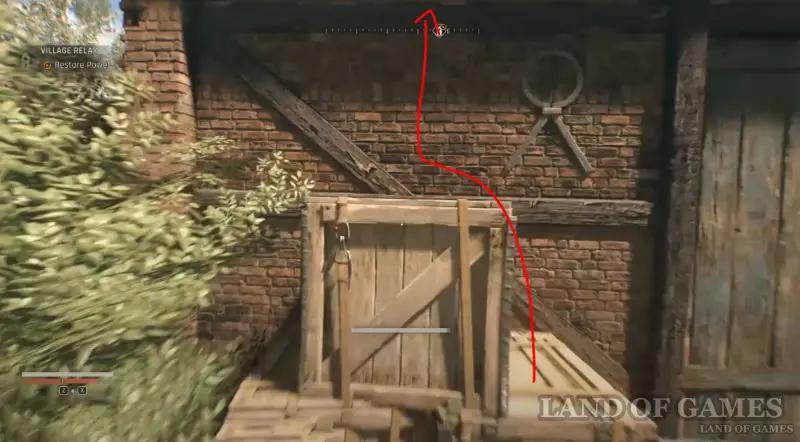
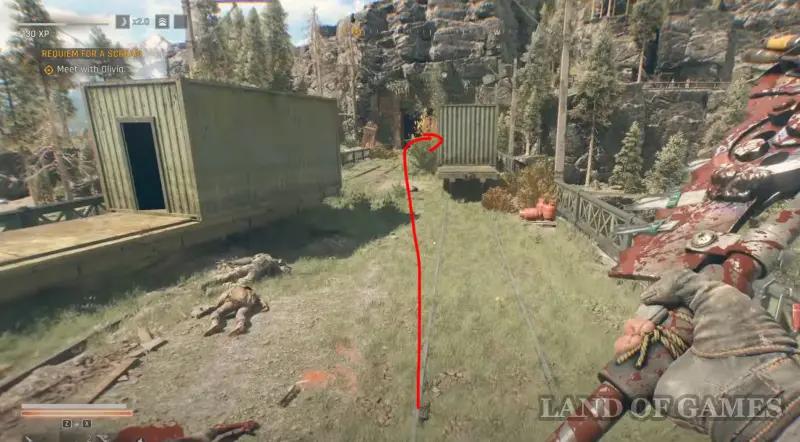
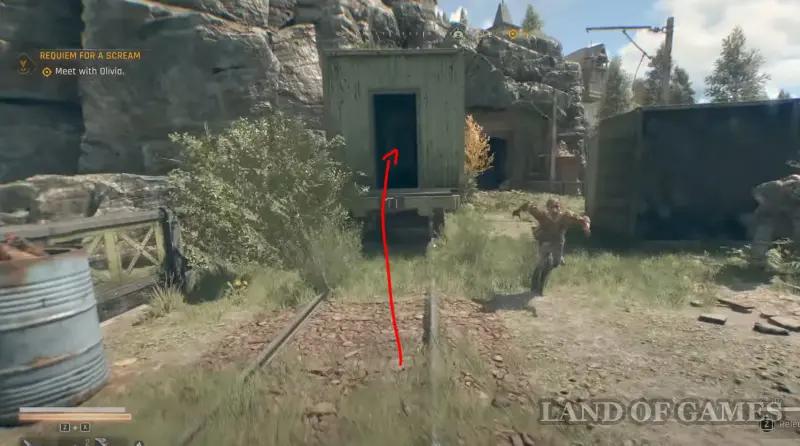
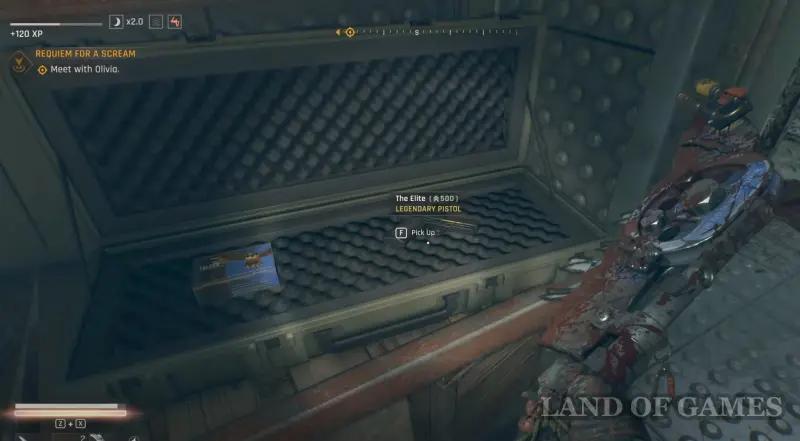
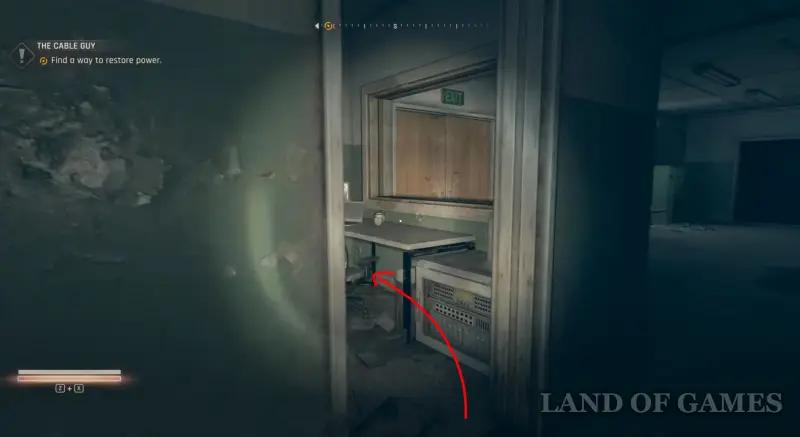
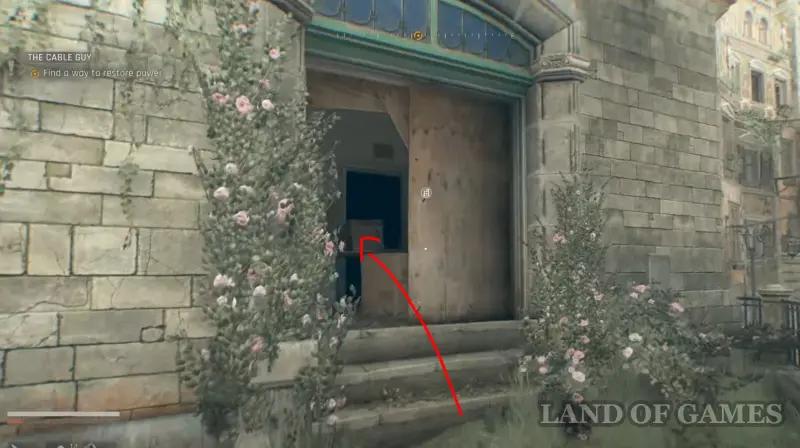
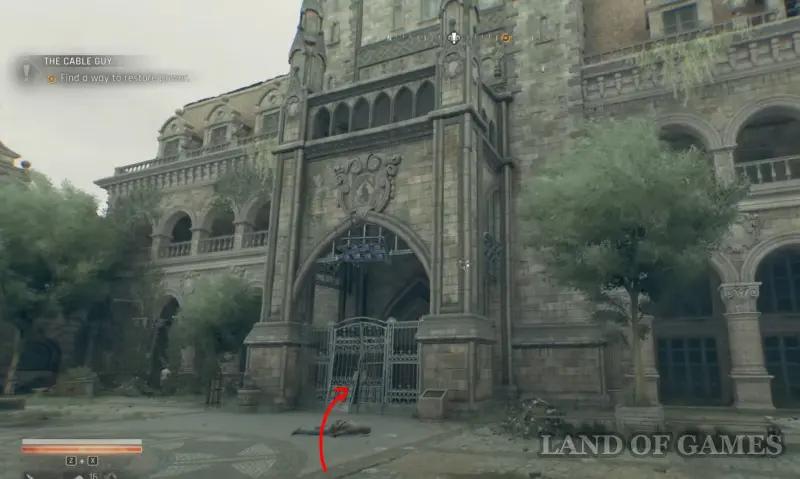
Head south from the previous location and east of the monastery you should see a bridge with a railroad and trains. Then go into the green trailer shown in the screenshots below, using the master key to unlock the door. Inside, kill the zombies and go to the combination lock, which will be de-energized.
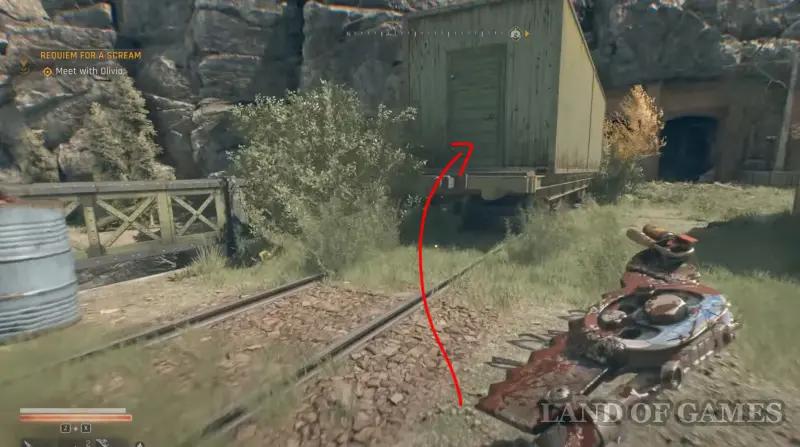
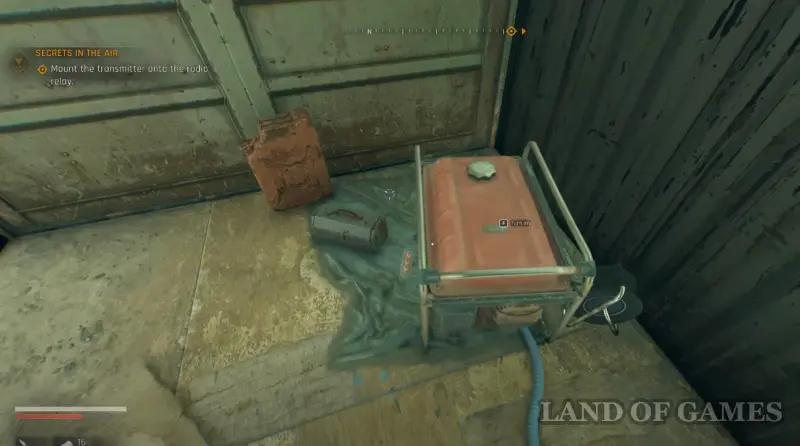
Exit the carriage and run in the opposite direction to another green container on the right. Inside it you will find a generator that needs to be turned on. Then take the cable and start dragging it to the previous trailer. Be careful, as zombies will attack you at this moment.
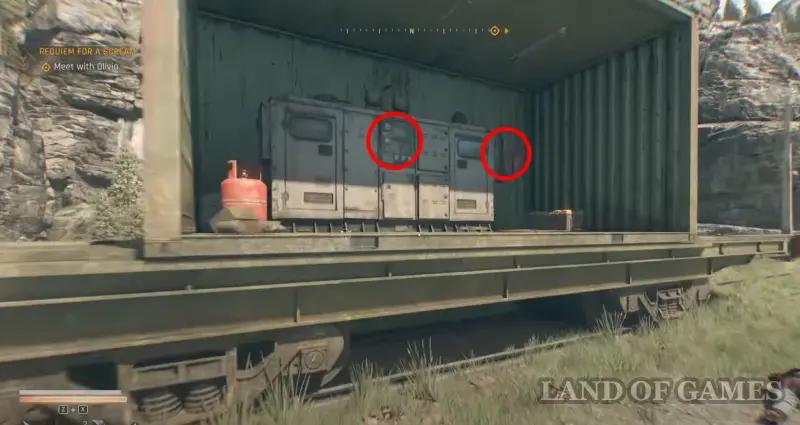
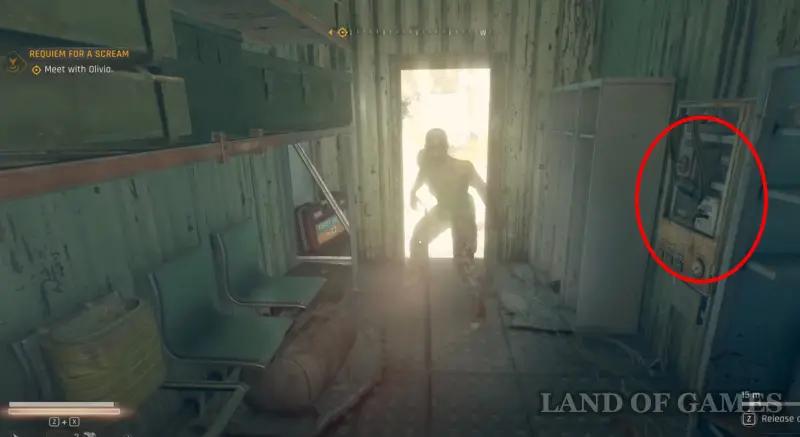
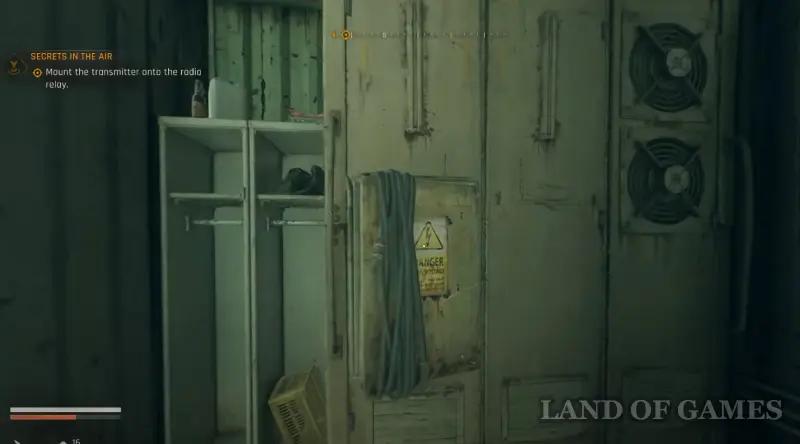
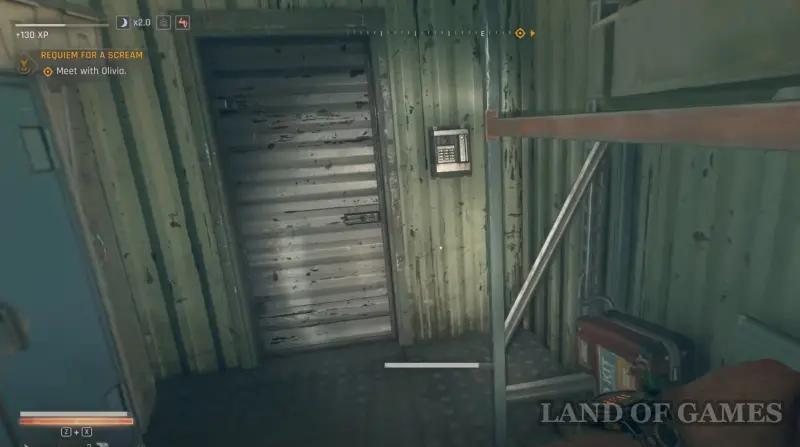
Deal with the monsters, and then connect the wire to the electrical panel inside the first car. Now open the door by swiping your key card and go inside. Here you will find the legendary Elite pistol and valuable consumables.
Treasure map C1
It can be found inside a small building located directly opposite the dark zone of the Megamall Taurus. The drawing you need hangs on the brick wall. The screenshots below show the corresponding location.
Where to find treasure C1
Go to the point shown in the screenshots below, and then climb to the fourth floor of the brick building located north of the railway. Enter it by destroying the wooden barricade on the window.
Once inside, you will immediately see a white board with some code written on it. Then turn right and you will see a safe. Enter the password 85-20-48 into it to open and pick up SMG ammunition and an army first aid kit.
Treasure Map C2
Get to the Highway Tower safe point, located northeast of the Golden Pine hotel complex. Then climb up the wooden tower and find the drawing on the windowsill next to the bottle.
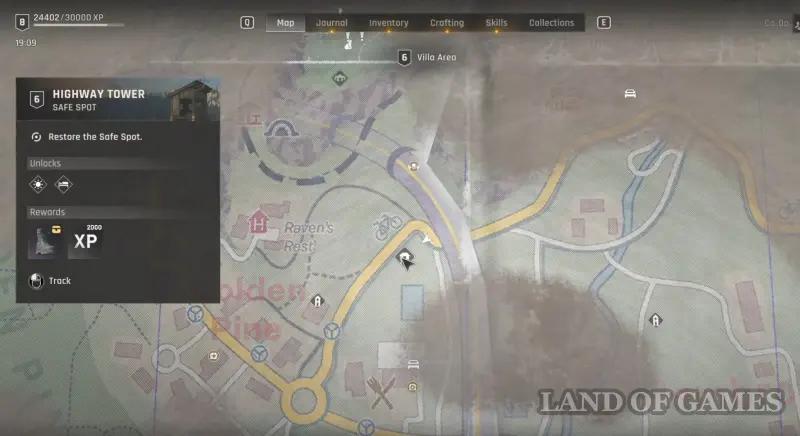
Where to find treasure C2
Start walking northeast from the tower until you notice a winding path next to the municipal wastewater treatment plant. Here you will find some ruins – go through them and then go down the stairs (watch out for mines).
Once in the basement, crawl into the ventilation hole on the right and enter the secret room. Here on the mattress you will find the Inferno blueprint, mines and weapons.
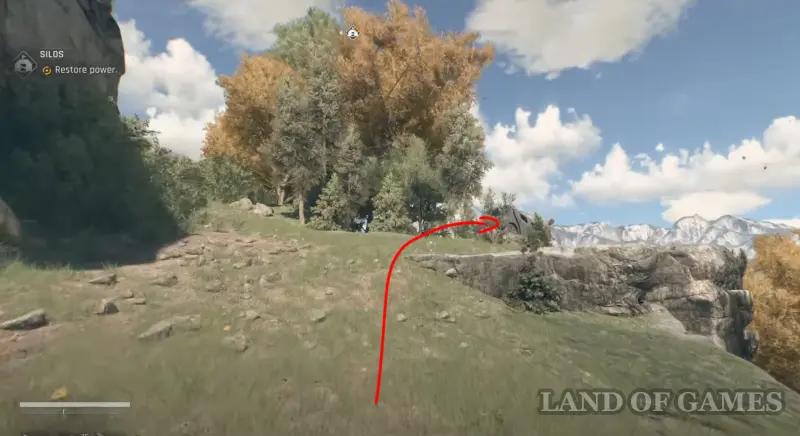
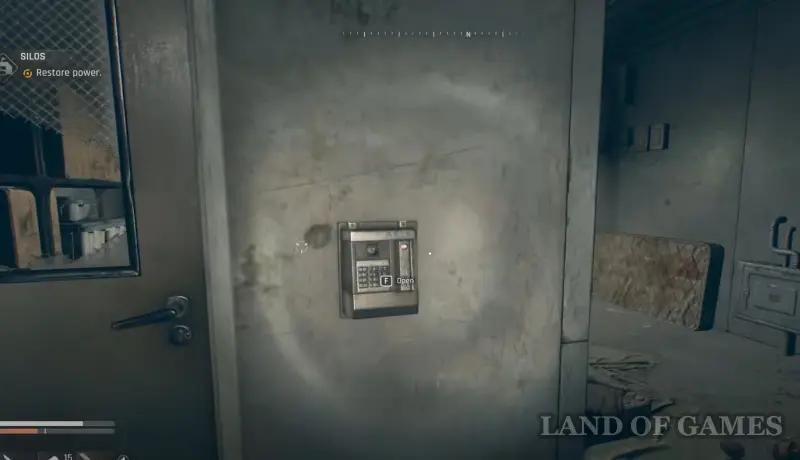
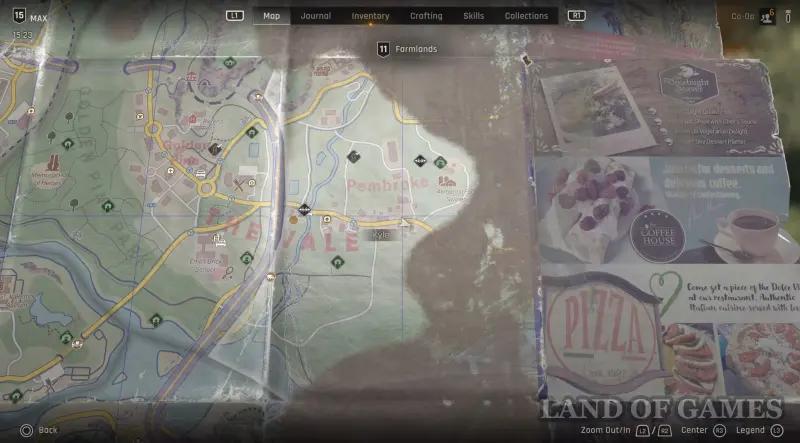
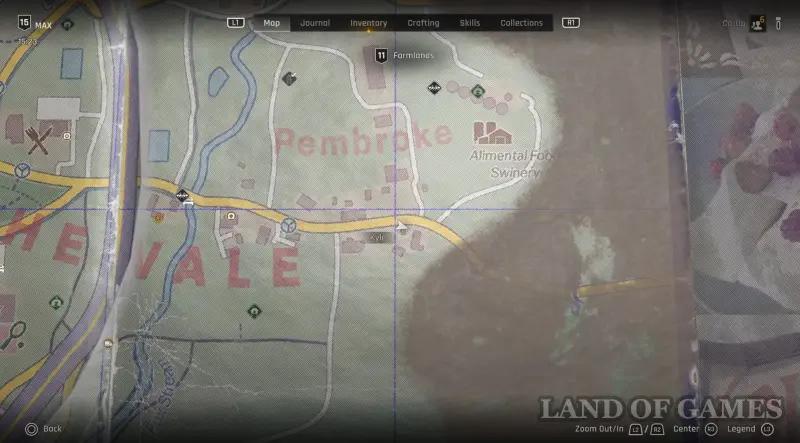
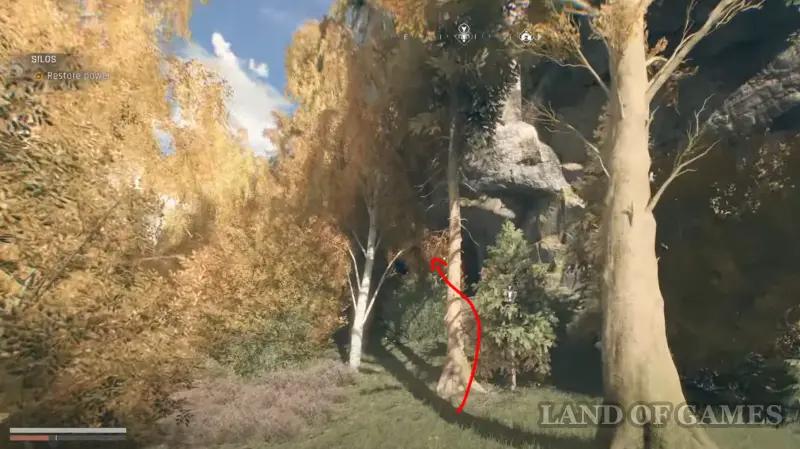
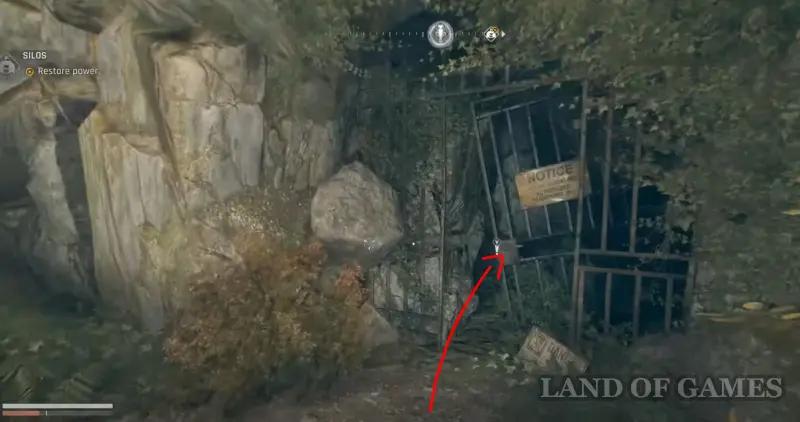
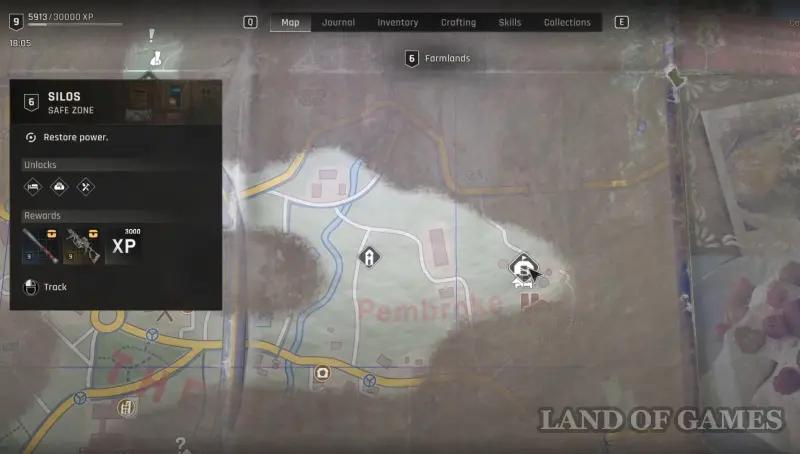
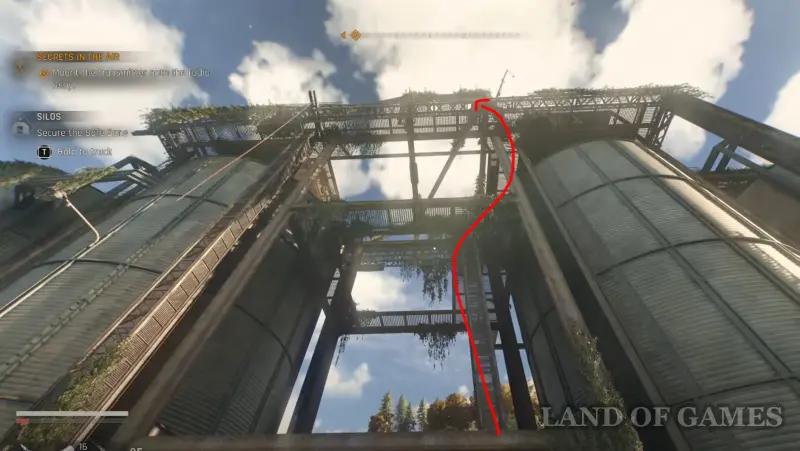
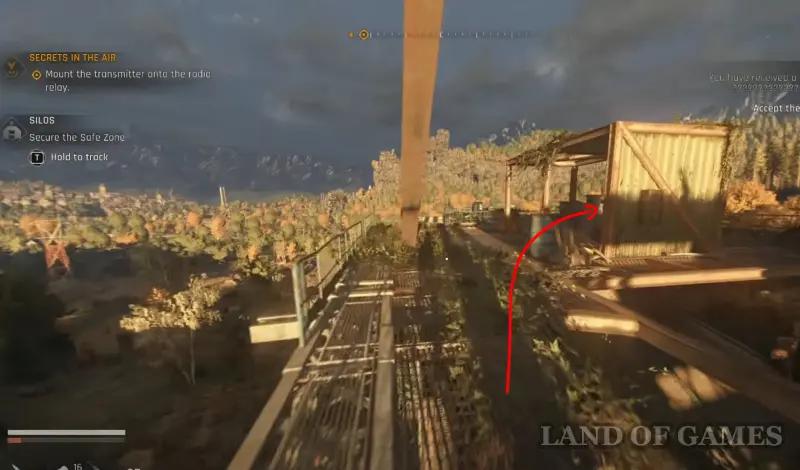
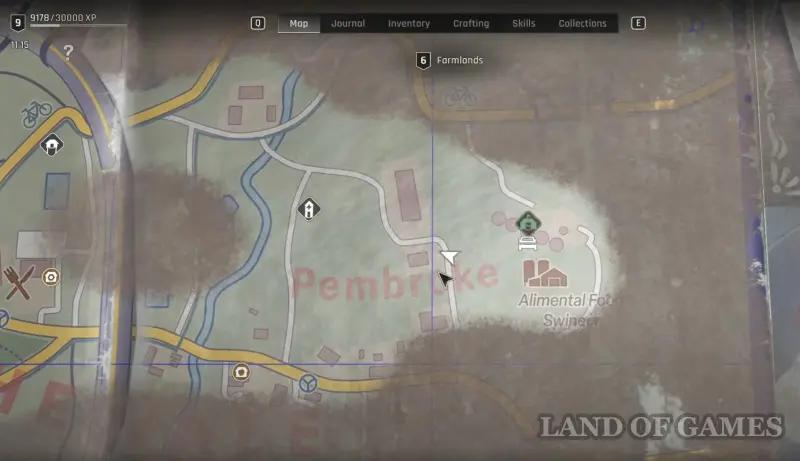
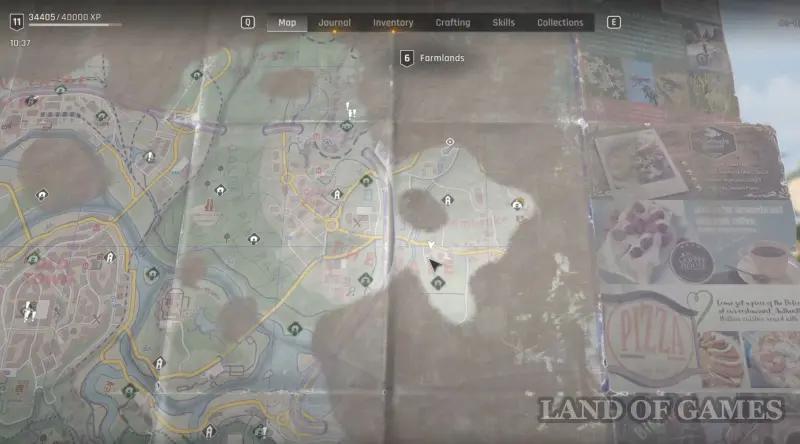
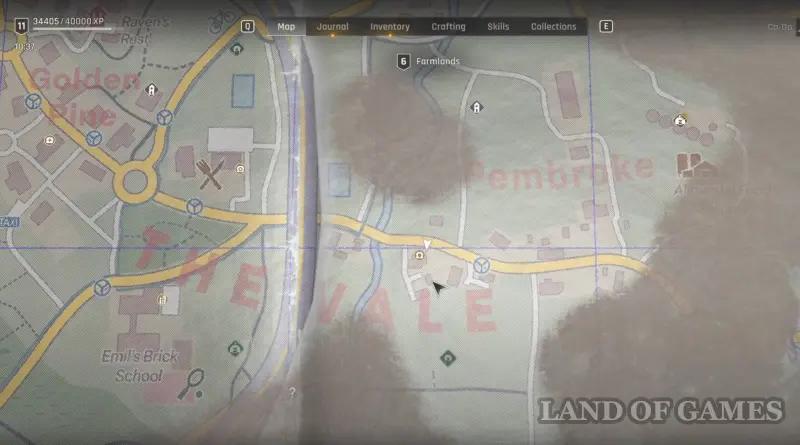
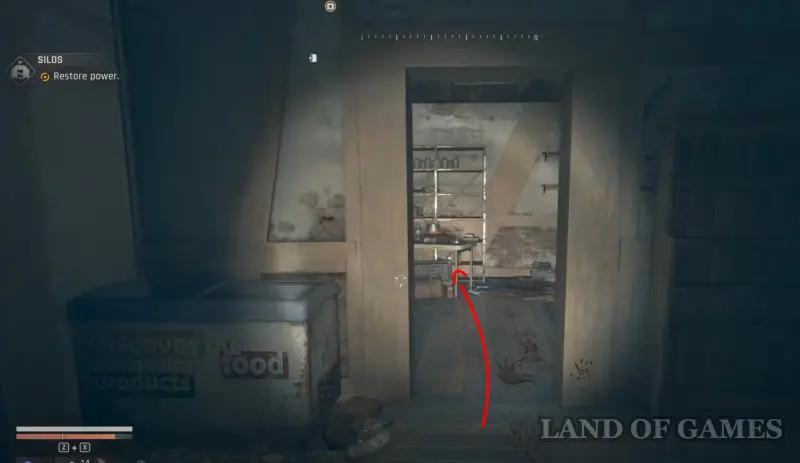
Treasure map C3
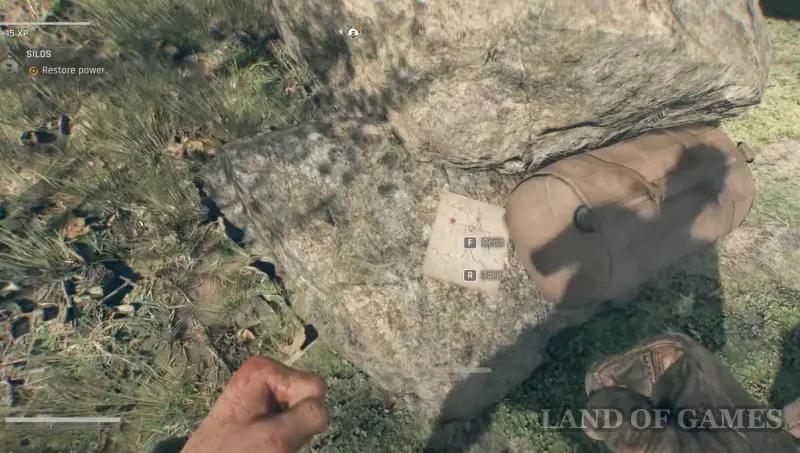
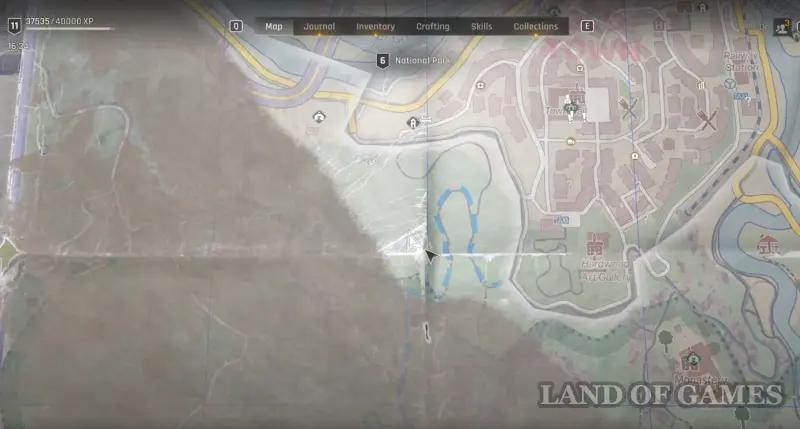
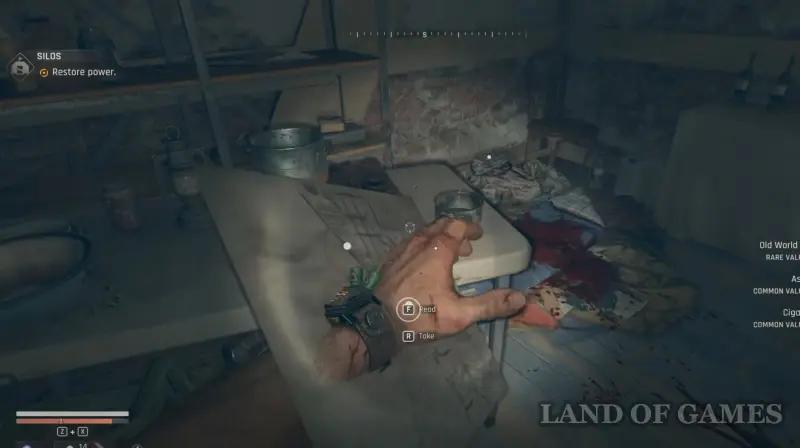
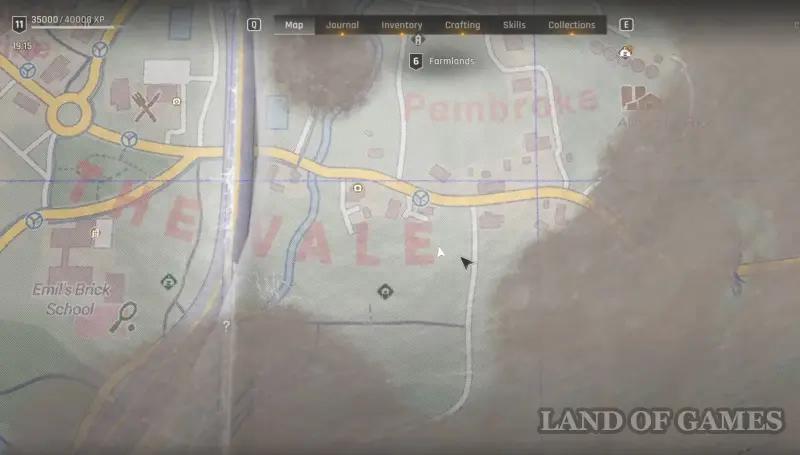
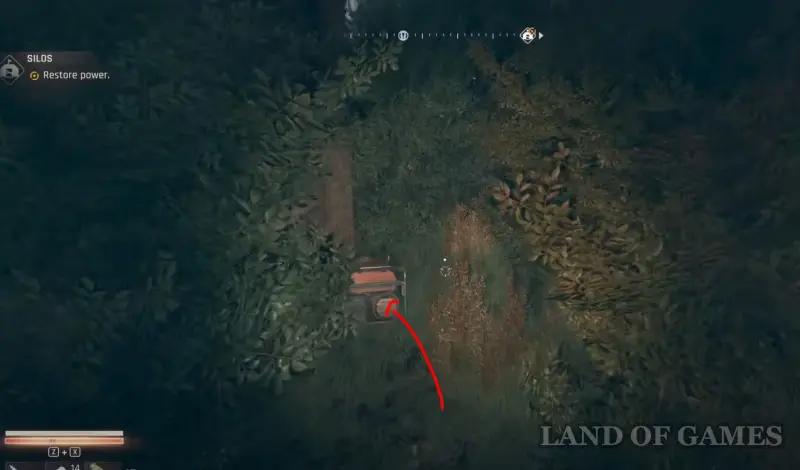
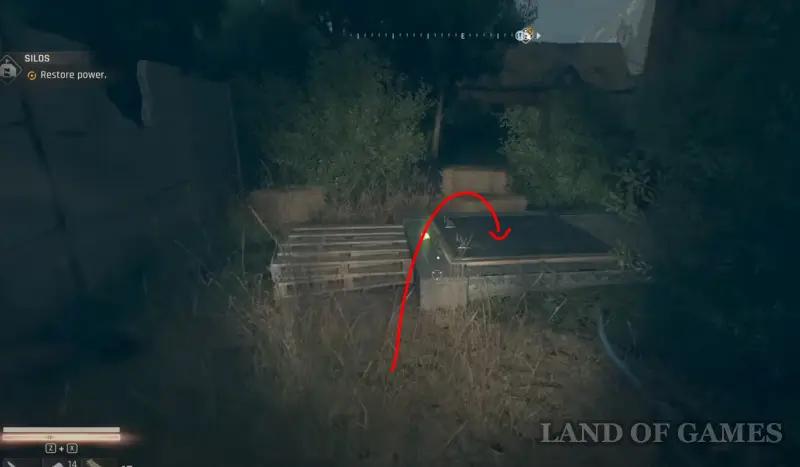
You can find her at the top of the Silo safe zone, located in the eastern part of Pembroke. Let us immediately warn you that the climb to the top is quite difficult and long, so be patient and turn on parkour mode in advance. Once at the top, run to the half-open container on the left. Here on the table you will find the drawing you need.

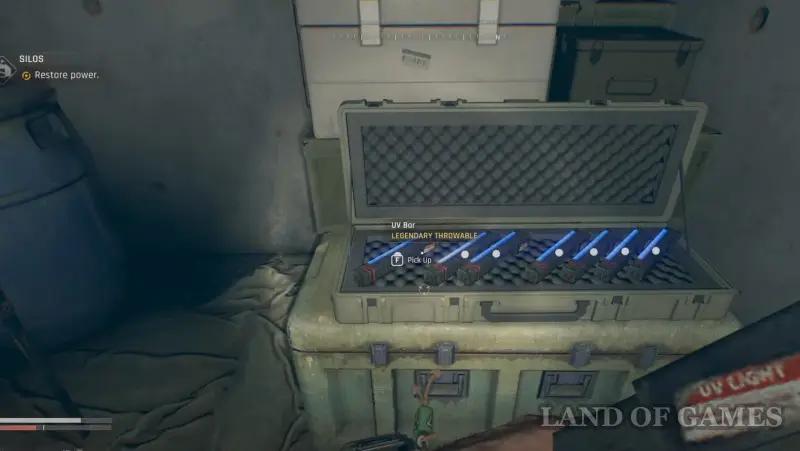
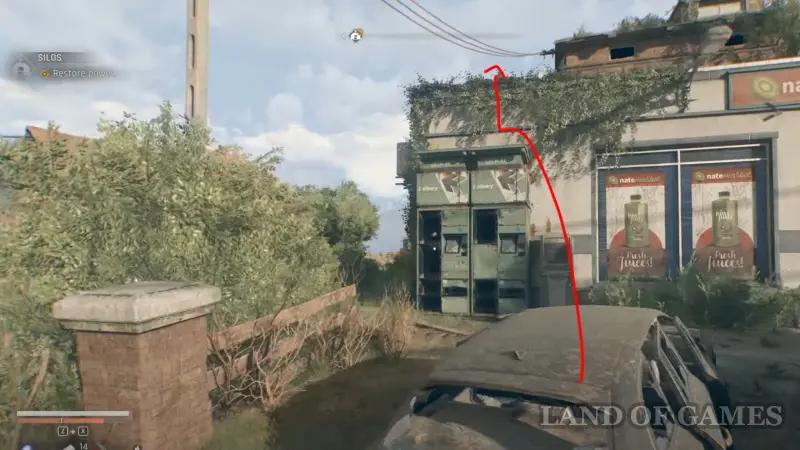
Where to find treasure C3
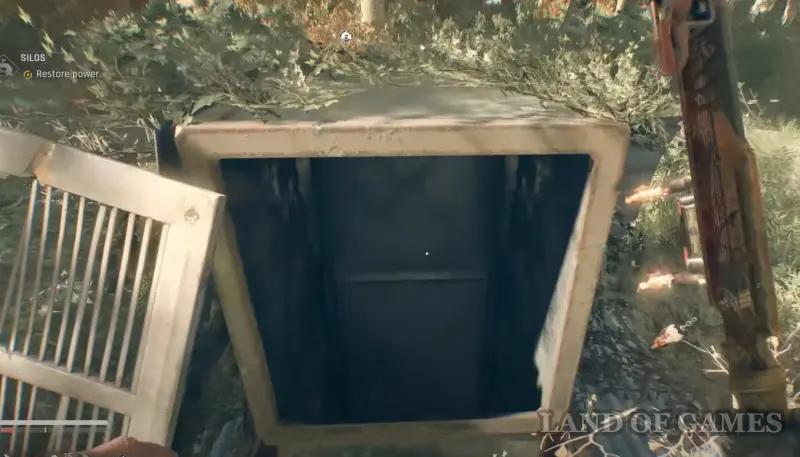
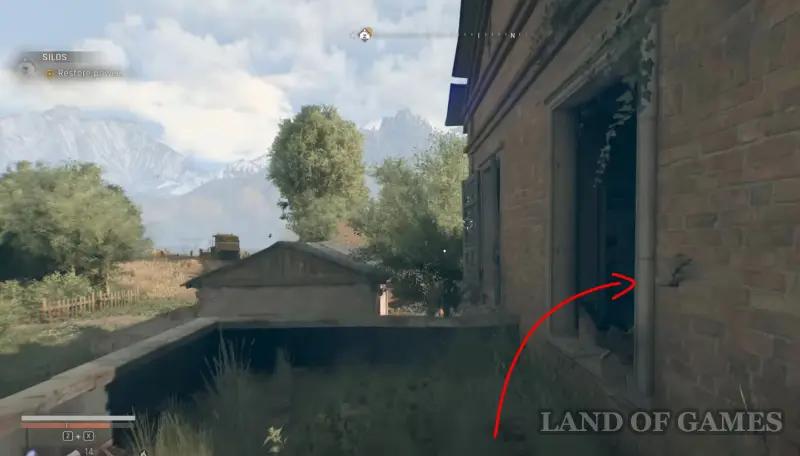
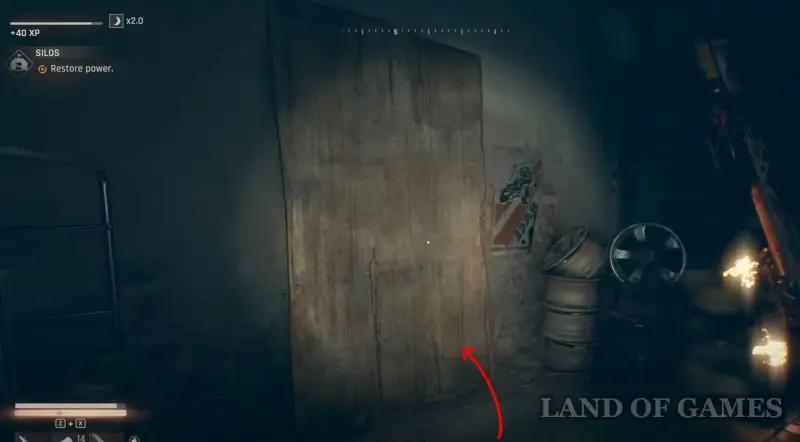
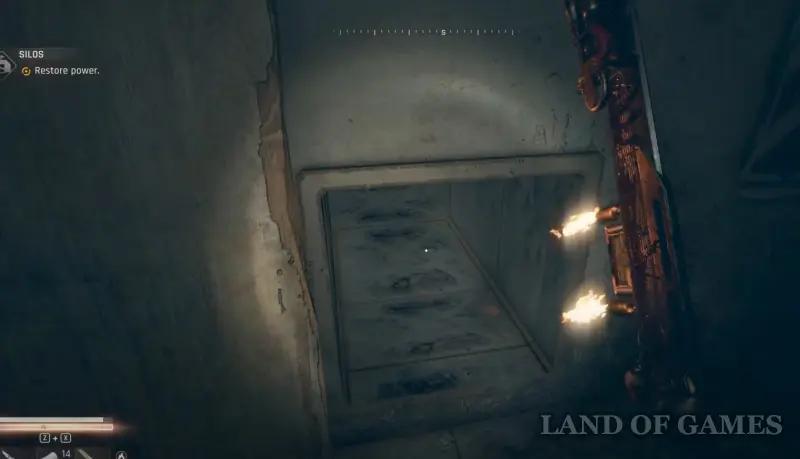
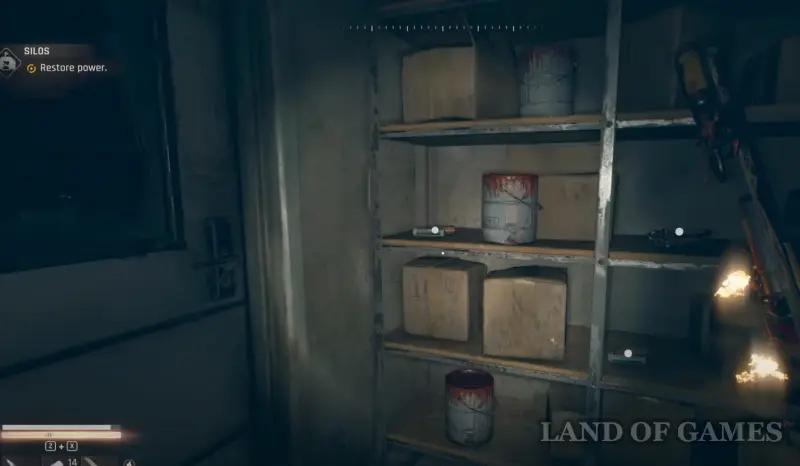
From the previous location, run west to the barn and go inside. Here, activate the generator on the left, and then open the hatch on the right and go down to the basement. Be careful as the water here is energized. Throw a throwing knife at the electrical panel on the right to turn off the electricity. Now you can safely explore the location, finding a lot of useful materials and various epic weapons.
Treasure map C4
Head to the dark Nate's Market area, located in the southwestern part of Pembroke, then go to the green lockers near the merchant building and climb them to the roof. Next, go inside the building through the open window on the right. Now go down to the basement and enter the room ahead. Turn left and take the drawing from the table on the left.
Where to find treasure C4
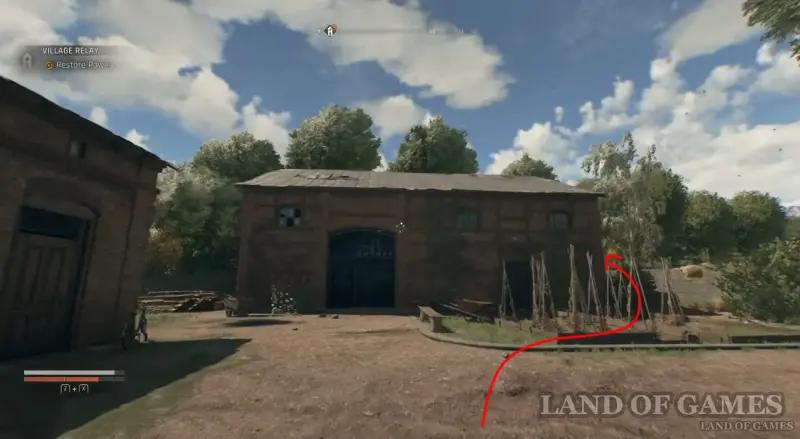
Go back to the garage with three safes, where you found treasure B3, and again go to the back of the building, where you climbed up the boxes, but now you need to go further into the bushes and find the generator there – turn it on. Next, go back and find a hatch in the ground, near which a green light will now light up.

Go down into the basement, turn right and move the board to reveal a ventilation hole – crawl along the shaft into a storage room, where you can find a lot of useful materials and weapons of epic rarity.
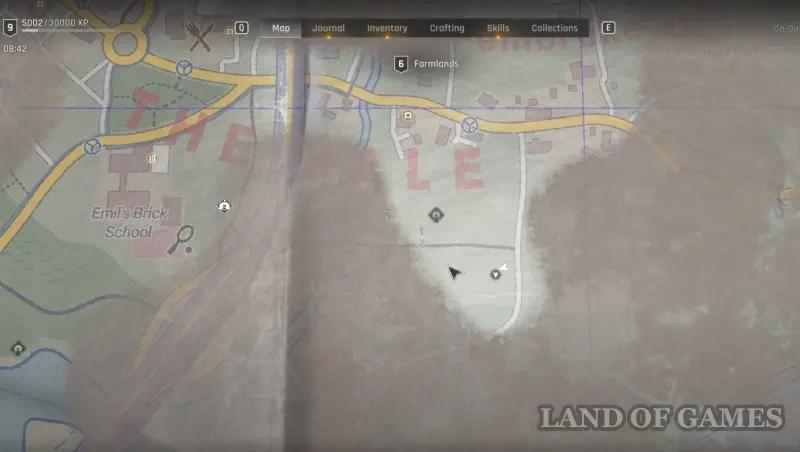
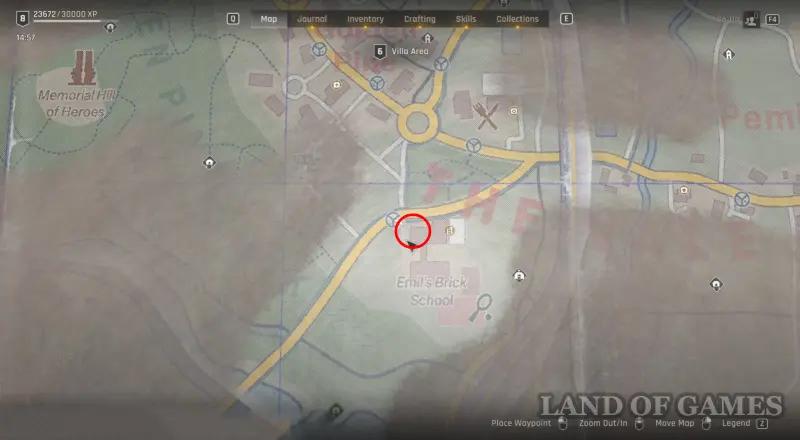
Treasure map D1
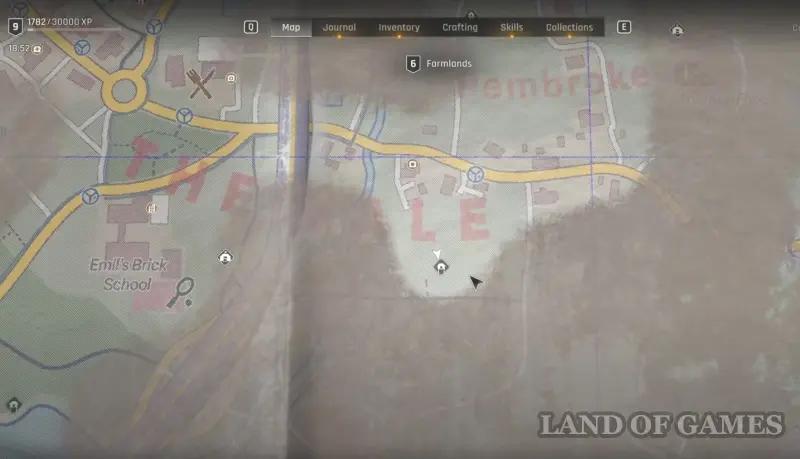
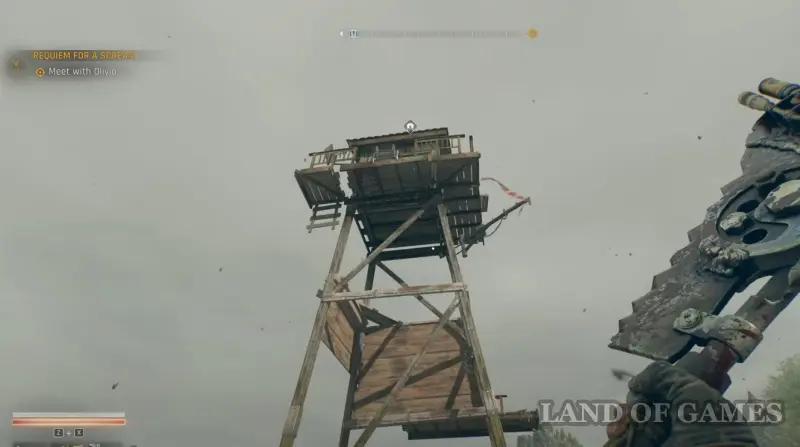
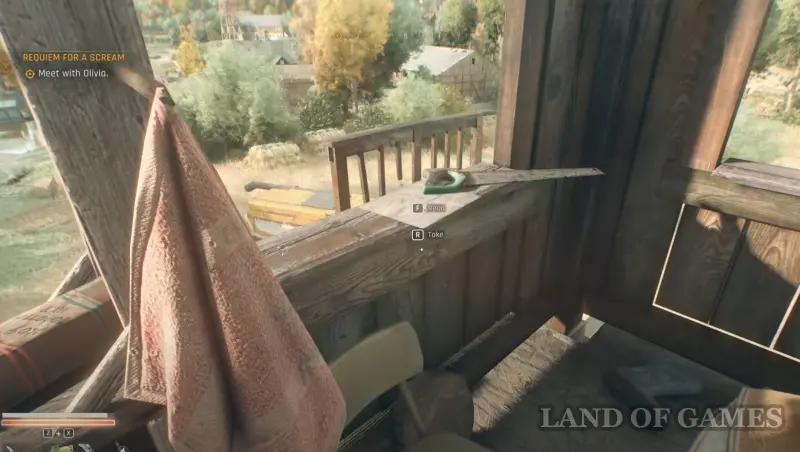
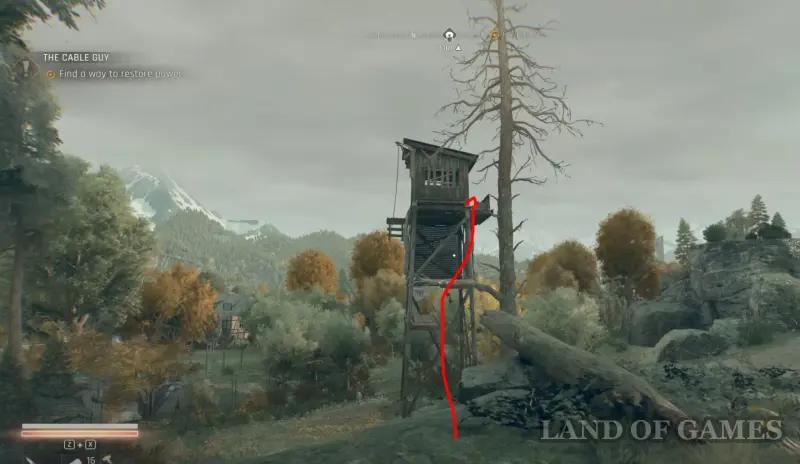
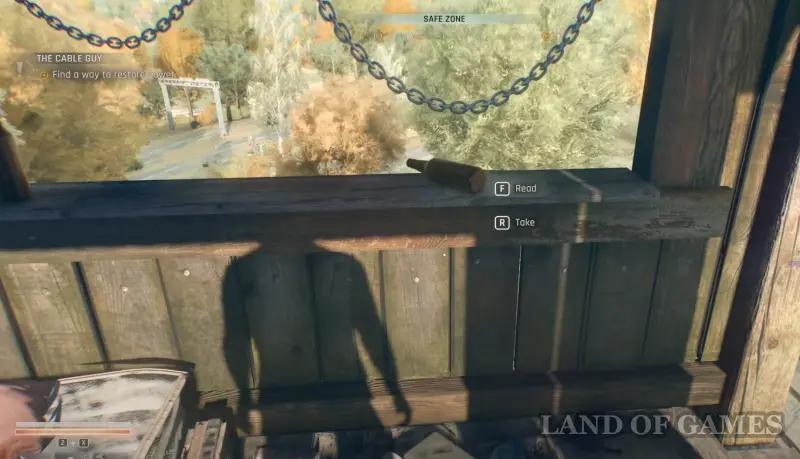
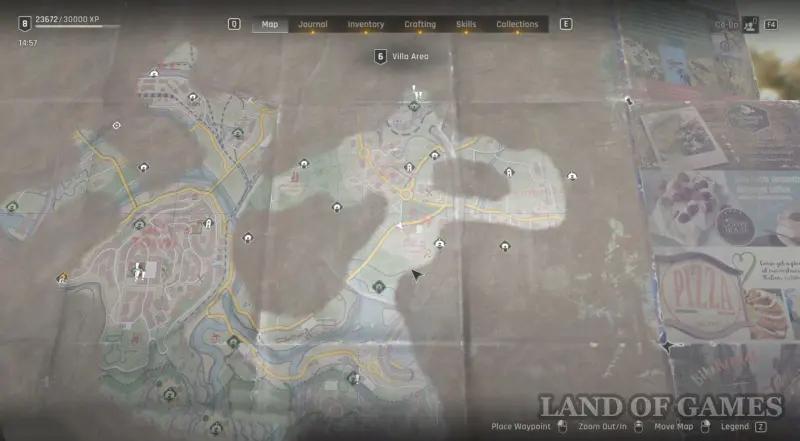
Get to the “Tower by the River” safe point, located south of Emil Brik's school. Then climb to the top of the wooden tower by first climbing the tree and then jumping onto the ledge on the tower. Having risen, find the drawing hanging near the window.

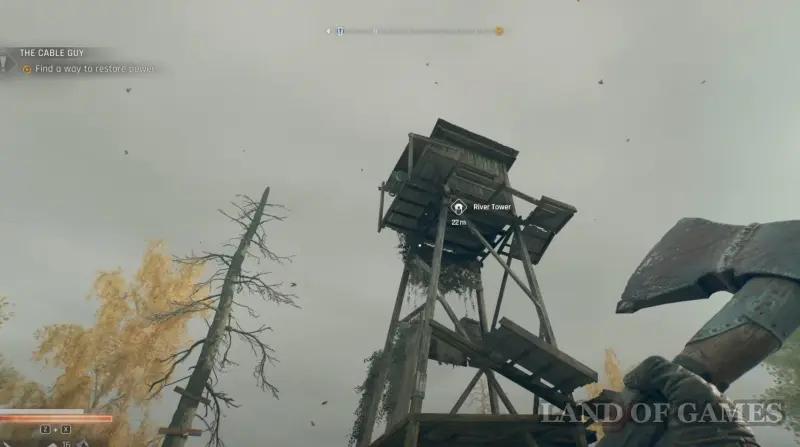
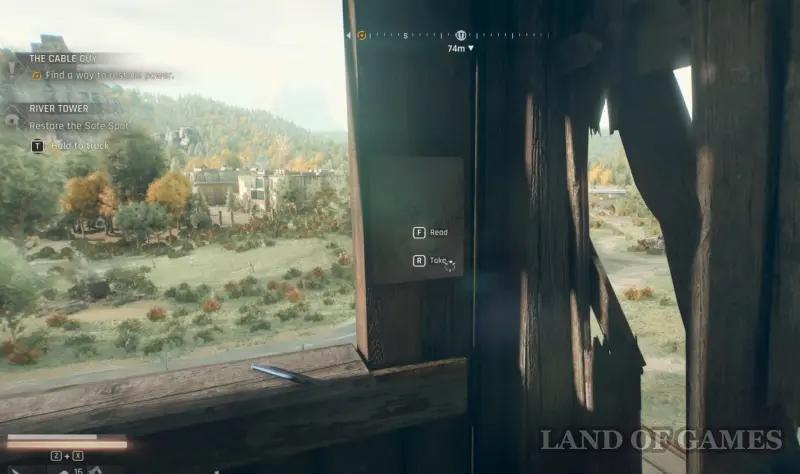
Where to find treasure D1
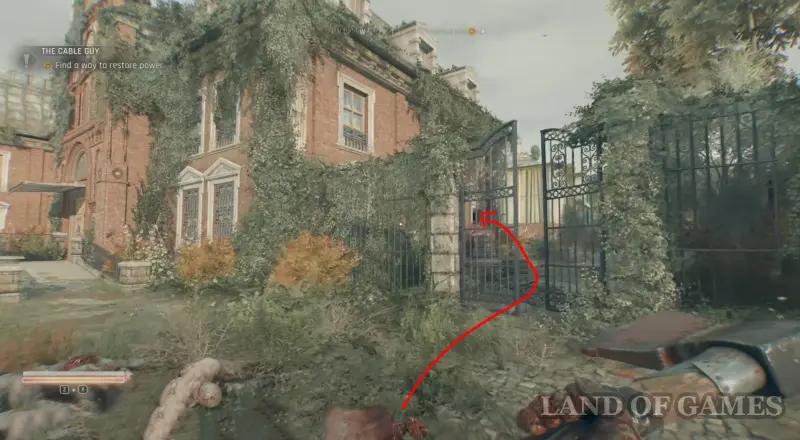
Standing north of Emil Brik's school, go through the half-open iron gate and enter the building through the window on the left side. Once inside, start moving to the right, crawling through the small holes. You will end up in the toilet.
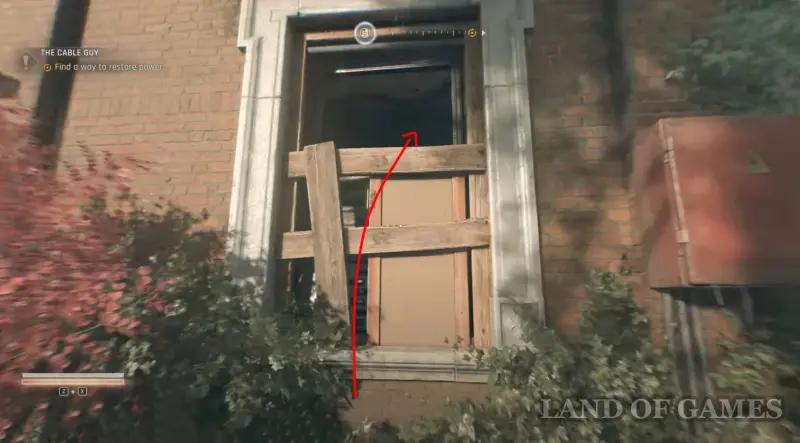
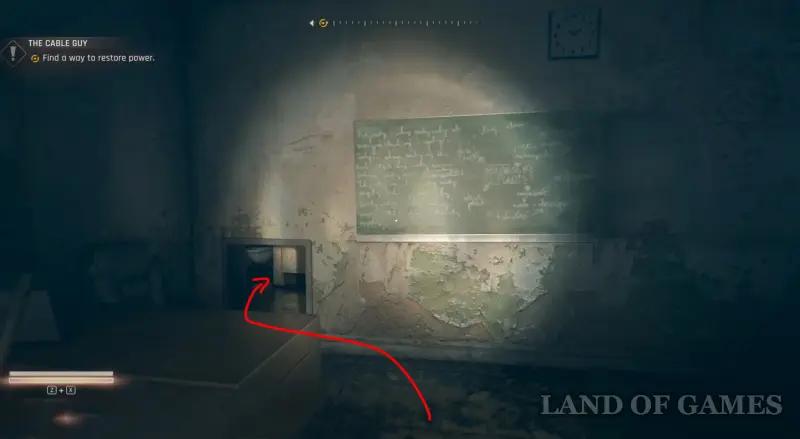
Exit the toilet and immediately turn left. In this small room you will see a board with a binary code, which is the correct combination for the safe on the shelf to the left – you just need to convert it to decimal. If you are too lazy to do this, then here is the correct password: 5-50-90 or 5-40-90. Inside you will find jewelry and a smartphone.
Treasure map D2
Head to the Fun Island Tower safety spot and then climb to the top of the wooden tower using ropes and destroying the crates on the ledges so they don't interfere with your landing. Having climbed up, go to the window sill and pick up the drawing.

Where to find treasure D2
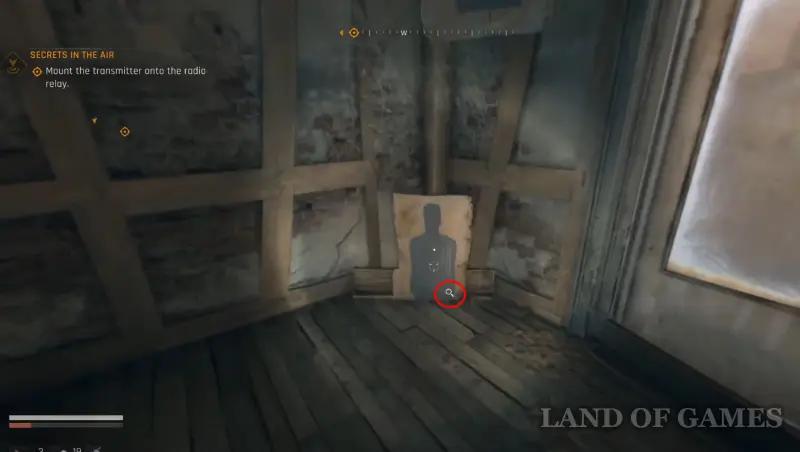
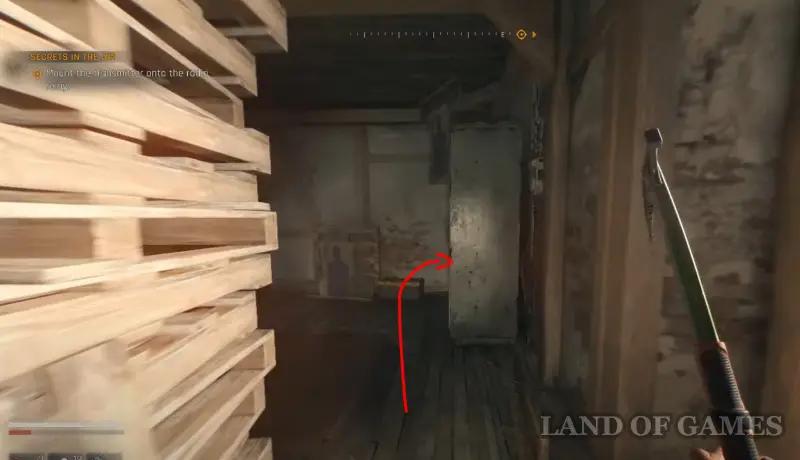
Head to the northern part of the Old Town and reach the apartment complex shown in the screenshots below. Climb onto the truck's van, jump from it through the open window and enter the house. Turn left, go along the corridor, and then turn right and climb into the ventilation hole.
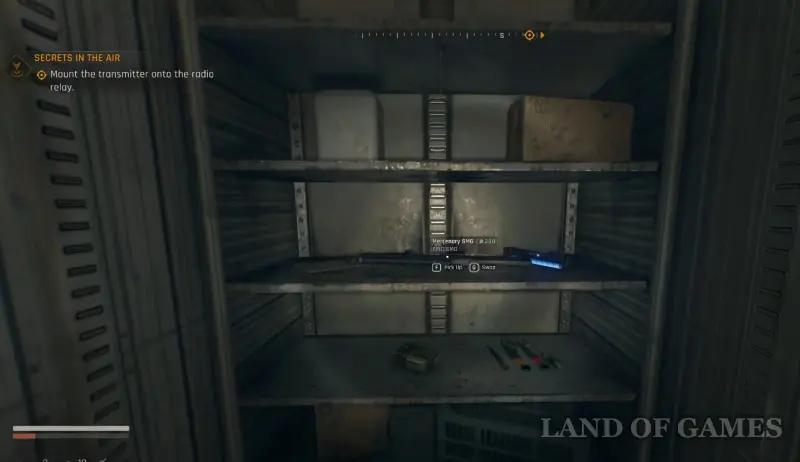
Next, start climbing along the yellow pipe to the top floor. Jump onto the platform on the right and go into the room with targets. Turn right, go to the wall and find the key under the target (you need to break it). Then go back a little and open the cabinet on the right side with the key you found. Inside you will find the epic Mercenary submachine gun and throwing knives of legendary rarity.
Treasure Map D3
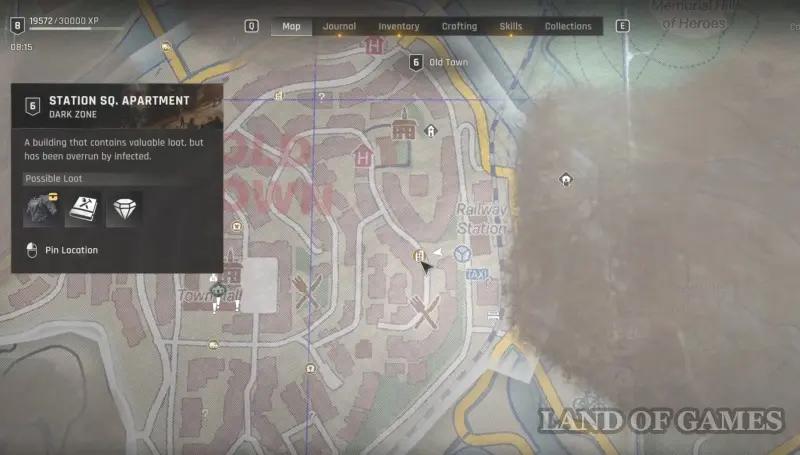
Enter the dark area “Station Square Apartments”, located in the east of the Old Town and west of the train station. Once inside, crawl through the hole on the right, and then run along the corridor and turn into the room on the right side. Here, lift the camera up and you will see a passage to the ventilation shaft on the left – climb there.

Crawl forward until you find yourself in a new room. Exit through the open door on the left, and then run forward to the end of the corridor and turn right, entering the laundry room. Here, climb through the hole on the right and at the top. You will find yourself in a locked room, where the drawing you need will be on the table.
Where to find treasure D3
Travel to the waypoint located southwest of the train station, and then climb onto the roof of the cafe with the Hipocrates sign, go forward a little, and on the right you will find a board blocking the entrance to the building. After moving the obstacle away, pick the very easy lock on the door and go inside. Take a few steps and you will see a safe on the shelf on the right side.

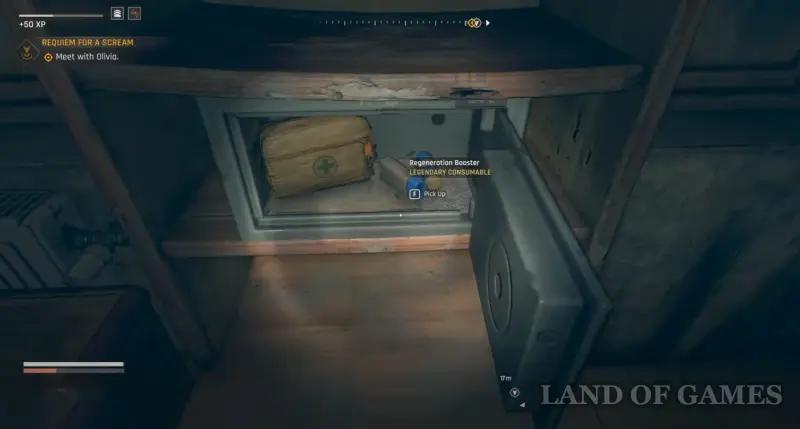
The required combination is written on a piece of paper “Clear Time”, which lies in the TV cabinet. Correct code: 12-25-25 or 12-25-55. Inside you'll find an Army First Aid Kit and a Regeneration Booster.
Treasure Map D4
While in the Industrial Zone, get to the “Refugee Bus on the Highway” safe point, then climb onto the highway and enter the yellow bus. The drawing will hang on the board near one of the handrails.
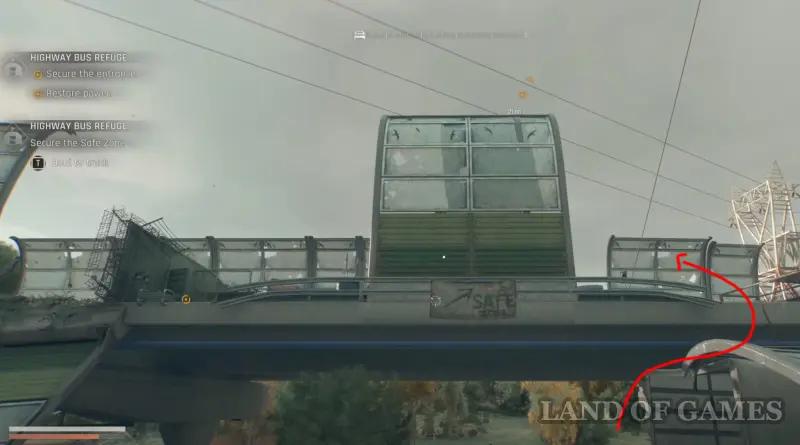
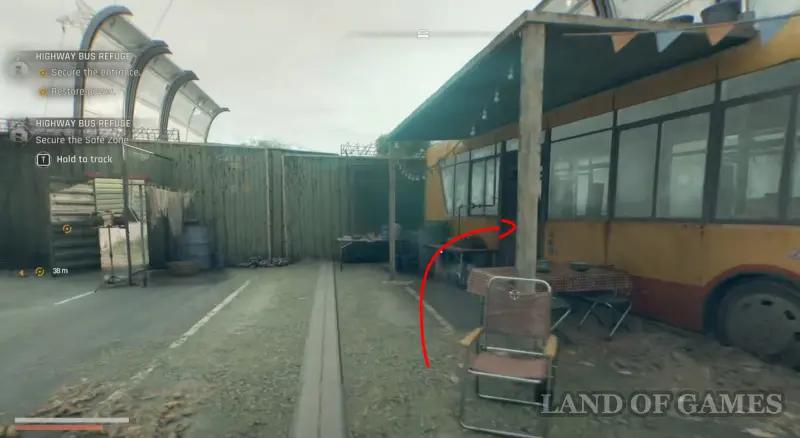
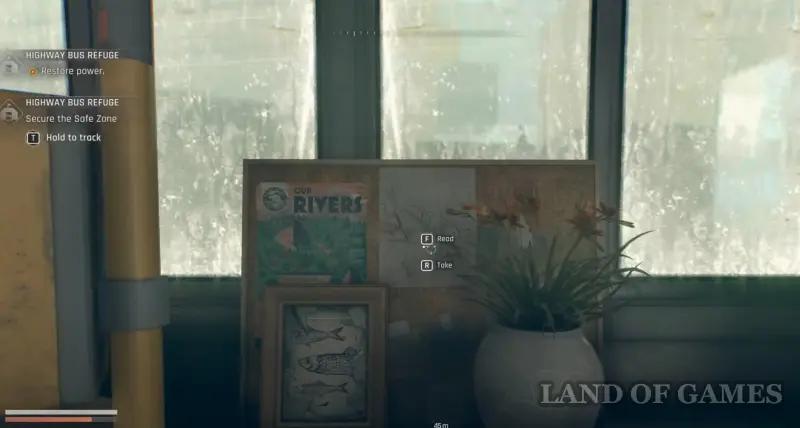
Where to find treasure D4
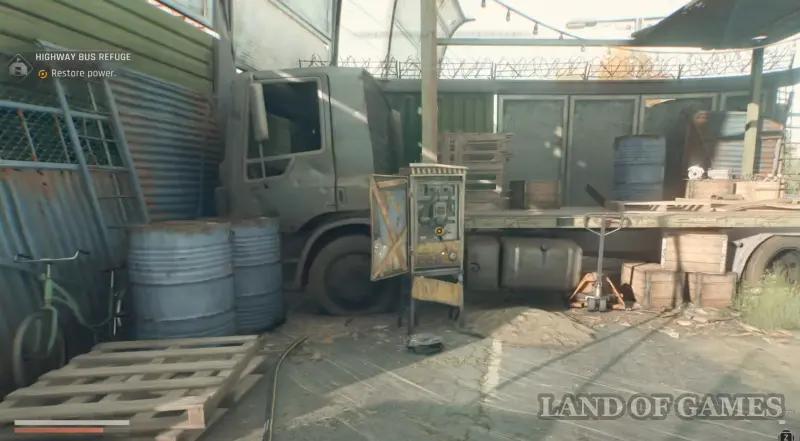
Get off the bus and then climb onto the brick building ahead. Once on the roof, take the cable from the panel and use the cable to return to the safe area with the bus, and then connect the wire to the fuse panel.
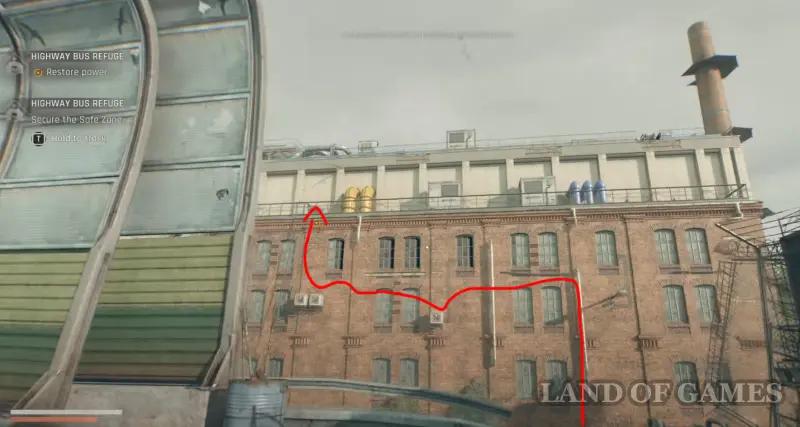
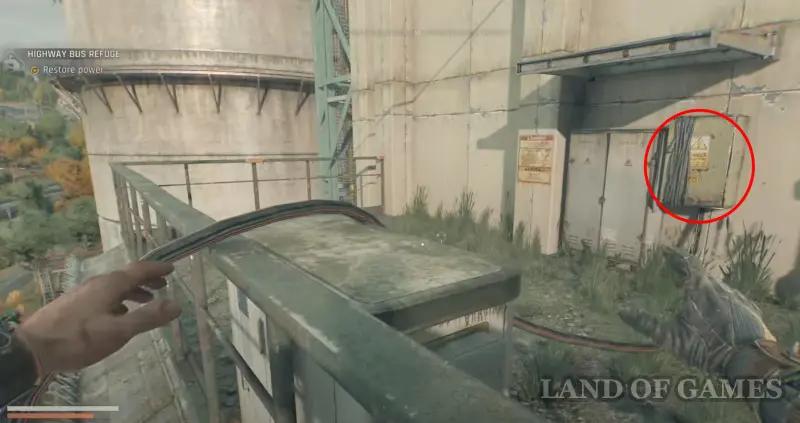
Next, climb onto the roof of the brick building again and open the iron hatch located here. Go down, deal with the zombies and start collecting valuables, including the Flame blueprint and the legendary mine.
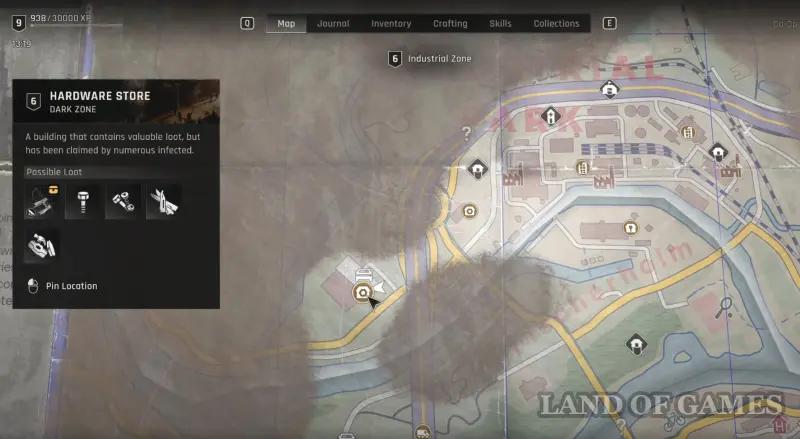
Treasure Map E1
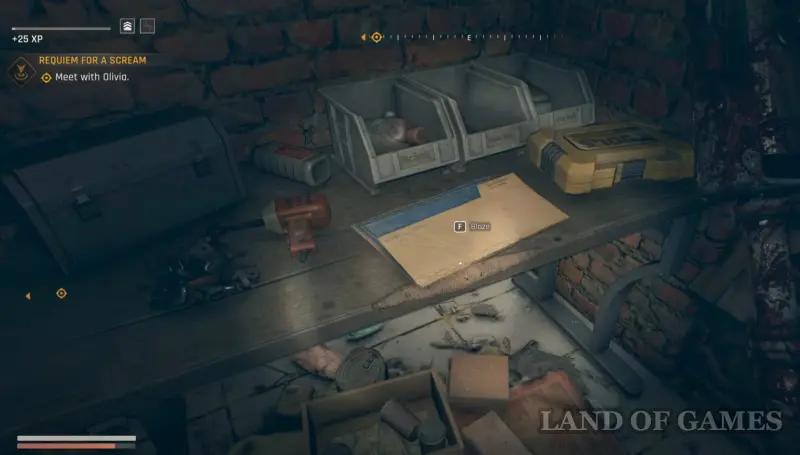
Go to the dark “Hardware Store” area, located on the western edge of the Industrial Zone. This place is infested with dangerous monsters, so you need to either act carefully or run very quickly. In any case, go inside the building by climbing into the ventilation passage, and then move to the opposite wall on the left.

Here, crawl through the hole, and then immediately turn right and break open the door. Enter the room and approach the corpse of the girl, next to which the drawing you need will lie.

Where to find treasure E1
Head northwest from the store you just visited and you'll soon see a small stone structure in front of you. Take out all the bandits guarding the cache, then go inside and take away valuable items, including the Epic Rogue Gloves.
Treasure map E2
It can be found on top of another chimney located in the Industrial Zone. First, climb the brick building using scaffolding, and then climb the tower itself. On the upper platform near the backpack you can find another drawing with the location of the treasure.
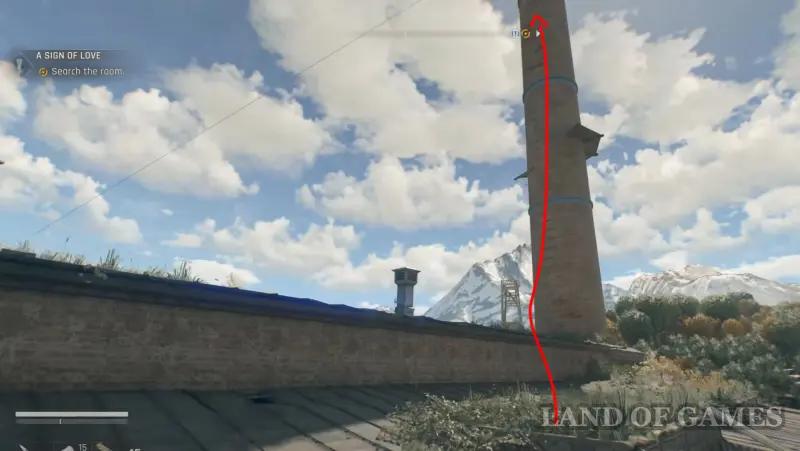
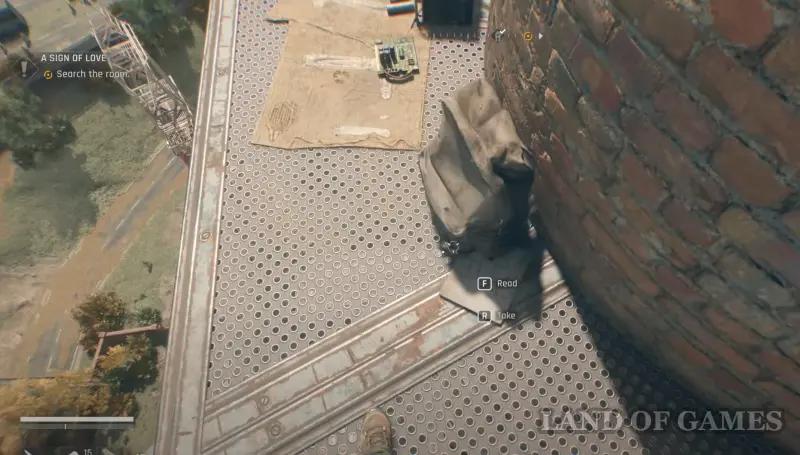
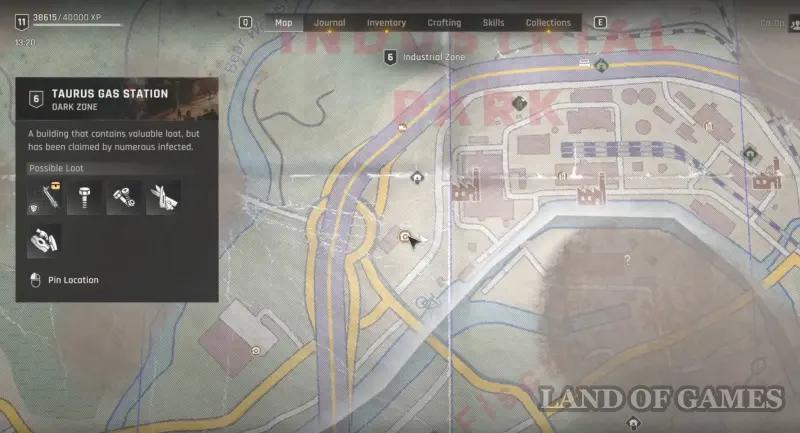
Where to find E2 treasure
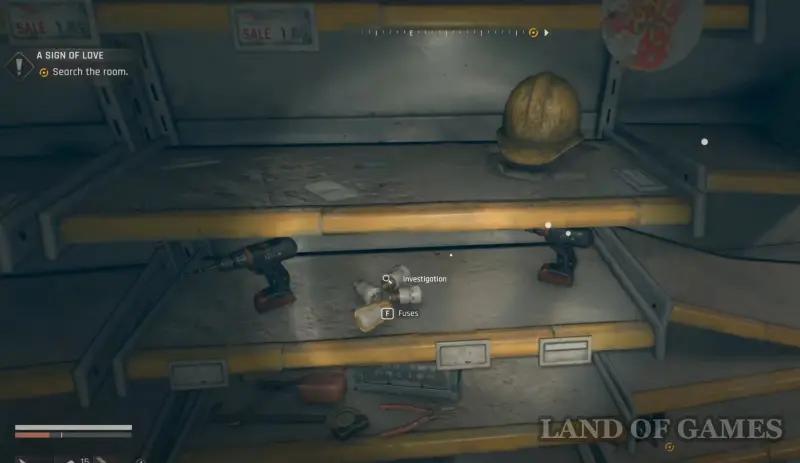
Get to the dark Taurus Gas Station area, located southwest of the tower you climbed a little earlier. Next, go up to the roof of the smaller building, open the hatch and go down. You will see locked doors here, and the board will tell you about the fuse.
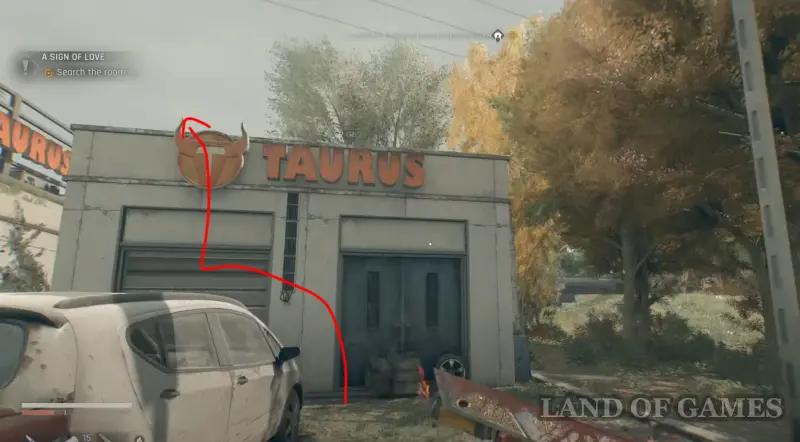
Go back up to the roof and jump down, and then enter the main gas station building. Now run to the left and find the fuse on one of the shelves. Having taken it, return back to the small building and install the part in the electrical panel. Then pull the red lever on the right and explore both rooms to collect useful materials.

E3 Treasure Map
Go to the Town Hall, located in the Old Town, and go to one of the rooms where the quest givers are located. The drawing will hang on a large map leaning against the wall on the left.
Where to find E3 treasure
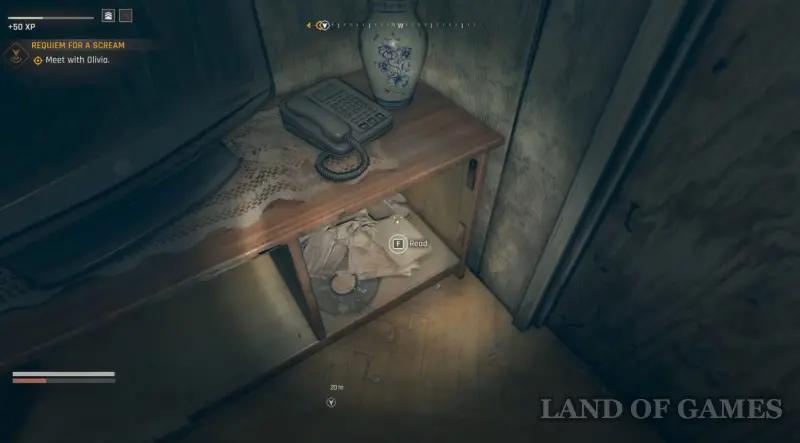
Now go to the bell tower, located east of the Town Hall, and enter the red building opposite it through the open window. Once inside, immediately turn the camera to the left and climb into the vent. Go down and move the cabinet on the right, opening a new passage. Enter the room with the locked white cabinet and read the note on the table to the left telling you about Trattoria.
Exit the house, go towards the bell tower, and then turn left and go down the stairs. Almost immediately you will see a sign on the left that says “Trattoria”. Run forward a little more, and then climb onto the visor and from it climb into the open window on the second floor. Deal with the zombies in the apartment, and then examine the corpse on the floor to find the key behind it (it will not appear if you have not read the note before).
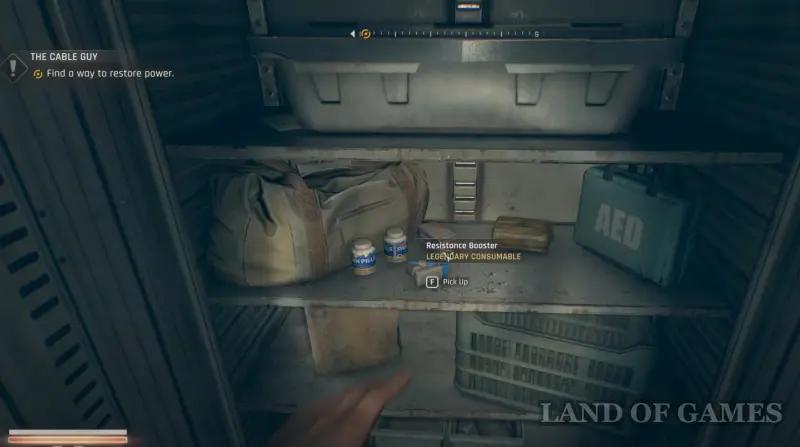
Now return to the previous red house, go to the white cabinet again and open it. Inside you will find a legendary resistance booster, an army first aid kit, antibiotics and other valuables.
E4 Treasure Map
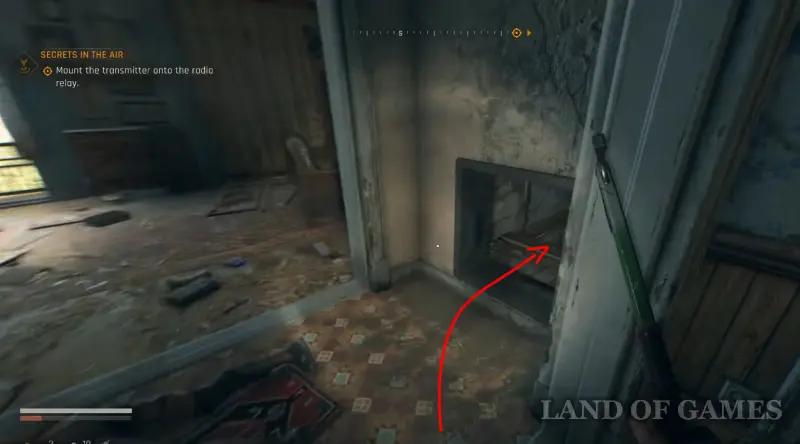
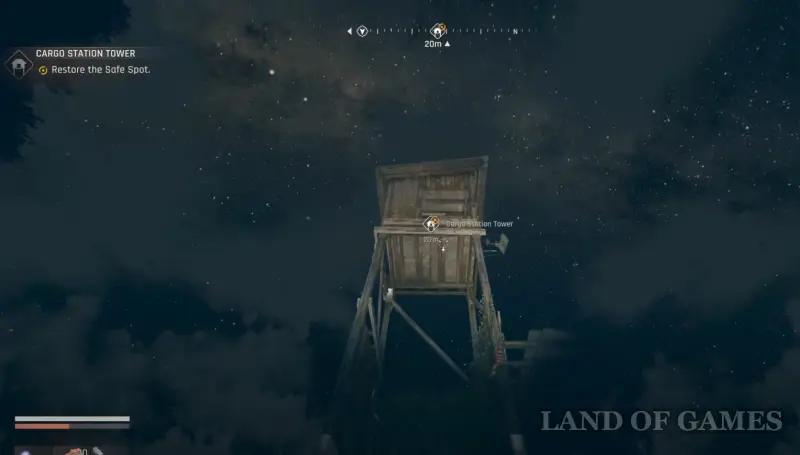
Get to the “Freight Station Tower” safe spot located in the Industrial Zone, and then climb up the wooden tower as usual. The design you need will be on the wooden box to the left of the frying pan.
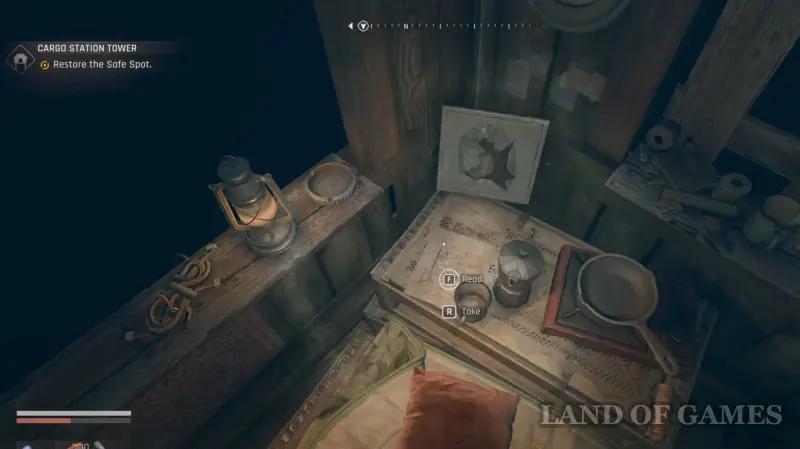
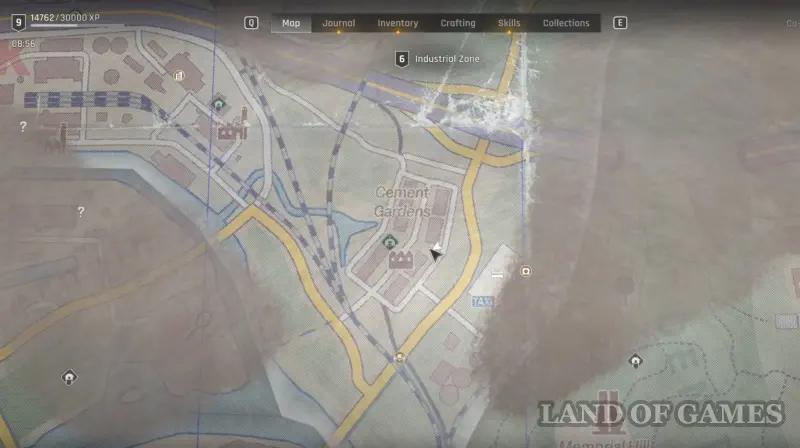
Where to find E4 treasure
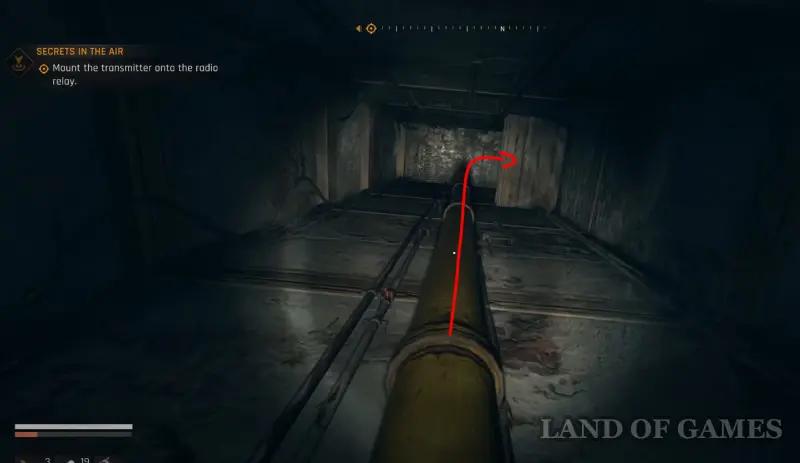
From the wooden tower, start heading south until you reach the Cement Gardens. Then climb the pipe onto the roof of the brick building shown in the screenshots below and look for a ventilation hole here that you need to climb into immediately. Jump down the hole to the middle floor, that is, not to the very bottom.
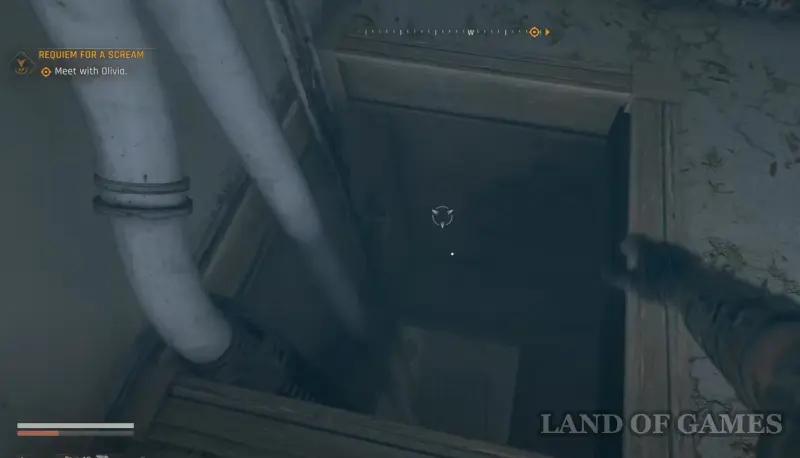
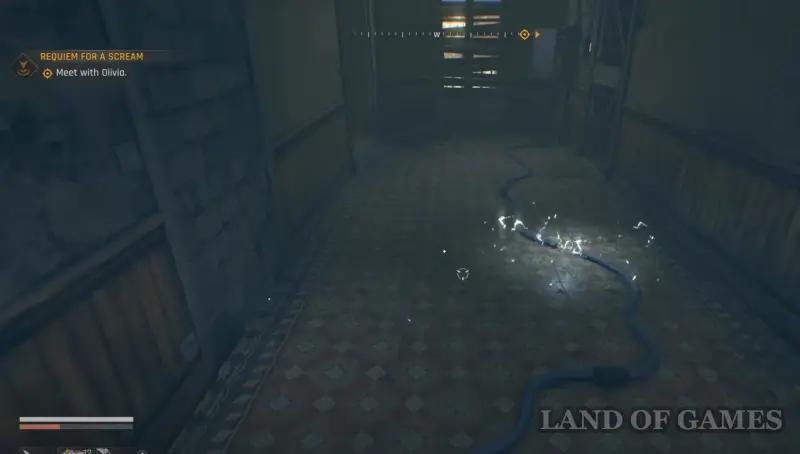
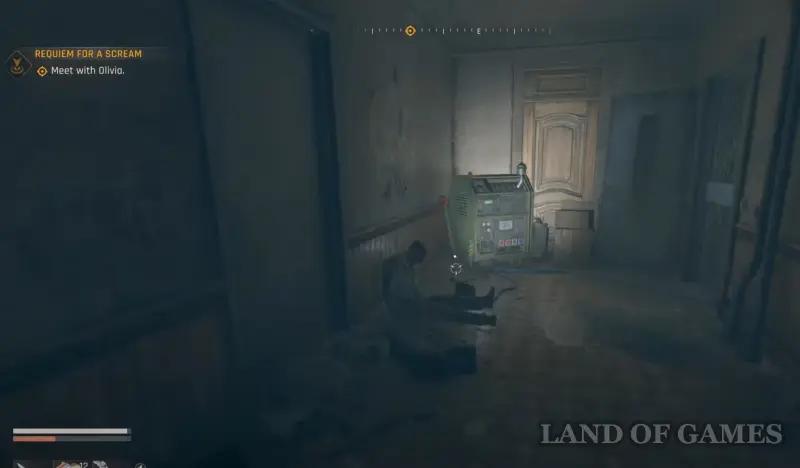
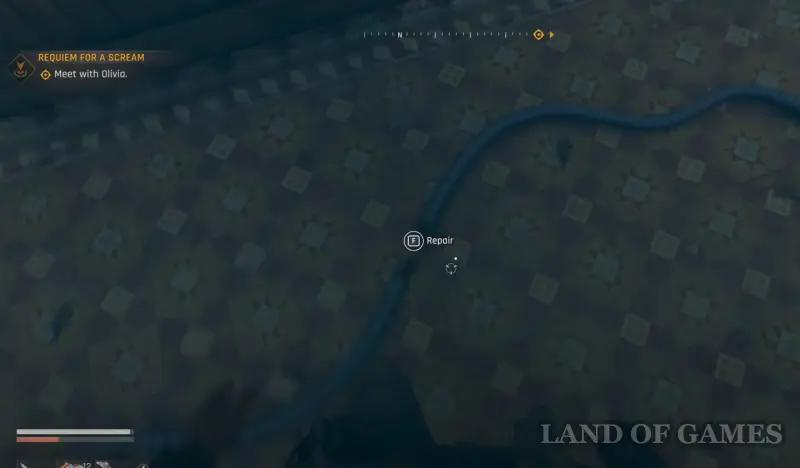
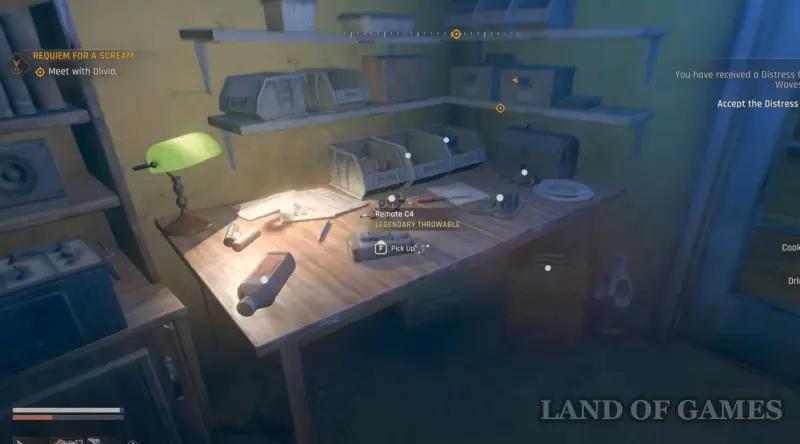
Then go out into the corridor, turn left and go down the stairs even lower. Next, turn right and interact with the generator to turn it off. Go upstairs again and repair the previously sparked cable. Go down again and now activate the generator. Go upstairs again, pull the red lever and open the lattice door. Inside you will find a lot of useful items, including C4 explosives.

These are all the treasure maps that can be found in Dying Light: The Beast. We hope that our guide helped you find them, as well as solve the mysteries associated with them and discover all the caches with valuable materials and equipment.