In Baldur's Gate 3, approval of companions is an important parameter on which the opening of their personal quests, the possibility of developing romantic relationships and even effectiveness in battle. In this guide, we will talk about how this mechanic works in the game, as well as what actions lead to approval or disapproval from each companion.
How the approval system works in Baldur's Gate 3
High and low approval of companions – what's the difference
With high approval, relationships with party members often improve significantly, as a result of which they become more loyal to you, support your point of view, and fight more effectively in battle. Personal quests of your companions may also be revealed to you and their romantic branches may become available.
If approval is low, you may experience dissatisfaction with your companions, conflicts with them, and even their departure from the team, which will deprive you of valuable allies and reduce your ability to complete both main and story quests. In addition, bad actions or decisions can affect your reputation in the world and interactions with other NPCs.

You can view the current level of approval of a companion at any time by simply opening the card of the desired character.
How to increase the approval of companions
To do this, you will have to act in accordance with the values, beliefs and aspirations of your comrades. Pay attention to their personal quests, backstories, and dialogue to better understand their preferences. Frequently communicating with your teammates, getting to know their opinions, thoughts and experiences will help you deepen your relationship with them and gain insight into what they like and don't like.

Be sure to complete their personal missions and at the same time show interest in their goals and desires. You can also offer them gifts or small favors to increase their approval rate. Naturally, to do this you need to study their interests and tastes, otherwise the gift will not bring you the desired result.
Conflict of interests between partners
Often you will find yourself in situations where different companions will have different opinions regarding current events, so some may approve of your actions, while others will clearly not like them. Unfortunately, it will not be easy, and sometimes even impossible, to please everyone.
For this reason, carefully consider the consequences of your decisions and make choices based on your own values or the long-term goals of your playthrough. At the same time, try to use dialogue options that are aimed at finding compromises, reducing tension between party members and resolving conflicts between them (some fights can even lead to the death of one of the companions, so it is better not to let the situation come to this).

Usually, quarrels and disagreements arise between characters with different worldviews. For this reason, in order to avoid conflicts, we advise you to simply take into your squad companions whose beliefs match yours, that is, if you are playing as a good-natured hero, then it is better to keep companions such as Karlach, Gale or Will in your team, and villains should take a closer look at Mintara and Astarion.
Changing the worldview of companions
However, you don’t have to try to constantly adapt to your companions – you can try to change their worldview to make it easier for you to communicate with them, moving along a good or evil path.

For example, you can change Gale's moral principles. If you side with the goblins in the first act, then, unlike Will and Karlach, he will not automatically leave your party. Talk to him during the goblin party, where he will threaten you to leave the group for participating in the massacre of refugees. You need to convince him to change his attitude towards life, justifying the atrocities committed as necessary for survival. You will prevent him from leaving the team by distorting his alignment.
Reaching maximum approval
When you reach the maximum approval of a companion – “Exceptional”, you will no longer receive notifications regarding changes to this parameter.
If you follow our guide, then after Act 1 you will most likely be able to achieve the maximum approval rate with the companion you need. So, even if you encounter situations that can increase this value, the game will not reflect this in any way.

Please note that you are unlikely to be able to get maximum approval from absolutely all your companions in one playthrough. The point is that you need to keep the characters in your squad so that they can express their opinions on this or that issue (interactions in the camp alone are unlikely to be enough for this).
How does distance affect approval
If you stand too far from your companions when dealing with certain situations, they simply will not hear you, and therefore will not be able to express their approval or disapproval of your actions. So make sure that they are near you if it is important for you to listen to their opinion.
This feature can be used for your own purposes. For example, if it is important for you to gain approval from one of your companions, but at the same time you do not want to worsen your relationship with another companion, then simply take the second one away from the group, and then make a choice.
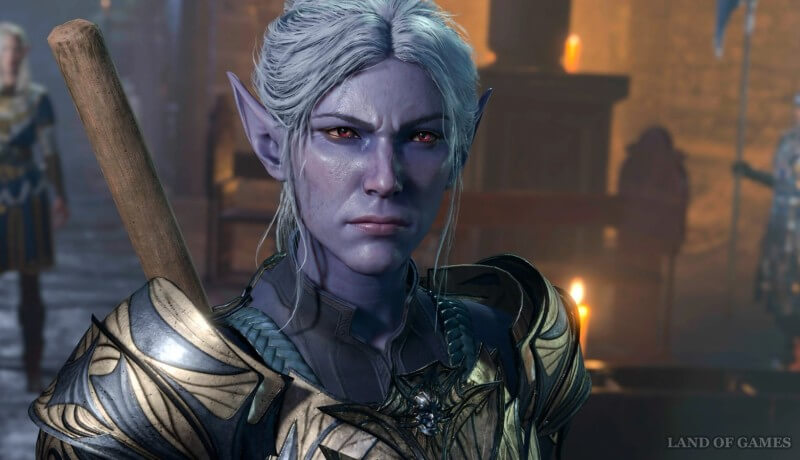
Shadowheart
Shadowheart is a controversial person when it comes to receiving approval and disapproval of your actions. She cannot be called a 100% villain or hero – she is somewhere in the middle, with a slight bias towards good. For this reason, you may have trouble choosing the right solutions at first. However, once you get to know her better, you will be able to more easily understand her motives and desires.

What Shadowheart approves
Prologue/Beach/Dark Crypt:
- Rescue her from the capsule on the Nautiloid.
- After rescuing her from the capsule, you chose the option to go with her in search of supplies and a healer.
- Tell Shadowheart at the Camp that you will search for a healer your top priority.
- Calm down a boar frightened by Astarion by passing a Train check or talking to him (requires the Speak to Animals spell).
- Convince the adventurers to leave the Overgrown Ruins.
- Agree with Shadowheart after the battle with undead in the Dark Crypt.
- Successfully pass the Religion test while studying the Book of Dead Gods.
- Successfully deceive Laesel's captors while she is in the cage.
- Demand from Laezel says “please” before releasing her.

Druid Grove:
- Show Hex at the training ground your sword fighting technique (you need to pass an Athletics or Insight check.
- Convince Zevlor and Aradyn to stop fighting in the Druid Grove.
- After rescuing Nadira from Bugbar's assassin in the Grove, use Deception to convince her to give you the Soul Coin.< /li>
- Don't let the tieflings kill the caged goblin Sazu, because she'll be able to give away more information alive.
- When you first meet Zorru, talk to Laezel and ask her if she plans to be so rude to everyone she meets.
- While Laezel is in the party, talk to Zorru and prevent the githyanki from forcing Zorra to bow to her.
- When Arc asks you why you care whether the goblin lives or dies, choose the option where it is said that revenge eats a man alive.
- In the Emerald Grove, let Silver (the wolf) pick up your scent (requires Talk to Animals).
- Successfully persuade Kaga to let Arabella go.
- Tell Kaga that protecting your friends sometimes requires resorting to to cruelty.
- Swear to Netta to use the vial of wyvern venom she gives you.
- Agree with Shadowheart about extreme measures after swearing to use the poison.
- Distract the Topaz bird from making a nest using Deception or the bard ability (requires Talk to Animals).
- Call Raphael crazy and tell him that you will never make a deal with the devil.
Forest:
- Crush the larva outside of the Druid Grove.
- Convince Edovin's brother and sister to leave rather than seek revenge on the bearfish.
- Convince the bearfish not to attack you in his nest.
- Spare the baby bear if you killed his mother in the nest before.
- Tell Skryab (the dog) that he can come to your Camp if his master will not wake up.
- Listen to Shadowheart when she tells you not to touch Silune's chest in the bear's cave (after the dialogue, you can still take the contents of the chest).
- Offer to help Jol and Demir return Mairin from Aunt Ethel.
- Convince the goblins at the entrance to let you through peacefully.
- Convince the trolls to fight for you for free by passing a Persuasion check.
- After helping the gnome at the windmill, ask him for compensation.
- When you first meet Karlach, choose any answer that does not say that the paladins sent you. Then make an Intimidation/Persuasion check. If Will is a party member, then persuade him to spare the girl by showing him that they have the same views.
- Use the Bard ability when talking with Ruganne to convince him to give you the cargo.
- Imitate the roar of a mind flayer while talking to Lorin.
- Say: “This has nothing to do with me. Goodbye” when you encounter Auntie Ethel and the brothers while attempting to enter the Sunlit Moors.
- After locating Auntie Ethel, tell Jol and Demir that it's their problem.
- >After entering the passage in the swamp, successfully pass the Perception check
- If Astarion is in the party, ask why he attacked Gandrel and tell him that he didn't need to kill him.
- Make Crusher kiss your foot in the Goblin Camp.
- After the first dream about the larva, tell Laesel that in the dream you resisted.
- After the first dream caused by the larva, tell Shadowheart that you refused/resisted in your sleep.
- Use intimidation again to get Crusher to kiss your foot.
- Tell Crusher you'd rather spit in his face, then win the fight and make him kiss your foot.
- Tell Crusher you'd rather spit in his face, then win the fight and try to finish him off (starts battle with the entire camp).
- Convince the ranger Klagga to give you the poem of the slain dwarf.
- Tell Grikka (standing near the roasted dwarf) that you can help with the torture of the prisoner.
- Win the Kurogon battle and convince Krolla to give up the money using the power of the illithids.
- Invite the little bear to your Camp.
- During the kurogonting, talk to the little bear and persuade him to help you win.
- Tell the eighth goblin child standing outside the camp that you are sorry for his loss.
- Agree to the ritual of the priests of Loviatar.
- Torture Liam for Executioner Thorn without Will.
- Successfully torture Liam for Will. Requires a Persuasion check.
- Intimidate Executioner Thorn into telling you the information you need.
- In the Broken Sanctum, with Will in the group, express your desire to join the game with three goblins talking about the Blade ( the room in front of the passage to the Throne Room of Dror Ragzlin, the desired area is located in the west).
- Tell Mintara that you know where the grove is, but make an Intelligence check to hide the location from her.
- After finishing torturing Liam, tell Mintara that the prisoner revealed the location, and then make a Deception check.
- When you first meet Halsin, tell him that you will help him deal with the goblins.
- Tell Halsin to stay in the warg enclosure.
- Agree to the ritual with Abdirak.
- Agree to the ritual with Abdirak.
- Tell Halsin to stay in the warg enclosure.
- Agree to the ritual with Abdirak.
- li>
- Fight the false god Buoal in Festering Bay.
- Take the Boots of Speed from Tulla.
- Talk to the Myconid King and succeed on a Persuasion check.
- Tell the Restless Myconid the truth about the parasite and that you are seeking safe passage.
- Tell the Restless Myconid the truth about the parasite and that you are seeking safe passage.
- Calm and convince Rothe to clear a path in the Abandoned Shelter.
- Offer to share details about the Nautiloid ship with Omelum and succeed on a Perform check.
- Tell Isobel that Marcus is trying to kidnap her.
- Play hide and seek with Oliver.
- Refuse to drink Jaheira's spiked wine.
- Trick the toll collector Gerringoth Torm
- During the quest “Find Protection from the Curse of the Shadow”, pass a Deception check when talking to Karniss, who will ask for a lantern.
- During the quest “Find Protection from the Curse” shadows” successfully convince Karniss to leave the area without a lantern.
- Once you get the moon lantern, don't let go of Pixie Dolly.
- You will receive a thumbs up every time you can successfully fake drinking with Tisobald Torme in Waning Moon.
- You will receive approval every time you can successfully recall the story of Tisobald Torm in the Waning Moon.
- Convince the sisters to practice on themselves.< /li>
- Convince Malus Torm to commit suicide.
- Tell Arabella that you will find her parents.
- Tell Arabella that she can stay in your camp.
- Immediately attack Yurgir.
- Convince Balthazar to give you “help” in your task.
- Before you begin the tests of the Ball, interact with the Sacrificial Cup and let it do as it pleases.< /li>
- Before entering the Realm of Shadows, agree with her regarding the sacrifice she needs to make for Lady Shar.
- Give the little bear some food from your bag while he is at camp.
- On your first night at camp, agree with her statement that it is necessary to find someone who can heal you all.< /li>
- During the first event in the “larvae dream” camp, convince Laezel to retreat.
- Pet Skryab in the camp.
- After the second larvae sleep, tell your companions to stop using powers of the parasite.
- Say that you regret your choice after the third dream of the larva.
- Refuse Raphael's deal.
- After talking to Raphael, tell Shadowheart that you will never trust the devil.
- During the conversation about Shar, pass a Persuasion check, and then tell her that you will not judge her personal views.
- When you find out that Shadowheart worships Shar, tell her that you don't care who she worships.
- Ask her about Shar's worship and convince her that you have no problem with it problems.
- Talk to Shadowheart about her missing memories and tell her that you want her to show you her favorite flowers.
- When a strange magical event happens to Shadowheart, change the subject.
- When Laezel finds out that Shalowheart is in possession of a Githyanki relic, side with the latter.
- While at the camp, Shadowheart will ask if you want to hear a story about her. Say yes, and then thank her for choosing to share her only memory with you.
- The desire to join the search for a manger with Laezel immediately after her release.
- Agreement to help Will rescue the refugees in Druid Grove.
- When talking to Aunt Ethel in Emerald Grove, mention that you need help because you are infected with a parasite.
- Try to convince the goblin guard near the goblin camp.
- Help Aunt Ethel when she encounters Jol and Demir.
- Shadowheart doesn't like Laezel, so she will be upset if you start taking advice githyanki.
- Tell her that she is hiding something after asking “what will you do if we succeed in removing the parasites.”
- If you decide to look at the two trolls doing love in the Extinct Village.
- Tell Raphael that you will do whatever it takes to get rid of the parasite.
- Insist on helping Maireena when you talk to Aunt Ethel at her house.
- Inform the group that that you trust Astarion after you allow him to drink your blood during a long rest.
- Near the entrance to the temple in the Goblin Camp, a dialogue will begin between the companions. Tell Shadowheart that you are in no hurry when she insists on choosing priorities.
- Condemning her worship of Lady Shar.
- On the first night at camp, when she tells you to be careful around Gale, you will receive her disapproval by choosing the fourth option: “If anyone bothers me, it's you.”
- In the Broken Sanctum, if you allow Halsin to stay with you and take matters into her own hands, you will receive her disapproval.
- Drink Jaheira's wine laced with truth serum.
- Give the artist 200 coins.
- Lick dead spider meat in Shar's Challenge.
- In Shar's Challenge, before entering the Shadowfell, look into her mind while she prays to Lady Shar.
- Accept Astarion's apology when you first meet him.
- After you have convinced the tieflings to release Laezel, select the “Betray the tieflings” option.
- Make Laezel say “please” before freeing her from her cage.
- Lead Laezel against the tieflings if you convince them to free her.
- Choose to attack Gimblebok and his gang near the ruins (works only in the initial dialogue).
- Refuse to help Zevlor when he asks you to mediate with Kaga.
- When talking to Aunt Ethel in the Emerald Grove, mention that you need help because you are infected with a parasite.
- Allow Arc kill Sazza in the makeshift prison of the Druid Grove.
- Tell Astarion that the refugees are desperate and will do anything after Arca kills Sazza.
- Tell Archdruid Kage you liked her performance after she asks if you think she's a monster (quest: Save Arabella).
- Agree to open the gate for the goblin raiders.
- Poke the bird that Nettie was healing during dialogue (requires Talk to Animals).
- Intimidate or provoke Ardyn and Zevlor in the Druid Grove during their conflict (Ardyn must survive the goblin attack).
- Choose to kill Kaga without trying to convince her.
- Praise Laezel for interrogating Zorru.
- When meeting Zorru, make him obey and bow to Laezel.
- Call Raphael crazy and tell him that you will never make a deal with the devil.
- >If you tell Mirkon: “Stop whining or they'll come back. They like tasty little tieflings” after saving him from the harpies on the beach.
- Use your illithid powers against Brynna (Edowyn's own sister), convincing her to avenge her brother.
- Talk to Astarion and say: “Such powers could be useful” (this option may also appear the first time you use illithid powers against non-companion character.
- Try to convince the goblin guards near the Extinct Village.
- Go to the trolls, making love in an abandoned barn in the Extinct Village.
- Ask for “Effort Compensation” in dialogue with Barkus (the gnome tied to the windmill).
- Intimidate the mirror in the Extinct Village so that it opens to you (quest: Search the basement).
- Deal the final blow to Fizerk (make Fizerk surrender by killing one of his goblins and bringing him below 30% health, but without killing him).
- Pass a Persuasion check and recruit trolls for free.
- Agree to help the tiefling Karlach.
- When you meet the paladin Cyrell, say: “Take supplies.”
- Kill a Githyanki patrol or successfully convince Laezel to “play along” with you and take a Deception check.
- After purchasing Oscar the Artist, tell him that he is now your slave. (do not buy if your companion is Astarion, as he will not approve).
- Tell the gnoll leader to feast on the other gnolls.
- Agree to kill Rugan.
- Kill Gandrel (the monster hunter located in the southern part of the location, not far from Aunt Ethel's house). After killing him, immediately talk to Astarion about his past master to receive special lines of dialogue. Instead, you can go to the camp (without a long rest) after killing Gandrel.
- There you will also have a conversation about his past master and a chance to gain approval (you need to choose a line of dialogue that sounds like this: “You You have my back, I've got yours.”
- Tell the two brothers (in the northern part of the area) that you will not help them find Myrina's sister.
- Resurrect Myrina's husband and give her the wand. Immediately after this, tell Astarion that it was fun.
- Taunt Lorin (the elf in Aunt Ethel's house) by pretending to be a mind flayer.
- Resolve to spare Aunt Ethel when she surrenders in time battle.
- Have Astarion kill the Gurr to the left of Aunt Ethel by selecting the phrases: “not a real vampire”, then “they can sneak up”, and then “kill”.
- After killing the witch, use the wand to resurrect her husband, give her the wand, and then tell Astarion it was fun.
- At When you meet Sentinel Olak at the entrance to the goblin camp, select the “Deception/Nature” option, then say “you've got to be kidding me” and then throw poop at the guards.
- Scare Volo in the goblin camp during his performances.
- Kiss Crusher's foot in Goblin Camp (and steal his ring).
- Use intimidation a second time to force Crusher to kiss your foot.
- Tell Crusher you'd rather spit in his face, then win the fight and make him kiss your foot.
- Tell Crusher you'd rather spit in his face, then win the fight and try to finish him off him (a battle with the entire camp will begin).
- Convince the bear that the goblins are responsible for his pain.
- If Krolla refuses to give you your winnings after winning the kurogont, then use the powers illithid.
- Talk to Priestess Gut with Will in your party, and then attack.
- Kill Priestess Gut in the Goblin Camp.
- Tell Abdirak that you are curious and you are willing to be tortured (Loviatar's follower in Goblin camp). Save the game before doing this, as sometimes the approval does not work.
- Tell Ranger Grikka (the goblin near the roasted gnome) that you can get answers from the prisoner.
- Agree with Mintara's offer to raid to the Grove (it is not necessary to open the gate).
- Tell Mintara the exact location of the Grove.
- Torture Liam for Thorn without Will being present.
- Attack the Goblin Camp.
- Volunteer to torture Liam at the Goblin Camp.< /li>
- Refuse when Halsin asks you to kill the goblin leaders.
- Agree to the ritual with Abdirak.
- Demand boots of speed in dialogue with Tula.
- Agree to kill the Dvergar.
- Fight the false god Buoal in the Festering Bay or let the koapalpm worship you as Buoal's chosen one.
- During the quest “Find the Mushroom Picker,” tell Baylen that “he got himself into this mess, so let him get out of it himself.” her.”
- Side with Spaw and kill Glut.
- Push Corsair Greymon into the water.
- Ask Ward Magmar how to get your own slave.
- If you decide to free him from the cave, tell Nere's true soul, so that she “finishes off the slaves” for the sake of the absolute.
- Tell Chrai Vvargaz: “Give away an artifact of enormous power just like that? You insult me.” (sorcerer dialogue option).
- When Jaheira asks why you came here, select “Spend your weekend.”< /li>
- Refuse the wine offered by Jaheira.
- Shuffle the board in Maul's favor.
- Choose the answer “My opinion: we should follow the winged freak” when Marcus invites Isobel to meet with Ketherick.< /li>
- Tell His Majesty the cat: “My intentions are pure. I just wanted to admire you up close.”
- Tell His Majesty the cat: “You are simply special. How did you get to this place?
- Agree to keep the secret of Strange Ox.
- Convince the Hyena to leave the goblins.
- Flee when the Harpers are attacked by the shadows.
- Trick the toll collector Gerringoth Torm.
- During Punish the Wicked, convince Madelyne to inflict damage on herself. strike.
- During Punish the Wicked, tell Madelyne, “Start stabbing and don't stop until I say so.”
- During Punish the Wicked, make a Persuasion check to tell Madeleine: “Continue.”
- During the quest “Find Protection from the Curse of the Shadow”, pass a Deception check when speaking with Karniss, who will ask for a lantern.
- During the quest “Find Protection from the Curse of the Shadow”, successfully convince Karniss to leave the area without lantern.
- Once you get the moon lantern, don't let go of Pixie Dolly.
- You will receive a thumbs up every time you can successfully fake drinking with Tisobald Torme in Waning Moon.
- You will receive commendation every time you can successfully recall the story of Tisobald Torm in Waning Moon.
- Make Warrior Gronag “go and fetch the dice you threw.”
- Win a game of hide and seek against Oliver.
- Convince the sisters to practice on themselves.
- Convince Malus Torm to commit suicide.
- Tell Araj Oblodra that Astarion is also a person.
- Reject Araj Oblodra's request to receive a bite from Astarion either immediately or after his explanation.
- End the connection between Barnabus and the chef.
- When Apprentice Zrell probes your mind, “distract her with your passion for Astarion.”
- Ask Apprentice Zrell to show off her powers.< /li>
- Attack Yurgir directly or kill him through persuasion.
- Convince Balthazar to give you “help” in your task.
- Agree to accept the knowledge of the Awakening Mind.
- Give Yenna food.
- Have Yenna find the guard.
- When you meet Strange Ox again, tell him: “This is clearly not enough to make me throw up.”
- Comment Saer Grotpoll's Rivington accent.
- When you come across a dying bandit, choose: “Cut him up. Make him suffer. Make him scream.”
- Answer Master of Love Zetino's first question: “When he's up to his elbows in blood.”
- Answer Zetino's second question: “Me” or “Revenge.”
- Answer Zetino's third question: “Actually, most people are afraid of him” or “Break a nail.”
- Answer the clown Dribbles with the line “What a corny joke” or boo him when he asks “Did you hear about the scarecrow that lost the fight?”
- Ask one of your group members (anyone except Astarion) to come on stage with Dribbles the Clown. When a party member is reluctant, insist.
- Take the stage, and when Dribbles the Clown asks you what makes you special, answer him: “My strength, of course,” or “My courage.”
- Pass both checks after agreeing to “expose this madness” at the end of the quest “Help the Cursed Monk.”
- Agree to Astarion's request to make you his “wife.”
- Calm down Astarion when he declines your offer to get closer to his sibling Orlyth (triggers before completing his personal quest).
- Examine the pool of blood by the bed in the attic.
- Inform Lord Amber's bodyguard that the Steel Watch may attack sooner or later on them.
- In “The Devil's Lot”, during a conversation with Helsik, convince her to give you a free sample.
- Give the little bear some food from your bag while he in the camp.
- During your first long rest after talking with Laezel, talk to Shadowheart and tell her to be careful.
- Talk to Astarion and tell him that you don't want to die, but then choose the knife option.
- Refuse the devil's offer to remove your parasite.
- After talking with the devil, tell Astarion: “We are not his toys.”
- The morning after the larva's first dream, make an automatic Insight check, ask Astarion who he dreamed about, and make a Persuasion check (you don't know he's a vampire yet).
- Convince him to share his dream with you . Say you'll “watch his back.”
- Choose to continue using the illithid's powers after the second larva dream.
- Say “your powers, your choice” after the third larva dream.
- Show that you trust and support Astarion when you find out that he is a vampire.
- Let Astarion drink your blood in the camp.
- Support Astarion in dialogue with the party after draining your blood.< /li>
- Tell Astarion that he can feed on enemies.
- In a conversation with Shadowheart (after sleeping with the burning city), support Astarion's idea to continue using the power of the larva.
- (After next dream) tell Will that you will not let dreams stop you from using the power of the larva.
- Agree to share your bed/sleep with Astarion at the tiefling party in the camp.
- Choose the “Break your neck while inviting him” option in the bed scene.
- In the camp, before resting at midnight, at When discussing preferred methods of death, choose decapitation, knife or poison. Tell Astarion: “If I die, I will take you with me.”
- Give Astarion the Tome of Necromancy of Thay.
- Tell Astarion that “you will hunt down Kazador and kill him.”
- Tell Astarion that “you will hunt down Kazador and kill him.” li>
- Accept Astarion's apology and say, “I would do the same if I were you.”
- Choose the “attack Thaman and Gimblock” option in the dialogue outside the crypt.
- Convince the tieflings to let go Laezel, and then attack them.
- Help Hex learn to fight in Druid Grove (Athletics or Insight check) .
- Tell Hex not to shout out his moves.
- When Asharak asks for a message to the tiefling children, say: “Children, bad news, you will all die.”
- Hit Aradyn during his quarrel with Zevlor/use violence to end the conflict.
- Talk to the bird in the Druid Grove using Talk to Animals and intimidate it. (Charisma check).
- Find Zorra in the Hollow in the Emerald Grove.
- Convince Zorra in the Druid Grove to do what Laezel says.
- After interrogation, praise Zorra Laesel on this matter.
- When Zevlor asks for help in the conflict with the druids, say that you are sorry, but you do not have time to help him.
- After the incident with the Snake, tell the Kage after her line: “She was just protecting her own.”
- After Arabella's death, tell Rath that she deserved it because she stole the idol.
- Swear to Nettie, that you will take poison.
- Mock Elegis for being afraid of goblins.
- After killing the three goblin leaders, return to the druids, and Zevlor will meet you outside the gate. If Laezel is in your party, you will receive her approval as soon as he thanks you. (be sure to save before entering, as sometimes it does not appear).
- Crush the larva near the Druid Grove.
- Crush the larva near the Druid Grove.
- Tell Edovin's brother and sister to fight the bearcat.
- Kill the bearcub and its parent.
Extinct Village:
- Deal the final blow to Fizerk (make Fizerk surrender by killing one of his goblins and bringing him below 30% health, but without killing him).
Emerging Road:
- When Paladin Anders asks you to hunt the devil, say: “I will kill the devil.”
- After agreeing to help Karlach, tell Anders to his face that you will help Karlach/Kill him.
- Tell the paladin Say to Cyrell that “you will take the supplies” (start the fight).
- Have Laezel speak when meeting a Githyanki patrol.
- Pass a Deception check when speaking with the githyanki (increase Laezel's Charisma)
- Talk to the artist and call him a slave.
Sunlit Swamp:
- Say that you will intervene when you encounter Jol, Demir and Aunt Ethel.
- Imitate the roar of the mind flayer when talking to Lorin.
- Drink from the well in the Putrid Mire, near Aunt Ethel's house.
li>
Goblin Camp:
- When you meet Sentinel Olak at the entrance to goblin camp select the “Trick/Nature” option, then say “you've got to be kidding me” and then throw poop at the guards.
- Reply to Volo in the Goblin Camp with “Ew! Get off the stage!”
- Say you're taking your time when Shadowheart tries to speed you up.
- Intimidate Crusher into kissing your foot in Goblin Camp.
- Tell Crusher that you would rather spit in his face, then win the fight and force him to kiss your foot.
- >Tell Crusher that you'd rather spit in his face, then win the fight and try to finish him off (a battle with the entire camp will begin).
- Tell Ranger Grikka (the goblin near the roasted gnome) that you can get answers from prisoner.
- Torture Liam for Thorn without Will being present.
- Successfully torture Liam for Will. Requires a Persuasion check
- Will tortures Liam.
- Talk to True Soul Gat with Will, then attack.
- Take a Persuasion check while resting at the camp, when Laezel tries to kill you.
< li>Use intimidation a second time to force Crusher to kiss your foot.
Feast at the Campsite (on the side of tieflings and druids):
- If you have a sufficient relationship (average level of approval) with your companion, then in this case he will offer you to spend night together. If you say yes, you will get their approval. You can get approval by saying “yes” to several companions.
Underdark:
- Fight the false god Buoal in Festering Bay.
Grimforge:
- While on the boat to Grimforge, make an Athletics check (15) to push the Dvergar into the water.
- Tell Pistle that he is not effectively using his slave Skippit by forcing him to perform mundane tasks.
- Convince the Roths to turn against their masters.
- Tell Skippit to take the elevator to the surface after killing his masters.
- After Nere pushes the gnome into the lava, don't say anything.
- Enter battle with Nereus, and side with the Dvergar.
Yllek Manger:
- When entering the crèche through the main entrance, let Laesel answer for you.
- When you first speak to Gustil Stornugoss, let Laesel speak for you.
- When Varsh Kokuu asks , what you will do when you take the egg, say that you are leaving it as your own flesh and blood.
- When interacting with the Zaitisk, insist on going before Laezel. Then say, “Without my guidance, you would still be looking for this place.”
- While talking to Young Varril, convince him – through Intimidation, Deception or Persuasion – to give you the book about Orpheus.
- After receiving the book from Young Varril, talk to Laezel about it.
- Talking to Kitrak Terezzin, tell her that you have the relic and agree to hand it over.
- After talking with the Inquisitor, hand over the relic.
- Kneel before Vlaakith.
- In conversation With Vlaakith, agree to enter the prism and kill the Guardian.
Last Light Tavern
- When Marcus demands that Isobel follow him, tell her that the group will have to fight their way out of this place.
Rivington
- Talking to Yenna, offer to talk to the guard.
Camp stop:
- During the dialogue with Laesel, after she describes ceremorphosis, tell her that you will find a cure .
- If you choose the Dragonborn race, then during the dialogue where she explains how you will turn into a mind flayer, choose the option available to a representative of your race.
- Recognize how valuable the Kliir library is.
- Choose the option “This kind of wisdom is very valuable” when she tells her that studying is as important as exercise.
- When she says she wants to taste you, tell her you want to share with her with your body.
- Reject Raphael's offer to remove your larva.
- During the first event in the “larva dream” camp, convince Laezel to retreat.
- After the first maggot dream, tell Laezel that you resisted in the dream.
- After the second maggot dream, tell the companions to have stopped using the larva's powers.
- After defeating a Githyanki patrol, win Laesel's Persuasion check to calm her down.
- When talking to Shadowheart about worshiping Shar, call her religion evil.
- When Laezel and Shadowheart are fighting over an artifact, don't side with either of them and instead ask how they want to resolve the issue. Come in the morning, use persuasion. You will receive some approval from Laesel.
- In the transition from Act I to Act II through the monastery, after Vlaakith declares Laesel a traitor, Kithrak Voss will come to negotiate. Let Laezel make her own decision.
- When Laezel challenges you to a duel, accept it.
What Laezel does not approve of

- In the crypt, agree with Shadowheart that the dead no longer need things.
- Argue with Laezel about her interrogation techniques when trying to extract information from Zorru.
- When Arc asks you why you care whether a goblin lives or dies, choose the option that says revenge eats people alive.
- Convince the urchin not to kill you in his nest using Execution.
- In the camp, agree with Shadowheart that the first priority is to find a healer.
- Tell Jol and Demir that you will help them find Mairina
- In the Sunlit Marsh, let Astarion kill Gandrel.
- Try to convince the goblin guard near the goblin camp.
- Convince Mintara to spare Sazza.
- Successfully torture Liam, but refuse to kill Spike.
- Smear your face with manure when Guardian Olak asks you to do so.
- Say to Crusher, “I'd rather spit in your face,” and then, after winning the fight, help him up.
- Say to the eighth goblin child near the goblin camp: “Sorry for your loss.”
- Listen to Shadowheart's advice.
- Buying an artist in the Zhentarim hideout.
- Sympathetic behavior .
- Stop Kage from locking up the child by passing a Persuasion check.
- If you call Kaga a monster.
- Find evidence of Kaga's collaboration with the Shadow Druids and expose her.
- Bring Mairin home.
- Make a deal with Aunt Ethel to remove the larva from your brain.
- If you will agree to join forces with Will the first time you interact with him in the Emerald Grove.
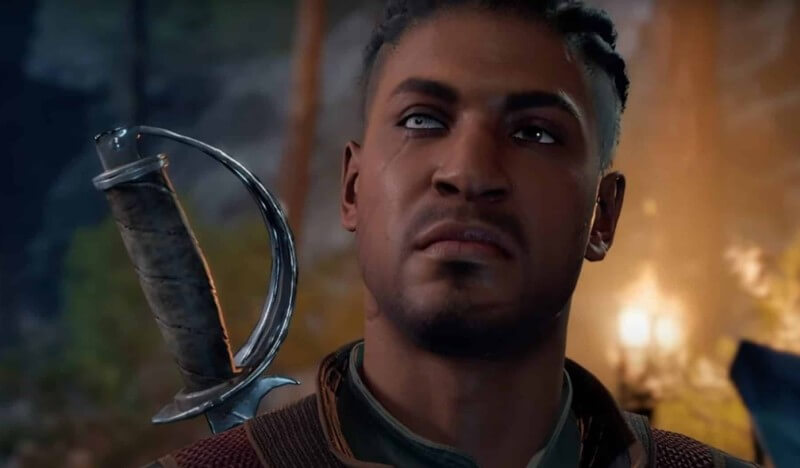
Karlach
From a moral compass perspective, Karlach leans more towards good than evil, so if you follow the path of a true hero, you can win her over fairly quickly, but it will be more difficult for villains to do this. At the same time, you can’t call her God’s dandelion, since she loves to fight and is not against violence if it extends to those who deserve a good beating.

What Karlach approves
- Prove to Will that she is not a devil when he opposes her in your camp (it is better to recruit Karlach without Will first and argue with him in the camp, because in this case you will get approval from everyone if you protect the tiefilling from the sorcerer).< /li>
- Encourages the use of Speak with the Dead to ask a kidnapped noble on a crashed Nautiloid if there are any last rites he would like the [Priest] to perform.
- Tell Sylphy that you won't be angry when she fails to rob you.
- Tell Mizore that you won't give a damn for her.
- Approves the purchase of Oscar Fevras
- Approves of the Lamp of the Enlightened's conviction to fight for the flesh of the fallen.
- Approves of intimidating Crusher in the goblin camp.
- Approves of defeating Dror Ragzlin so you can ask him your questions.
- Approves when you say you don't trust Raphael.
- Tell Halsin that you will protect the grove.
- Side with the tieflings against Mintara.
- Approves of giving the Hell Iron to Damon.
- Tell Ellika at the bridge that the Githyanki mean nothing to you.
- Let Laesel speak to the Githyanki.
- Talk to save Duke Ravengard .
- Unmask Aunt Ethel.
- Agree with Karlach to give her the soul coin in the next battle.
- Approves of the decision to destroy the ancient tome.
- Tell the frightened boar that you will not harm him.
>

Camp stop:
- Approves of stroking Skryab.
- Feed the little bear .
- Inspect the bear's wound during his second visit.
- Pet the bear's wound.
Druid Grove:
- Convince Zevlor not to attack Aradyn.
- Convince Kaga to let Arabella go.
- Call Kaga a monster after convincing her to let Arabella go.
- Tell Zevlor to talk to Kaga about giving the tieflings more time in the grove.
- Let Silver the wolf remember your the smell in the Druid Grove cave where Kaga is located.
- Tell Arabella's parents that the Druids are overreacting to the child.
- Support Alfira, a tiefling bard who is facing writer's block.< /li>
- Save Sazze’s life.
- Will approve if you say you will free Sazza.
- Approves of driving the goblins out of Druid Grove.
- Kill Kaga without trying to convince her.
Sunlit Marshes:
- Tell Myrina that Aunt Ethel killed her brothers.
- Encourages an argument with Ethel about Myrina being in her hut against her will.
- Deceive Ethel by saying that your reinforcements are already close, but you are ready to spare her if he gives you the girl.
- Ask Myrina: “Are you sure you want to do this?”
- Give Myrina a wand.
Goblin Camp:
- Say Priestess Gut: “Okay, I'm ready” in her chapel.
- Tell Crusher that he should be the one to kiss your feet.
- Tell Eight (the goblin child) that you're sorry about his loss.
Emerging road:
- Agree with Karlakh to give her a coin of souls in the next battle.
- Persuade Rugan to sell you the cargo .
- Give the Artist 200 coins.
Underdark:
- Tell the Restless Myconid the truth about the parasite and that you are seeking safe passage.
- Tell the Restless Myconid that you are a traveler looking for adventure.
- Give the poisoned dwarf Thulla the antidote.
- Tell the details of the event to Spaw after killing the Dvergar.
- Offer your help to Baylen.
Last Light Tavern:
- Tell Isobel that Marcus is trying to kidnap her.
- Tell Jaheira everything about the artifact.
- Drink Jaheira's wine laced with truth serum.
- Approves of moving the board in Maul's favor.
- Play the lute to make Art Kallah wake up (the lute can be picked up from Malus Thorne in the House of Healing ).
- Defend the portal while Halsin rescues Thaniel.
Destroyed Battlefield:
- Free Dolly from the Moon Lantern.
- Free Dolly from the Moon Lantern.
- li>
- Play hide and seek with Oliver.
- Play another round of hide and seek with Oliver.
Raithvin Masonic Guild:
- Tell Arabella that you will find her parents.
House of Healing:
- Convince the sisters to practice on themselves.
- Convince Malus Torm to commit suicide.
Challenge Ball:
- Lick the dead spider meat.
- After finding the Song of Night, ask for Shadowheart spare her and listen to what she has to say.
Lower City:
- When Jaheira returns home, tell Rion: “The cult is strong, and this will not be an easy battle “.
What Karlach does not approve of

- Disapproves if you convince adventurers outside the Dark Crypt leave.
- Will not approve if you tell the Kage that sometimes cruelty is necessary.
- Does not approve of attacking the bear.
- Disapproves of Volo booing at the goblin camp.
- Disapproves of taking poison from Nettie.
- Disapproves of torturing Liam without Will.
- Disapproves of demanding a reward from Mintara for betraying the grove (likely disapproves of any scenario where you betray the grove).
- Disapproves of treating the artist Oscar Fevras as his slave.
- Disapproves of the idea of forcing Rothe into Grimforge work instead of rebelling against their masters.
- Disapproves of refusing to free the Pixie inside the working Moon Lantern obtained from the Drider on the Ruined Battlefield.
Gale
Gale is a true good-natured person whose affection can be won by simply doing good things and heroic deeds. At the same time, he will take any villainous deeds with hostility. He is also extremely curious, very intelligent, and has an excellent understanding of magic. If you share his curiosity and support him in learning everything new, then there will definitely be no problems with him.

What Gale approves
Prologue/Beach/Dark Crypt:
- Tell Shadowheart at the camp that finding a healer is your top priority.
- Use Talk to Animals to calm the boar after finding Astarion.
- Reply “Good evening” to the camp when he says “Go to hell.”
- Successfully deceive Laezel's captors while she is in the cage.
- Join Laezel's team.
- Convince or intimidate bandits/adventurers outside the Dark Crypt.

Druid Grove:
- Convince Aradyn and Zevlor to calm down.
- Agree with Zevlor to help the tieflings.
- Convince Rolan to stay in Druid Grove.
- Agree to help Will rescue the refugees in Druid Grove.< /li>
- Invite Will to the camp.
- Show Hex in the Druid Grove your sword fighting technique.
- In the makeshift prison in the Emerald Grove, stand between the Arch, pointing his crossbow at goblin, and Sazza.
- Convince Kaga to free Arabella.
- Tell Kaga that she is a monster during the dialogue that follows after the event with Arabella.
- After receiving the poison from Nettie, convince her to give you the antidote.
- Find evidence of Kaga's collaboration with the Shadow Druids and expose her.
- Save Myrkon from the harpies
- Go to Nettie and convince her to give you the antidote.
- Play along with Alfira or convince her to play her song, or as a Bard, help her finish the lyrics.
- In the Emerald Grove, let Silver the wolf catch your scent. You need to talk to animals
- Convince Kaga to speak out against the Shadow Druids when you uncover her plot.
- After stopping the ritual, talk to Zevlor about it and say that you will help.
- Crush the larva near the Druid Grove.
- Convince the bear owl not to attack you in his nest.
- Tell Skryab (the dog) that he can come to your Camp if his owner does not wake up.
- Convince the goblins to let you into the village.
- When you first meet Karlach, choose any answer that does not say that the paladins sent you. After that, pass an Intimidation/Persuasion check.
- Help Karlach in the quest “Hunting the Devil.”
- Use Bard's Persuasion when talking to Rugan to persuade him to give you the cargo.
- Rescue Benrin at Waukeen Refuge (once you open the door or destroy the debris blocking the path, the fire will begin to spread and you will have a limited time to rescue Benrin).
- Help Aunt Ethel when she encounters Jol and Demir.
- Tell Jol and Demir that you will help them find Mairina.
- Insist on help Mairine during a conversation with Aunt Ethel in her house.
- Invite the little bear to the camp.
- Convince Krolla to let you take the baby bear after talking to the cub. If you pay her, you will not receive approval from Gale.
- When playing Kurogon, use Talk to Animals to convince the bear to help you win.
- Win the Kurogon, convince Krolla to give you your money without using illithid powers, invite the cub to camp, and then when you ask for the beast, use illithid power.
- Have Crusher kiss your foot without using intimidation.
- >Use intimidation a second time to force Crusher to kiss your foot.
- Tell Crusher that you would rather spit in his face, then win the fight and force him to kiss your foot.
- Tell Crusher that you would rather spit in his face, and then win the fight and try to finish him off (a battle with the entire camp will begin).
- Convince the ranger Klagga to give you the dead gnome's poem.
- Say Mintara that “I also hunt, and you are my prey” in the first dialogue with her.
- Tell Goblin Child Eight outside the camp: “I'm sorry for your loss.”
- Intimidate Executioner Thorn into telling you the information you need.
- Tell Mintara that you know where grove, but make an Intelligence check to hide this information.
- Try to kill Mintara.
- After finishing torturing Liam, tell Mintara that the prisoner revealed the location of the grove, and win a Deception check.< /li>
- When you first meet Halsin, tell him that you will help him with the goblins.
- Fight the false god Buoal in Festering Bay.
- During the first night at the camp, first talk to Laesel and then Shadowheart and tell her that you agree.
- On your first night at camp, approach Gale and when he tells you to go to hell, choose the first option: “Good evening to you too.”
- When you are at the camp and first ask who he is, respect his privacy.
- During the first larva dream, convince Laezel to retreat.
- Decide not to use illithid powers after the second larva dream.
- Say that you regret your choice after the third dream of the larva.
- In the camp, when Raphael approaches you, refuse his offer to remove the larva.
- After meeting with Raphael, talk to Gale in the camp and ask him how to play against Raphael/Why the cambion wants to make a deal.
- Try to heal the bear in the camp when he comes to you wounded.
- After the second larval sleep, tell your companions to stop using illithid powers.
- Pet Skryab (the dog) in the camp.< /li>
- Pet the bear and Skryab when they become friends (do not use Talk to Animals).
- When Gale asks you to trust him before he reveals his secret/condition, agree.< /li>
- Tell Arabella that you found her parents dead.
- Ask Gale to teach you the Weave, and then imagine yourself kissing him or walking with him holding hands during the training scene.
- When Elminster returns with you to your camp, he will explain that Mystra knows about our goal. Answer this: “If even the gods know, why do we face these threats alone?”
- Show Hex, how to fight after passing the Athletics check.
- Convince Kaga not to kill Arabella.
- Tell Kaga that she is a monster during the dialogue that follows after the event with Arabella.
- Play with Alfira or convince her to play her song, or as a Bard help her finish the lyrics.
- Convince Kaga to oppose the Shadow Druids when you uncover her plot.
- Tell Kaga, that you will fight her when you uncover her plot.
- After stopping the ritual, talk to Zevlor about it and say that you will help.
- Tell Skryab (the dog) that he can come to your Camp if his owner does not wake up.
- Agree with Will's plan and knock out Fezzerk the goblin.
- Let's talk to Fezzerk
- Deal the final blow to Fezzerk (make him surrender by killing one from his goblins and bringing his health level below 30%, but without killing him).
- When you first meet Karlach, choose any answer that doesn't say you were sent by the paladins. After this, pass an intimidation/persuasion check.
- Agree to help Karlach against the paladins of Tyr.
- After agreeing to help Karlach, tell Anders to his face that you will help her/kill him.< /li>
- Use the Bard's Persuasion when talking to Rugan to persuade him to give you the cargo.
- After rescuing Councilor Florrick, agree to look for the Duke.
- Rescue Benrin at Waukeen Refuge (once you open the door or destroy the debris blocking the path, the fire will begin to spread and you will have a limited time to rescue Benrin).
- Help Aunt Ethel when she encounters Jol and Demir.
- Find out that Aunt Ethel is lying and tell Jol and Demir that you will help them find Mairina.
- Start a fight with Aunt Ethel while trying to save Maireena.
- When you meet Sentinel Olak at the entrance to the goblin camp, select the “Deception/Nature” option, then say “you've got to be kidding me” and then throw poop at the guards.
- Win the Kurogon game, convince Krolla to give it back you your money, without using the powers of the illithids, invite the cub to the camp, and then, when you ask to give the beast, use the power of the illithids.
- Convince Krolla to let you take the baby bear after talking with the cub. If you pay her, you won't get Will's approval.
- Demand Crusher to kiss your foot without using intimidation.
- Use intimidation a second time to force Crusher to kiss your foot.
- Tell Crusher that you would rather spit in his face , and then win the fight and force him to kiss your foot.
- Tell Crusher that you would rather spit in his face, then win the fight and try to finish him off (a battle with the entire camp will begin).
- In the Broken Sanctum, with Will in the group, express your desire to join the game with the three goblins talking about the Blade. They stand to the left of the room with the open spider pit. On the way to them, you will meet a religious goblin in a cage.
- During a conversation with the three, Will will tell the player to attack them – agree with him and join the battle.
- Tell Mintara that you know, where the grove is located, but pass an Intelligence check to hide this information.
- Start the fight with Mintara
- Once you've finished torturing Liam (he may escape), tell Mintara that the prisoner has revealed the location of the grove and win a Deception check.
- Talk to the True Soul of Gath with Will, and then attack.
- Tell Halsin to stay in the warg pen.
- If approval is high, find Will and talk to him. Ask him to dance with you. He will refuse, but you will receive his approval.
- Tell the Restless Myconid the truth about the parasite and that you are seeking safe passage.
- Drink the wine that Jaheira offers.
- Ask him how he became a Frontier Blade.
- Choose option: “What greater deed is there than saving a life? You must be very proud of yourself.”
- When he tells you how he became the Blade of the Frontier.
- Successfully convince Laesel to retreat during the first larva sleep.
- Tell him that you regret your choice after the third larva dream.
- Refuse Raphael's offer.
- After talking with the devil, tell Will: “Spare me the sermons, I'm not going to make a deal.”
- Pet Skryab (the dog) in the camp.
- Pet the bear and Skryab when they become friends (do not use “Talk to Animals”)
- When Mizora appears in the camp, tell her: “You better not lay a finger on Karlach.”
- After Mizora appears, talk to Will and ask him: “What is it like to be a devil?” followed by “Quite a handsome devil, in my opinion.”
- Tell Arabella that you found her parents dead.
- When Asharak asks you to convey a message to the tiefling children, say: “Children, I have bad news for you, y'all you will die.”
- Tell Zevlor that you have other things to do when he asks you for help.
- After stopping the ritual, talk to Zevlor about it and say: “It’s not my problem “.
- Yell at the corpse of the owner Skryab to prove that he is dead. Agree to a deal with Aunt Ethel.
- Apply the dung to your face when Guardian Olak asks you to do so
- Tell Ranger Grikka (the goblin near the roasted gnome) that you can get answers from the prisoner.
- Tell Mintara the exact location of the grove.
- Tell Mintara the exact location of the grove.
- Tell Mintara the exact location of the grove.
- Tell Mintara the exact location of the grove.
- Tell Mintara the exact location of the grove.
- Rescue Sazza in an argument with Arka in the temporary prison.
- Successfully torture Liam.
- If you decide to visit two trolls making love in the Extinct Village.
- If you decide to visit two trolls making love in the Extinct Village.
- Tell Crusher, “I'd rather spit in your face,” and then help him up after winning the fight.
- Violent behavior.
- Convince Mintara to spare Sazza.
- Agree to open the gate for goblin raiders.
- Tell Astarion “That was funny” after he will use his wand on Mairina's husband.
- He will leave you if you side with the goblins.
- Leave Fezzerk alive after interrogation.
- Make a deal with Aunt Ethel to remove the larva from your brain.
- Say you need Astarion the next morning after he tries to bite you.
- Flirting with Mizorah angers Will. If you sleep with her, then the possible romance with Will will immediately end.
- Unconditional devotion to the Absolute (at the beginning).
- Demonstration of decisiveness in resolving conflicts.
- Teaming with goblins.
- Attempts to go against the Absolute (in the beginning)..
- Attempts to influence her beliefs and will.
- Uniting with tieflings.
- Demonstration of cowardice.
- Indecisiveness when resolving conflicts or choosing sides.
- Respect for nature
- Showing kindness to animals.
- Maintaining his Druid beliefs.
- General acts of kindness and heroism.
- Harming animals.
- Unjustified acts of cruelty and violence.
- Attempts to challenge his Druid beliefs.
- Villainous acts of all kinds.
- Any heroic deeds.
- Demonstration of strong leadership qualities.
- Demonstration of decisiveness in resolving conflict situations.
- Any villainous actions.
li>
- Groundless acts of violence and cruelty.
- Cowardly actions.
- Attempts to deceive the interlocutor.
- Any heroic deeds.
- Be kind to animals, especially Boo.
- Always stand up for your teammates.
- Groundless acts of violence and cruelty.
- Challenging or ridiculing his beliefs and ideas.
- Showing disrespect for animals, especially Boo.
ul>
Between the Extinct Village and the Druid Grove:
Extinct Village:
Emerging Road:
li>
Sunlit Moors:< /p>
Goblin camp:
Underdark:
Campsite:
What Gale doesn't approve of

What Will approves
Druid Grove:

Between the Extinct Village and the Druid Grove:
Extinct village:
Rise Road:
Sunlit Moors:< /p>
Goblin Camp:
< li>When you first meet Halsin, tell him that you will help him with the goblins.
Celebration in the Campsite (on the side of the tieflings and druids ):
Underdark:
Last Light Tavern:
Campsite:
Which Will doesn't approve of
li>
Mintara
She is one of the three leaders of the goblin army, which plans to attack the tieflings and druids in Emerald Grove. She can be described as a domineering and cruel woman who is ready to do anything to achieve her goal. In conversations, Mintara does not mince words, so be prepared for barbs directed at you.
What Mintara approves
< li>When her goals and ideals are placed above her own.
What does not approve Mintara
Khalsin
Halsin is an honest and noble druid who proudly demonstrates his beliefs and never strays from his intended path. He always tries to act fairly, and his main goal is to preserve nature and the natural order of things. By nature, he is very stern, so he does not take jokes well. In general, if you follow the heroic path, you can relatively easily win his favor.

< h3>What Halsin approves
What Khalsin does not approve of:
li>
Jaheira
You will be able to meet her for the first time in the Last Light tavern while completing the quest “Getting into the Moon Towers,” in which you need to find protection from the dark curse. She can become your guide, and then a full-fledged companion.

What Jaheira approves
What Jaheira does not approve of
Minsk
First of all, you will need to recruit Jaheira into your squad – without her you will not be able to annex Minsk. Then take on her personal quest called “High Harpist” and get to the bald big guy. You have to fight him in a duel (there is no way to avoid it).

What Minsk approves
< li>Support for his beliefs and ideas
What Minsk does not approve of
This is all the information we know about approvals and disapprovals from companions in Baldur's Gate 3. We hope that it will help you build friendships or romantic relationships with your companions.
ul>
Extinct Village:
< li>Convince the goblins at the Windmill to leave peacefully.
Emerging Road:
Sun-drenched moors:
Goblin Camp:
< li>Near the entrance to the temple, a dialogue between companions can begin. Agree with Shadowheart's statement that finding and rescuing Halsin is your first priority.
< li>Convince Buyag Piddle to spend time praying instead of reading the manuscript.
Underdark:
li>
Tavern “Last Light”:
Ruined Battlefield:
House of Healing:
Raithvin Masonic Guild:
Challenge Shar:
Camp:
What Shadowheart doesn't approve of

< li>If you swear to Nettie that you will take poison as soon as the symptoms of becoming a mind flayer begin to appear, without telling Shadowheart that this is a last resort.
Astarion
Astarion can be described in one word – hedonist. He is only concerned with the implementation of personal whims, and he is not ready to adapt to anyone, continuing to live at his own rhythm. His position in life may seem frivolous at first glance, but he is quite consistent in his actions.

As a vampire who has lived a very long life, he loves to indulge in things that bring pleasure. He does not like any manifestations of weakness and senseless acts of heroism – he is more accustomed to enjoying the sight of cruelty and violence. Astarion is an excellent party member for those who are going to live a wild lifestyle and act at the pace that the vampire sets.
What Astarion approves
Prologue/Beach/Dark Crypt:

Druid Grove:
< li>When Asharak asks you to give a message to the tiefling children, tell them: “Children, bad news, you are all going to die.”
Between the Extinct Village and the Druid Grove:
Extinct Village:
< /ul>
Emerging Road:
Sun-drenched moors:
Goblin Camp:
Underdark:
Grimforge:
< li>Agree with Astarion that you don't need a lantern/to save Nere, “we can't turn back” when trying to open the gate to the moonrise towers.
Manger Ilek:
Last Light Tavern:
Destroyed battlefield:
House of Healing:
Moonrise Tower:
Challenge Shar:
Mind Flayer Colony:
Rivington:
End of Days Circus:
Temple of the Open Hand:
Gur Camp:
- < li>Answer: “He’s right. You are late” when talking to Ulma in the Gur camp.
Dragon Crossing:
Weasel Sharess:
Fraigo's Bed and Breakfast:
Snake Rock Fortress:
Lower City:
Camp stop:
What Astarion does not approve of

What Laesel approves
Prologue/Beach/Dark Crypt:

Druid Grove:
Between the Extinct Village and the Druid Grove: