
in doom: The Dark Ages Nesotula’s spire is the fourteenth location in which the executioner of rock will visit, and 23 secret regions with collection objects, 359 units of gold and 3 tests can be found on its territory. In this leadership, we will show you their location and tell you in detail how to get to them.
All secrets and objects in the spire of Nerotol: passing 100%
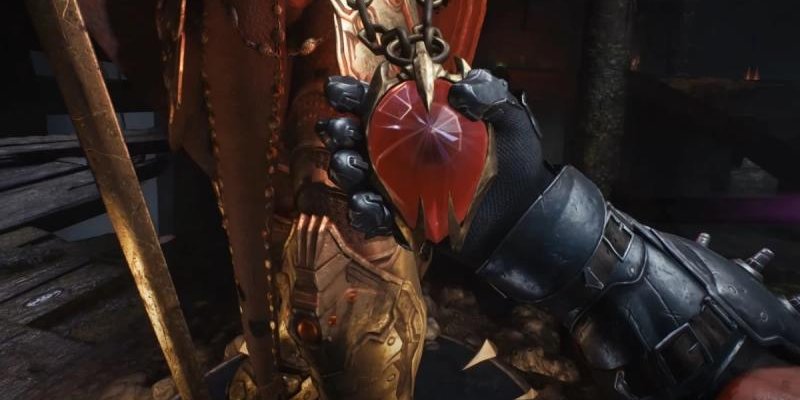
Testing “Gatter Heart”
To complete it, you just need to kill two Demons-Lawars from which a demonic essence falls out. You will have to do this according to the plot, so it is impossible to miss them, but just in case we will indicate these opponents in Gaid. As a reward for the test, you will receive 50 gold units.

Test” Automate machine “
You need to release 250 bullets from auto -turbines on demons. Autoturl is the third relic of the shield, which can be unlocked in the 12th. Be sure to equip it, and then parry it with green shells.


note that in this location you will receive another relic that will automatically be equipped with you, so do not forget to switch to an automatic turret again. As a reward for the performance of the test, you will receive 50 units of gold.
Test “Experienced Hunter”
You will need to catch up and destroy 2 hellish fighters. You have already encountered them earlier. In this leadership, we will show you the location of all demon warships. As a reward for the test, you will receive 50 gold units.

50 units of gold
When you deal with Alfa-Komodo at the very beginning of the episode, start climbing the hill on the left side of the structure. Get to the edge of the ledge near the dilapidated arch and jump down. Then turn around and in the cave you will find a gold chest.


Ghost stone 1
Climb on your flying pet again, and then fly to the cliff on the right side located on the edge of the card, and deal with the titan there to unlock the secret place for planting.


Having landed, straighten out all the demons that appeared to remove the red barrier, and then grab the ghostly pebble from the statue.


8 units of gold and ruby 1
Sit on the dragon again and fly into the central part of the location, having sorted out along the way with two flying monsters. Then start diving down near the waterfalls, going deeper until you find a hidden planting area – land here.


Blue off the animal and move to the reservoir in front, to the right of the red barrier. Jump into the water, immerse yourself deeper and find the hole behind two dilapidated columns – swim into it and find gold bars at the bottom.


Next, while still under water in a cave, swim further along the tunnel to the very end, avoiding fire shells. Turn right and start to pop up. You will find yourself in a previously closed room where a statue with a ruby will stand.


16 units of gold
Garming a new rune of the shield ” Karas of Heaven “ , start going upstairs along the central path, but, not reaching the very top, turn left to the edge of the site. Then jump onto a stone ledge below, turn right, and you will see gold bullion.


12 units of gold and the seal of life
continue to rise higher, and soon you will see a screw ladder on the right side – start climbing the steps to collect the ingots and printing next to the sanctuary.


18 units of gold
As soon as you turn off the first emitter of the stasis field, do not return immediately to the dragon, and instead start climbing the path to the left, picking up the ingot along the path. You will need to go to the tower and go down to the very bottom.


The first hellish fighter
Sit on your dragon, after which an enemy ship will immediately fly over you, which you will need to catch up and destroy. If you accidentally miss him from sight, then just restart the location from the control point to return to the time you sit on the dragon, so that the fighter will reappear in the same place.


26 units of gold
Having destroyed the fighter, return to the lower platform, with which you began to play catching up with the ship. Here you will find a huge passage to the tunnel – fly through it to find a secret place for planting at the end of the path. Blue off the dragon, and then start collecting gold scattered throughout the site.


Ghost 2 and a color for weapons (grenade launcher – a nightmare)
After collecting gold, go to the blue portal to move to a different location. Then begin to move forward, dealing along the way with a huge number of impressions. Go up the stairs, and on the right you will find a new skin and the second precious pebble.


Second hellish fighter
Use the springboard to rise above, and sit down again on your dragon. Next, begin to fly straight to the yellow quest marker, flying under the first stone arch and flying into the second (illuminated by lamps). Here you will find a passage into the tunnel – fly into it to find the enemy, and destroy it. However, if the enemy has time to reach the end of the tunnel, then he will immediately disappear. In this case, just restart the control point and fly here again.


8 units of gold
by destroying the fighter, continue to fly forward in the cave, until you find a new place for planting ahead. When you get off the dragon, start moving on and climb on two walls on a ledge with a springboard – use it to jump into the nearest cliff.


Next, turn left and go down to green armor, and immediately turn the camera up and right to see the green statue to which you can get to, do it to get to the site with ingots.


Collectible toy (arachnotron)
After collecting the previous gold, break the lattice and leave the room. Understand the opponents and turn left. After about a few seconds, you will find a destroyed wall with a rune on the left – break it with a shield to find a new figure in a secret room.


50 units of gold
Having found a toy, turn right to the edge of the site and jump onto the platform below. Go a little further to the next edge, and below on the right you will see a springboard. Look at it and in the cracks of the fence you will notice a red barrel, which must be undermined to destroy the barrier. Now jump down and take the gold chest.


Rubin 2 and 5 units of gold
Taking a gold from the chest, use the springboard to return to the central platform, and then go forward, following the quest marker. Go into the room with a bunch of impressions and red barrels. Explore the barrels on the right in order to create a passage, and go upstairs on a wooden path.


Once at the top, immediately turn the camera even higher, and you will see a red target into which you need to throw a shield to throw the box down and raise the grate in front. Spray down and stand on the springboard in order to be on the site with gold ingots. Then go to the right and get on the platform where the statue with ruby is standing.


16 units of gold and the seal of life
again begin to move towards the quest marker and leave the destroyed ship, walking along the fallen column and jumping down. Then immediately turn around and move to the edge of the cliff where green armor soars. Spraying to the lower ledge and deal with the alpha-como. Then just pick up the seal of life and ingots.


Demonic essence: health
Go down even lower, following a quest pointer, and soon you will find a red tree that needs to be destroyed by a shield. Next, straighten with all ordinary demons and defeat the mini-boss to take a demonic essence from him.


15 units of gold and record of the Code (spire Neutula)
Having dealt with the elite enemy, turn the camera again towards the quest marker and turn left. Then wrap it to the right and go down. After a few seconds, you will find the first 5 ingots.


Having gathered them, continue to go down the slope, passing under a small arch. Below, on a ledge, you will find another 5 ingots.


Next, turn right and again go towards the quest marker, walking along the fallen column across the river to the other side. Then turn the left, go under the arch and approach the edge of the protrusion to see the remaining 5 ingots and the page of the Code.


The third hellish fighter (optional)
Sit on the dragon again, after which you are immediately attacked by the titanium. Take a deal with him, and you will see an enemy fighter that will try to fly near you – catch up with it and blow up it.


The fourth hellish fighter (optional)
rise the top and fly to the quest pointer into the zone illuminated by blue. Flone into the tunnel, and you will immediately find a new ship – catch up with it and blow it up. He will disappear when he reaches the end of the tunnel. In this case, just restart the control point and arrive again to the marked point.


Rubin 3
After the destruction of the fighter, continue to fly along this tunnel until you reach the next landing site. Land, and then move forward and turn into the building on the left side. After going inside, straighten with several demons, and then take the gem from the statue.


13 units of gold and the seal of life
Having taken the ruby, turn around and go to the passage to the right, and then turn right again and jump to the site below. Run forward, go down the stairs and turn around again to see the gold bars in front of you and the green helmet.


15 units of gold
Follow the quest marker again and use the lift to go down. Here you will find another red zone where you need to deal with enemies. You can first kill opponents, and then take up the collection of ingots. Their location is shown in the pictures below.


25 units of gold
When you finally deactivate all three emitters of the stasis field, you have to sit down on the dragon again and land in another area of landing, where you need to get a BFA. Going down the dragon, go down the bridge, and then turn left and right to run down the ladder. Turn around and go even lower to collect 17 ingots.


Next, start climbing the opposite stairs, turn around, go even higher on the steps and turn to the right to find the remaining 8 ingots.


Collectible toy (Reanent)
After collecting the previous gold, turn around and take it down the wall on the right side. Turn right again and start climbing the spiral staircase upstairs. Enter the building and use the blue springboard to climb to the top of the tower. Go to the edge of the site and jump onto the ledge below, where you can see the sphere with the figure you need.


Demonic essence: ammunition
continue to move in the plot until you encounter the next leader of demons – Revumonant. Defeat him in battle, and then pull his essence out of him.


16 units of gold
Having made a ballistic phase crossbow in your own hands, climb the elevator and continue to move forward along the red path. Then go upstairs, roll left and go to the edge of the ledge. Below you will see the site you need to jump. Having done this, turn around and enter the cave. Inside you find the ingots.


50 units of gold
go out of the cave and go up the slope again. Take a look up, and you will find a huge stone column suspended on a chain. At her top there will be a red target – throw a shield into it so that the pillar falls down. Now just pick up the gold chest that was on this object.


16 units of gold
Having broken the chest, turn towards the quest marker, go around the cliff and use the springboard on the right to jump onto the site upstairs. Go ahead and enter the tower on the right. Crazy with enemies and climb the stairs to the very up, and then jump from the edge of the cliff to the second springboard.


After the jump, go ahead and immediately turn to the right to see two piles of gold ingreds.


record of the code (Serrat)
Return to the tower and continue to move behind the quest marker, rising higher. On the right, you will find the elevator you need by the plot, however, before entering it, select the Codes page soaring a little ahead.


Congratulations, you went through the location of Nepolal spire in doom: The Dark Ages 100%. Now you can go to the next area called “City Ray’ull”.