In Of Ash and SteelThe real cartographer is a side quest, for which you need to find all the viewpoints in order to eventually unlock the display of all key locations and objects on it. However, this can be difficult, since the game does not show their location in any way, so if you have problems finding them, then check out our guide.
Walking through the quest “The Real Cartographer” in Of Ash and Steel
How to start the quest
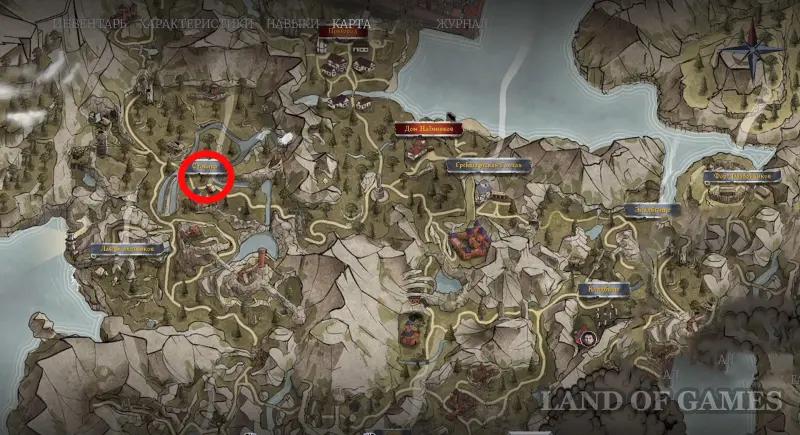
Before you can take on this mission, you will first need to get to the second story chapter, and then complete the quest “Return”. To do this, first find Irwin. The search for him will take place in two stages. First of all, get to the Expedition, and then start climbing the mountains, passing the cemetery. You will find a small wooden house – turn right from it and chat with Magwe in the barn, who will tell you where to go next.

Now just go to the Parking lot located near the tower and go to the large tent, where you will find Irwin – chat with him and continue the task. It will be noticeably easier here, since all the necessary places are marked with markers. At the end you will reach the coast from the Prologue and find a full map of the island. You can open it at any time by pressing the “M” key.
You also finally start the “Real Cartographer” mission, to complete which you need to find 11 observation points in different parts of the island. This way you can remove all the “fog of war” and see all the key locations and objects on the map. Next, we will indicate their location and tell you how to get to them.
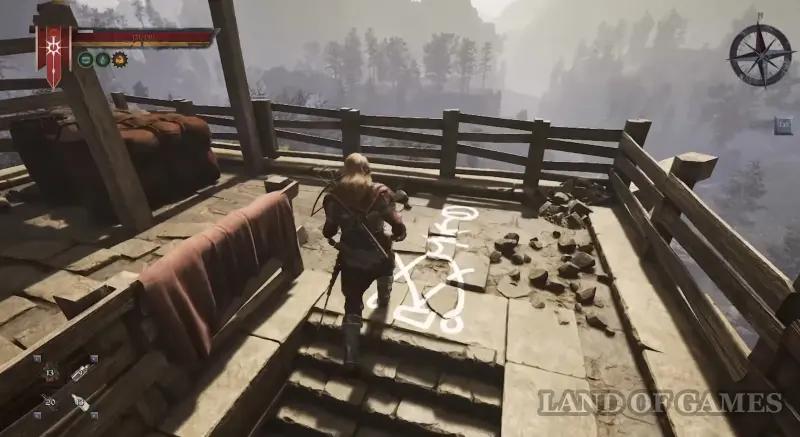
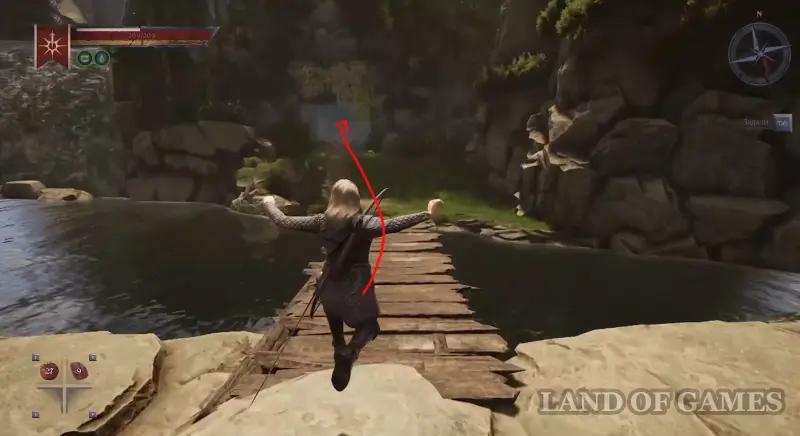
Viewpoint 1 (Forgotten Land)
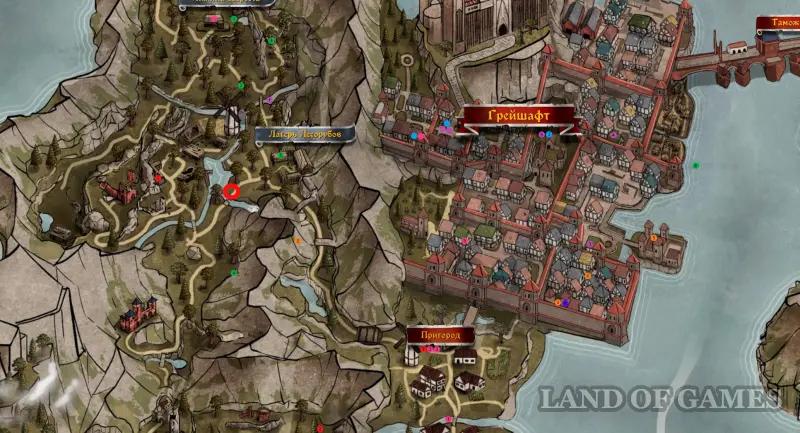
Go to the Lumberjack Camp, located southwest of the city of Grayshaft. Stand with your back to the entrance to the camp, and then run forward to the broken or restored bridge, but before reaching it, turn right, and on the ledge you will find the desired symbol with which you should interact (you will see the inscription “Explore the area” on the screen).
Viewpoint 2 (Hill Valley)
From the Parking Lot, start moving east, where you will find the wreck of a ship. Climb onto it, and then climb onto the bow of the ship, and you will find the white mark you need.
Viewpoint 3 (Suburb)
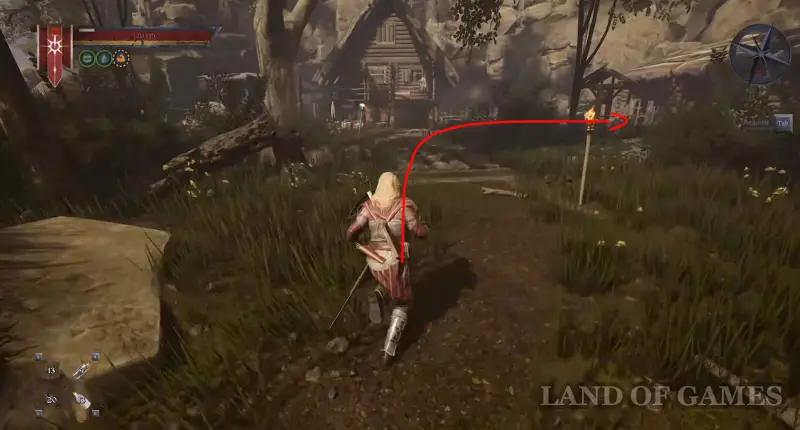
From the Greyshaft Hound Inn, start moving south towards the fort, and right near the entrance you will see a white mark on the ground.
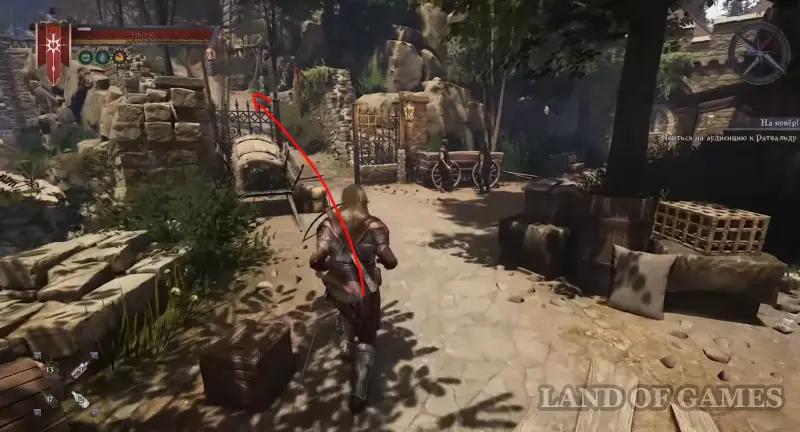
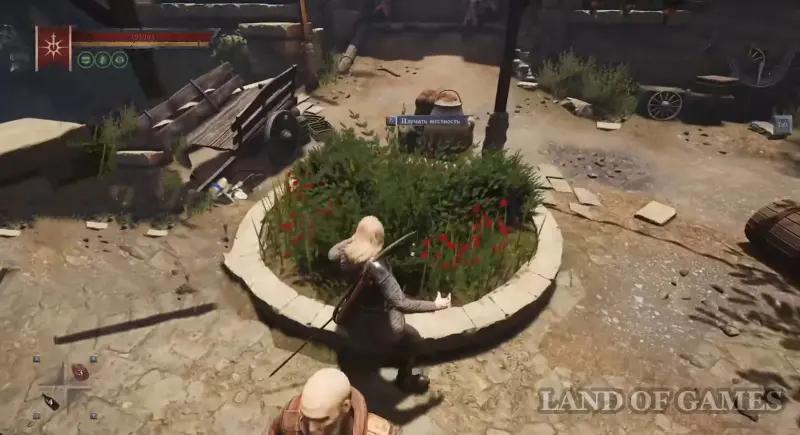
Viewpoint 4 (Grayshaft)
Go to the city and move towards the rich area, and near the entrance to it, in a flower bed you will see the rune you need. It's quite easy to miss.

Viewpoint 5 (Crosshair)
Get to the Fisherman's Village, then head west, cross the river and reach the tower. Enter it and climb to the very top, where you will find a white marker.
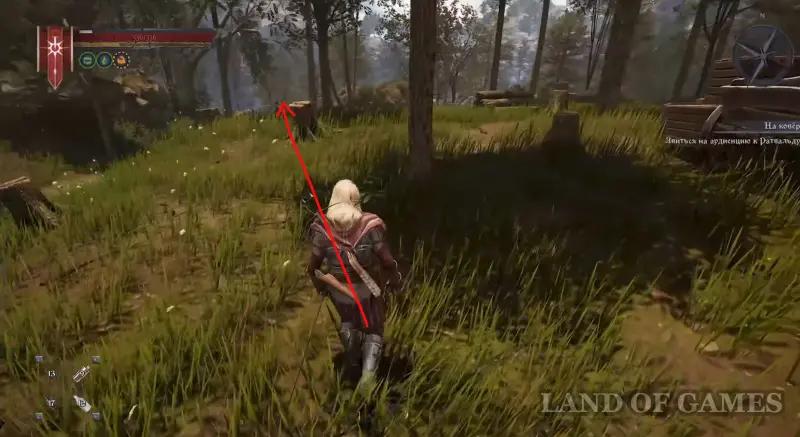
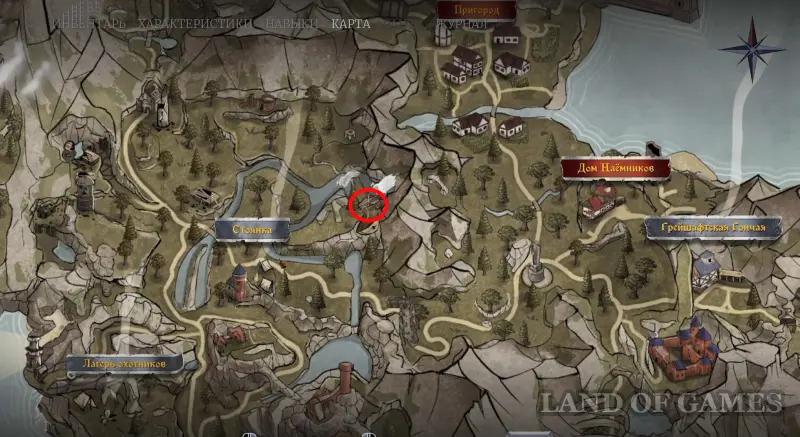
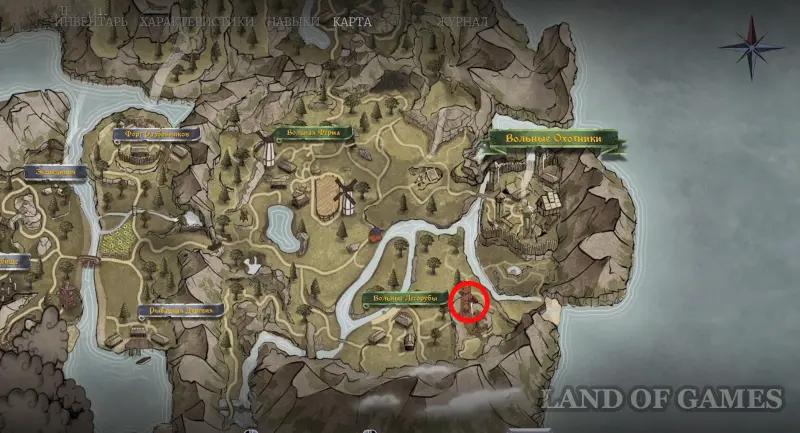
Viewpoint 6 (Free lands)
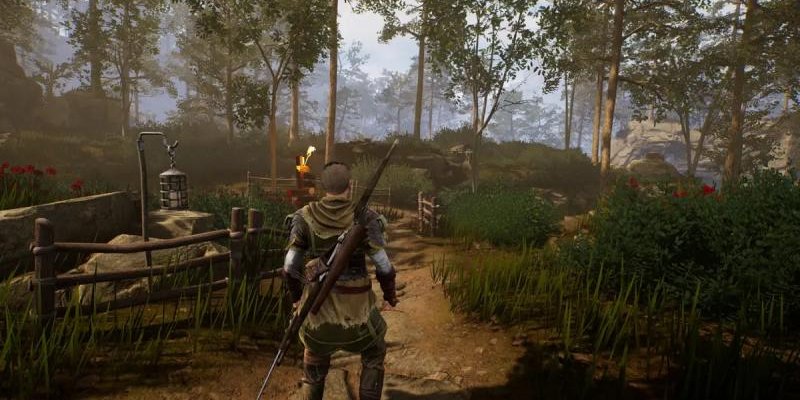
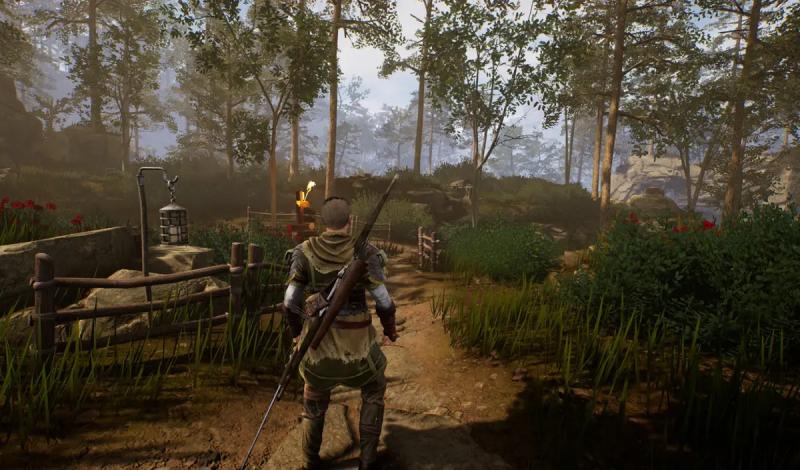
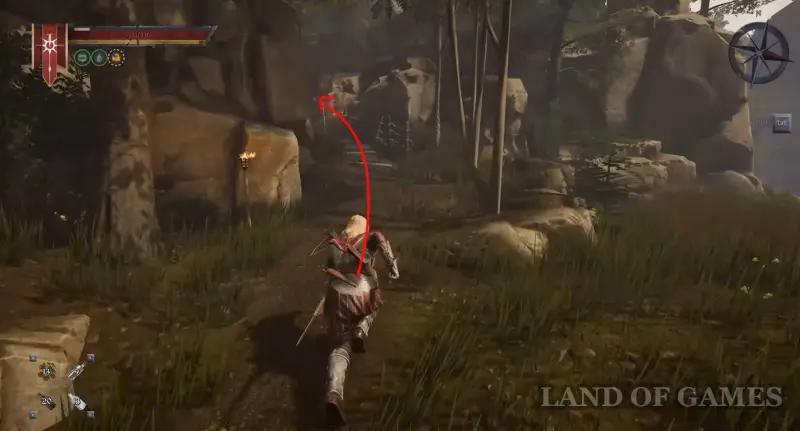
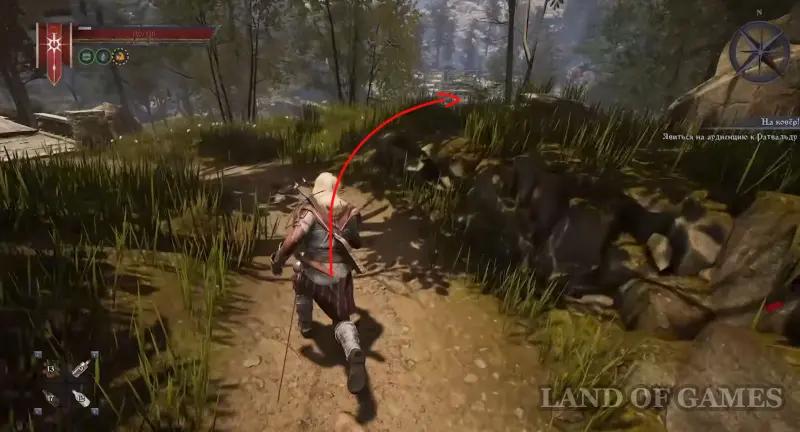
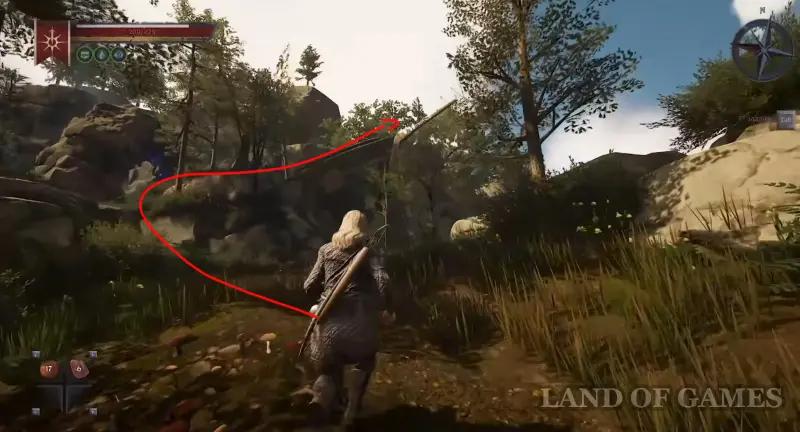
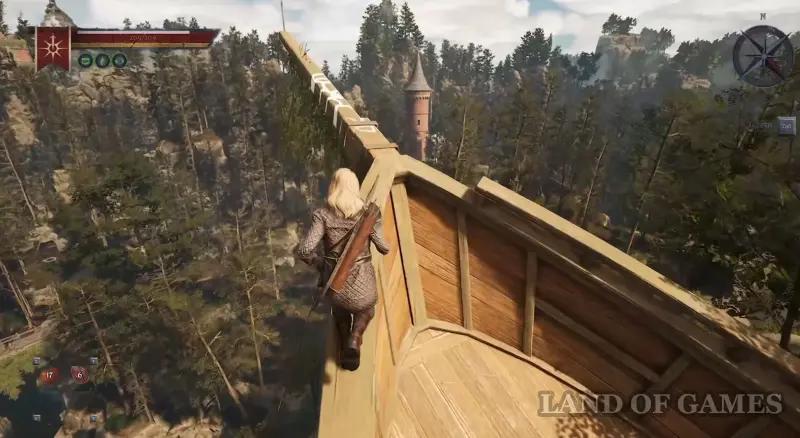
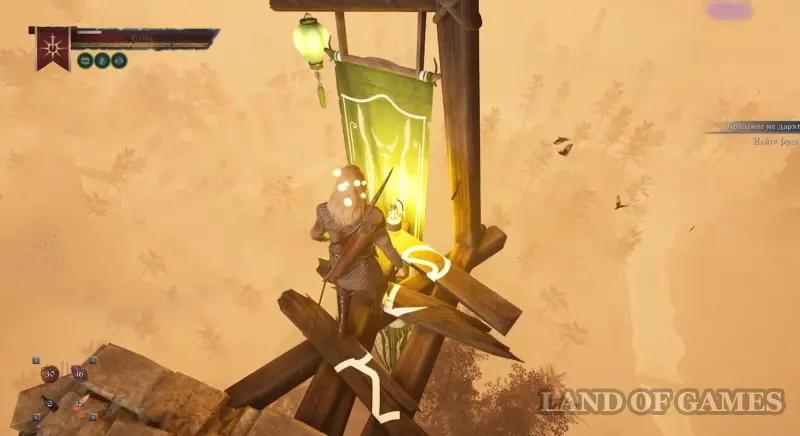
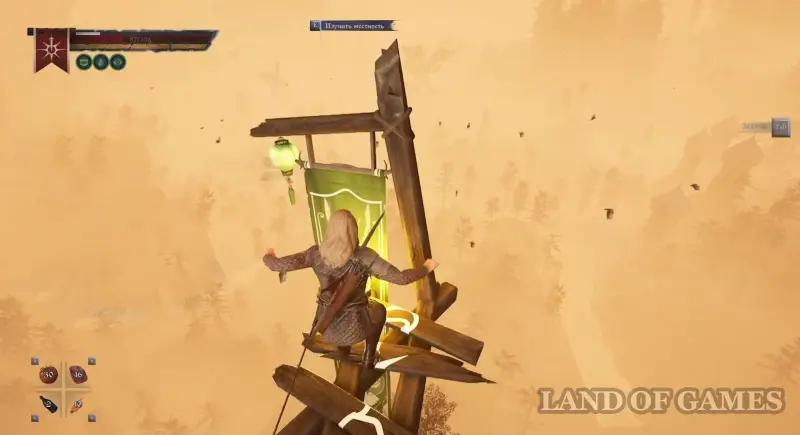
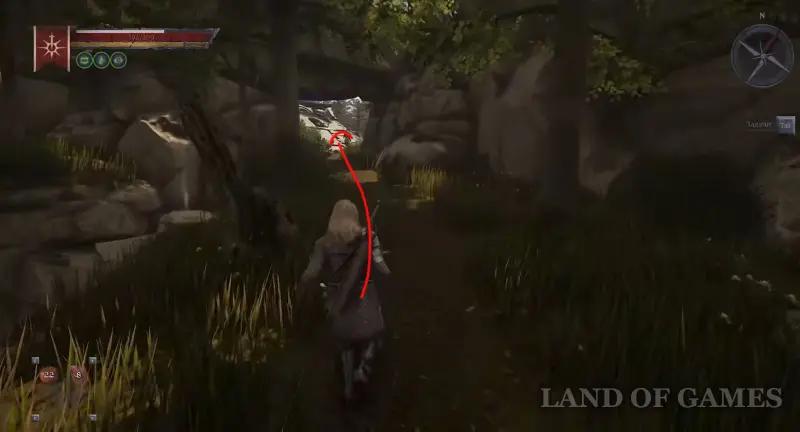
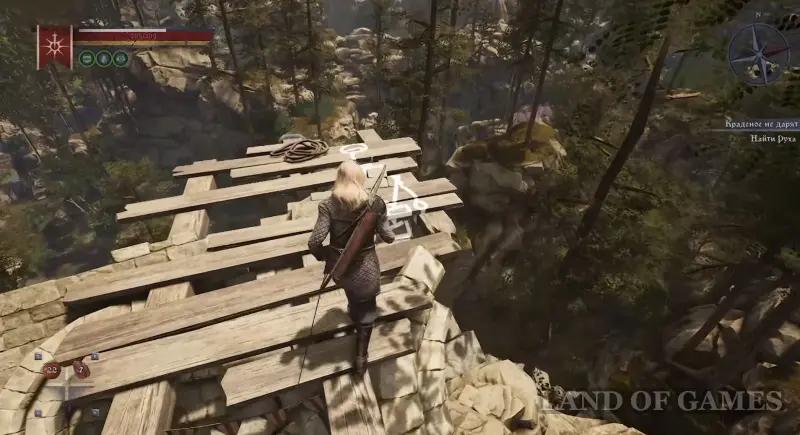
From the Free Hunters fort, move southwest towards the high tower (it will be visible from afar). Once in the ruins, start jumping onto beams, dilapidated walls and wooden ledges. Sometimes it will be necessary to use a long jump. The screenshots below show all the way to the very top of the structure.

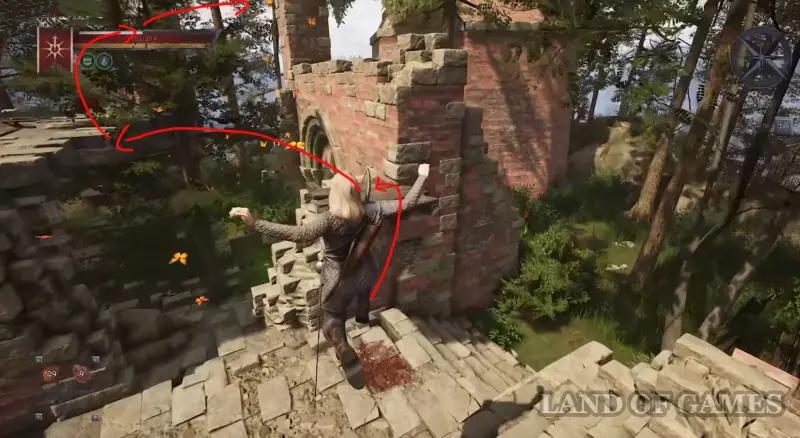
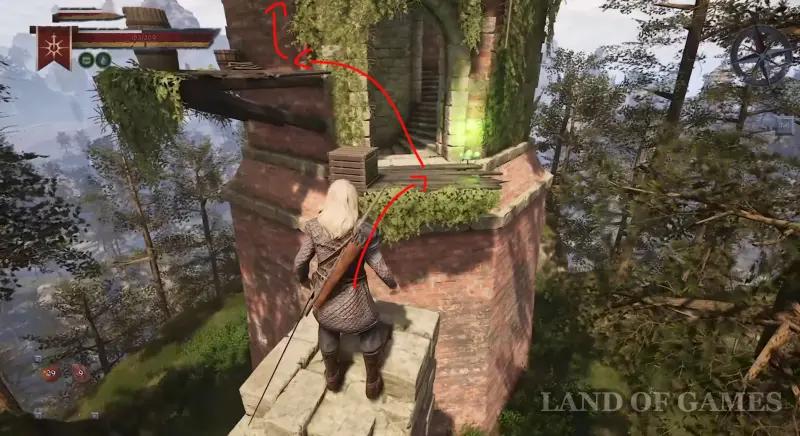
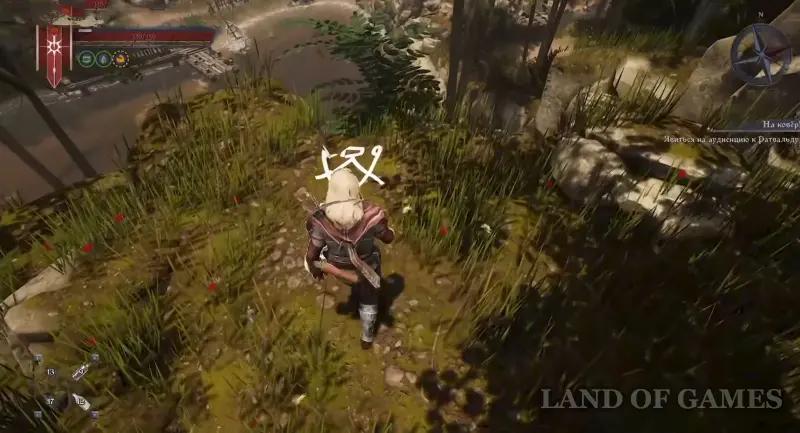
However, there is also a small challenge waiting for you at the top. The fact is that for some reason the interaction point is located about two meters above the mark itself, so you will have to try to get it by jumping or climbing onto a wooden beam.
Note: If you can't interact with this point, try going down and killing the three big monkeys roaming around, then wait until the next day and climb the tower again and try to click on the marker.
Viewpoint 7 (Alpha and Omega)
From Free Farm, start running north until you find a mill ahead next to a river. Behind her, on a stone ledge, you will find another white marker.

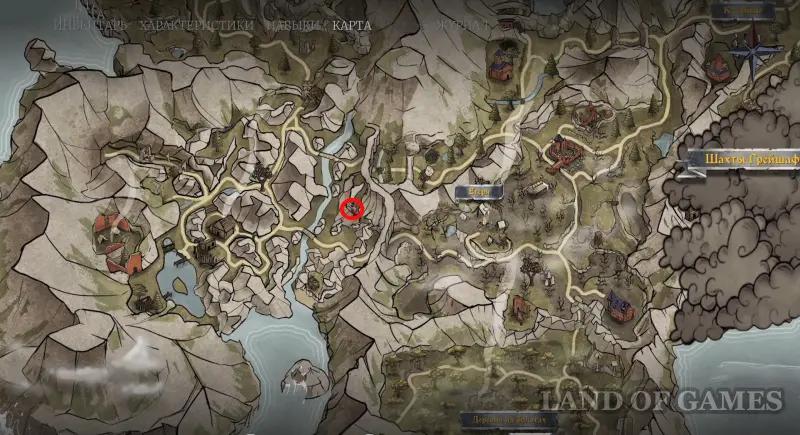
Viewpoint 8 (Darkwood)
The rune you need is located near a small tower located next to the Jaeger camp, which can be reached from the Cemetery – you need to follow the road to the southwest. You will need to climb onto a rocky ledge.
Viewpoint 9 (Ivara Village)
From the previous point, start moving west towards the river, however, before reaching it, turn right and go through the narrow passage to the top. Soon you will see a fallen tower ahead – climb up it and you will find a white marker.

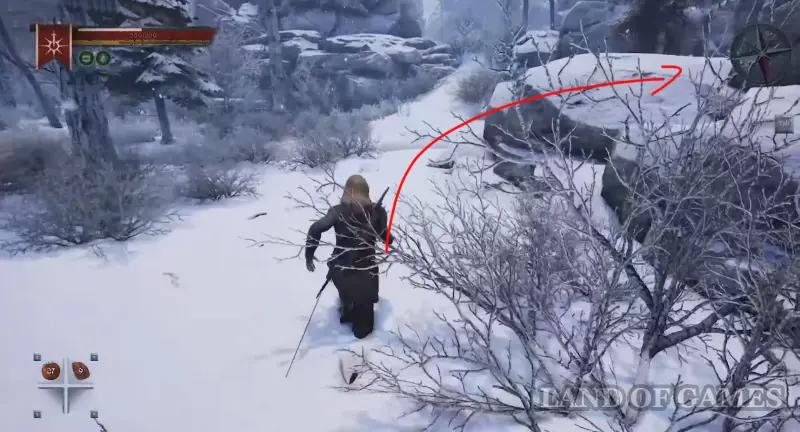
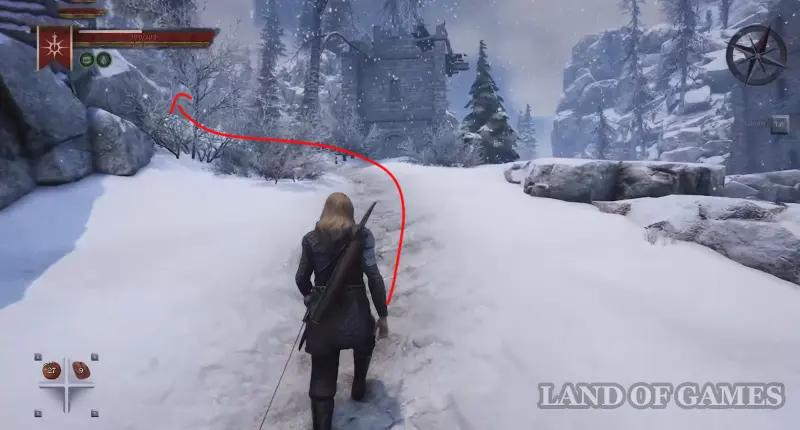
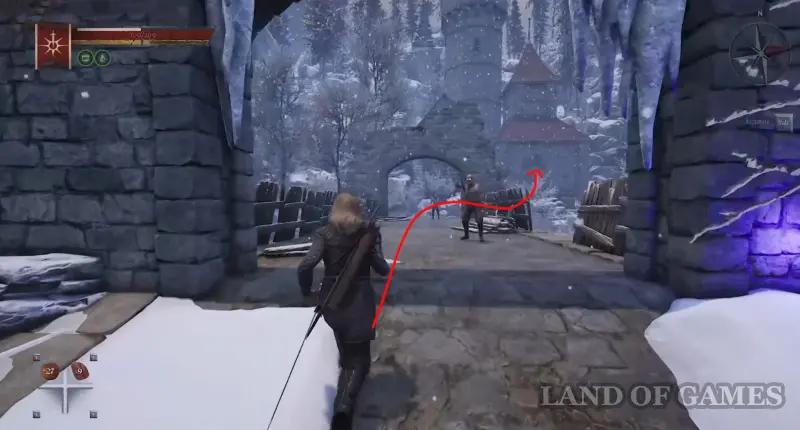
Viewpoint 10 (Frosty Valley)
From the Fisherman's Village, start moving south towards Frost Valley. Once you enter the snowy area, run forward, go past the stockade, and then turn right and go up the slope. Walk across the stone bridge towards the fortress with the tower. Enter the building and start climbing to the very top, where you will find a white mark.
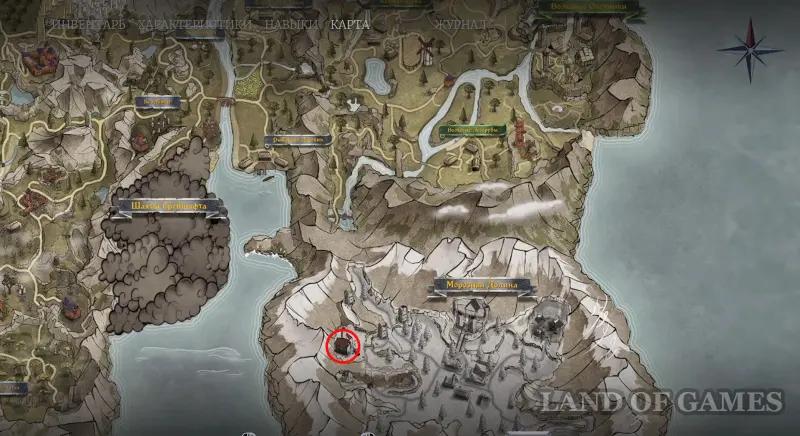
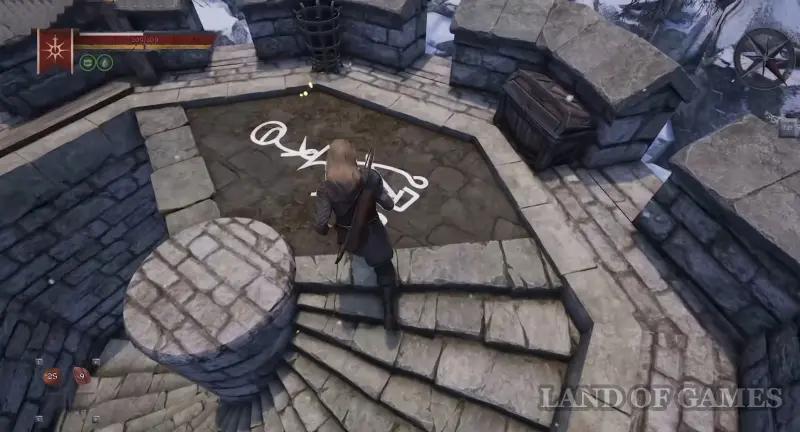
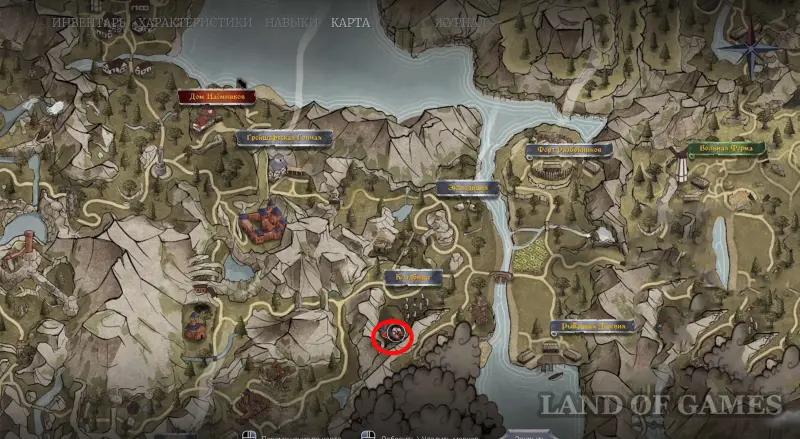
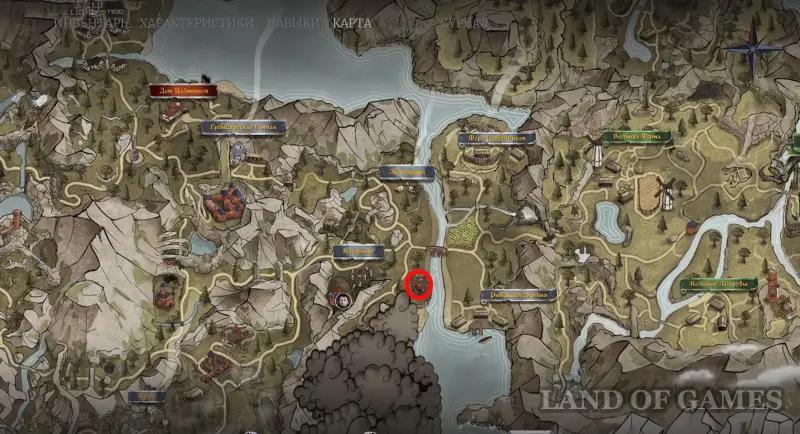
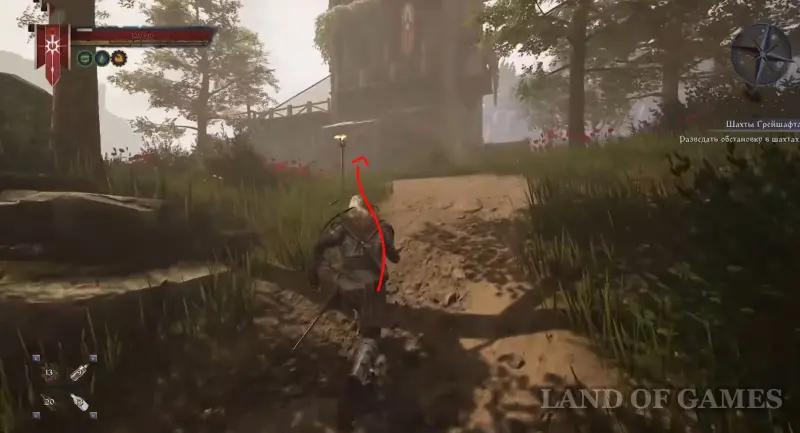
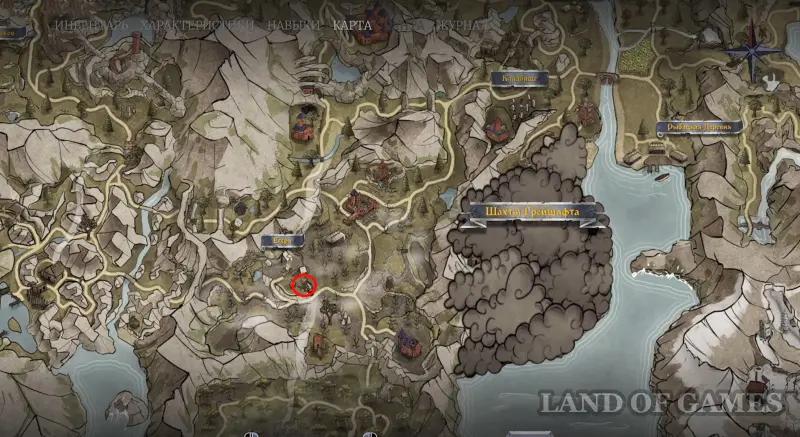
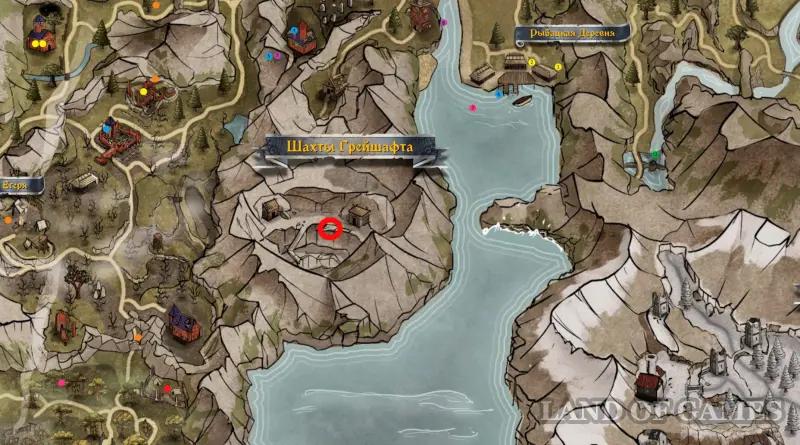
Viewpoint 11 (Mines)
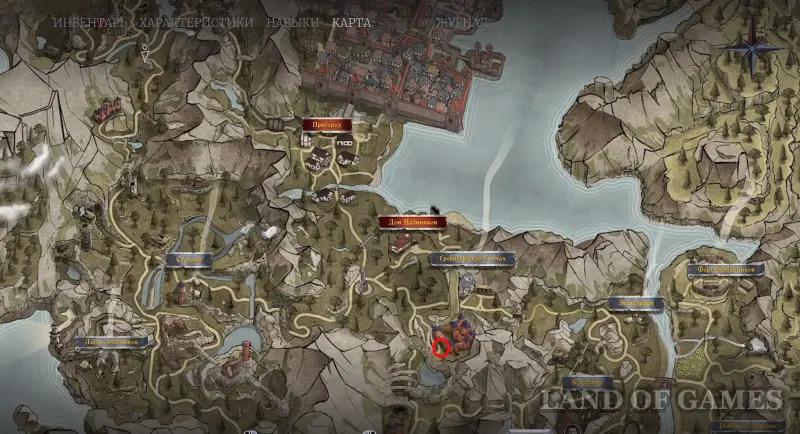
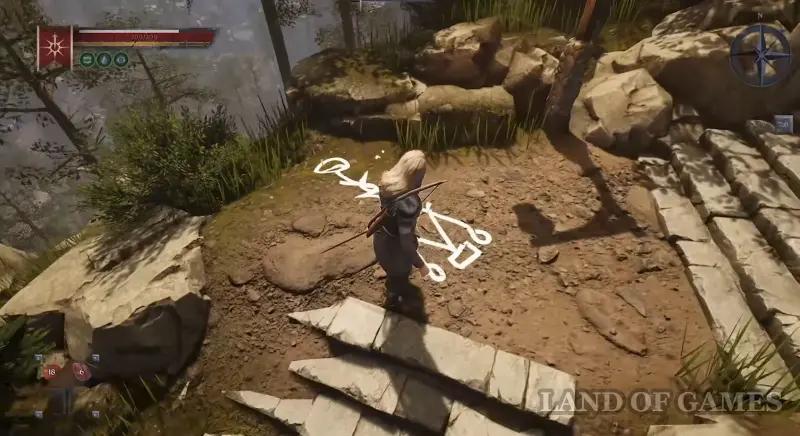
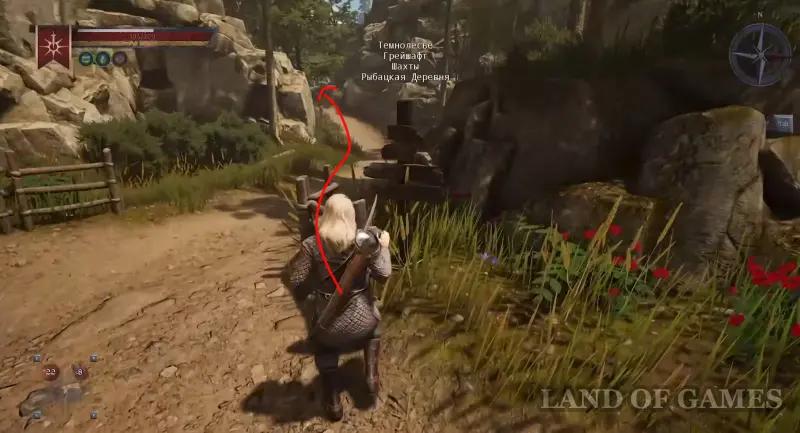
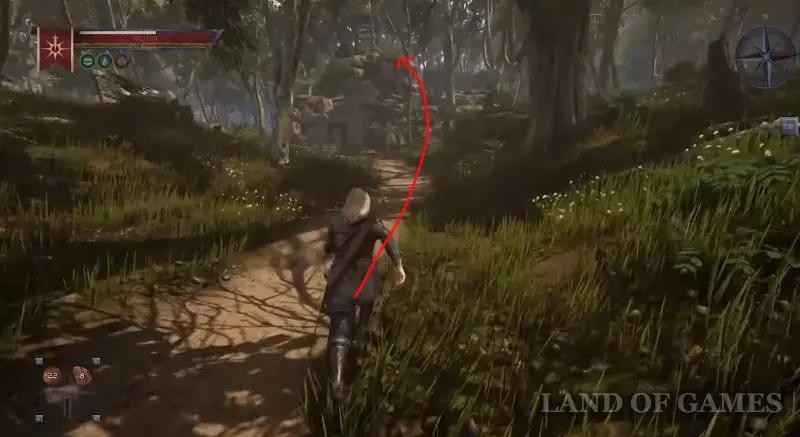
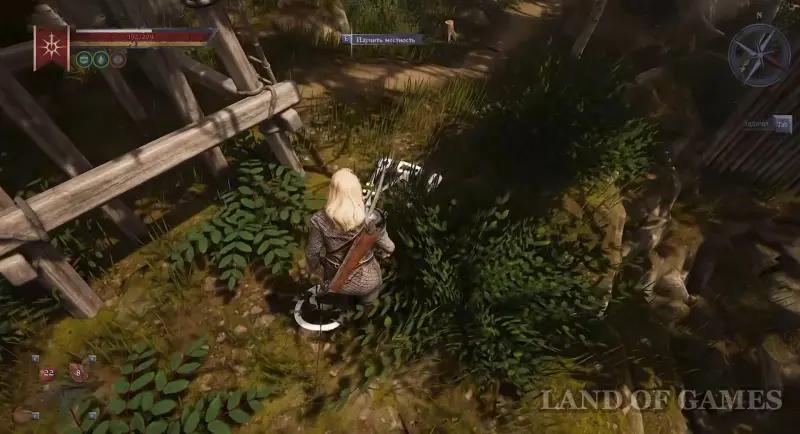
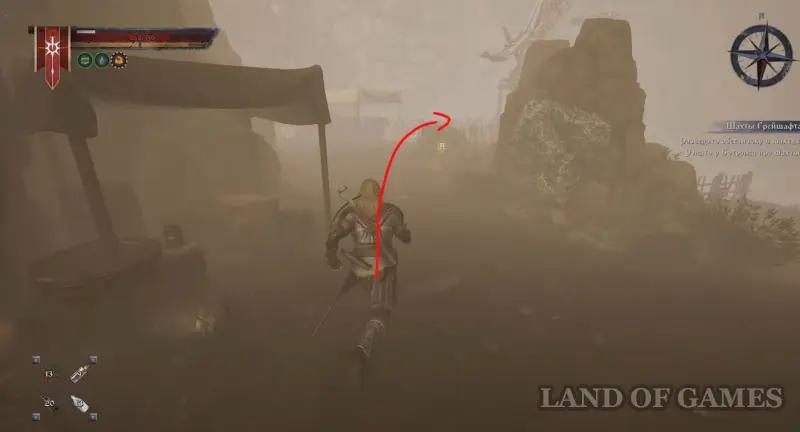
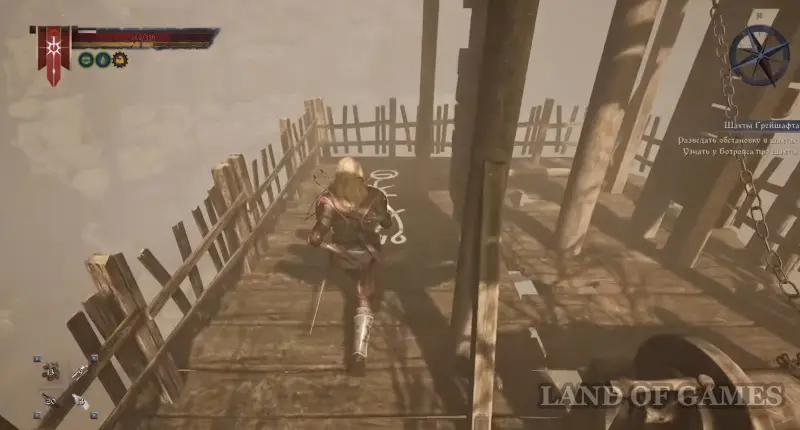
Please note that you can get to the Greyshaft Mines only in the third story chapter, by picking up a quest in the city’s castle. We won't spoil it, but just show you the place where you can find the white mark. Once inside the mines, go forward along the tunnels, turn right and get to the surface again, and then move to the area with the crane. Here you will find the rune you need.

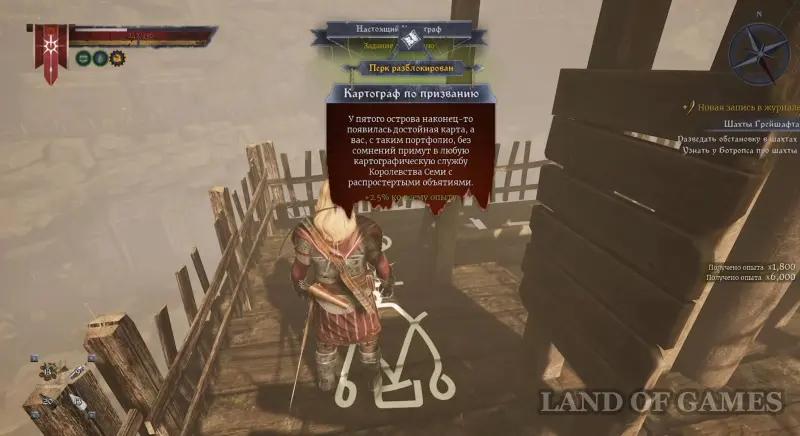
Add that after finding all the viewpoints you will unlock perk “Cartographer by vocation”, which gives +2.5% to all experience gained.