Detailed walkthrough of Episode 3 “The First” day” in Dispatch, in which you will find out what you need to answer to Blondie and Nevidiva in order to improve your relationship with them, as well as who to exclude from the team at the end of the episode. We will also tell you which superheroes need to be sent on certain missions during the shift of the SDS dispatcher, give advice on solving puzzles, and tell you how to deal with sabotage.
Walkthrough of Episode 3 “Turnover” in Dispatch
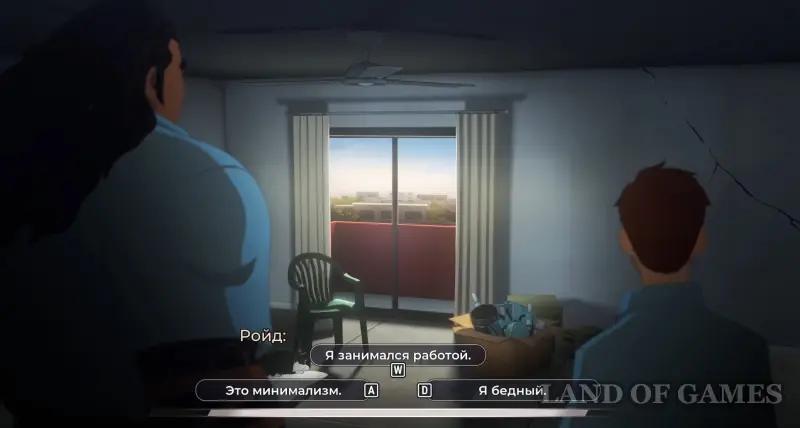
We watch the opening video and enter into dialogue with Royd. How do we respond to his words (do not affect the plot):
- This is minimalism.
- I was doing work.
- I am poor.
Roid will start talking about astral pulsator. We answer him (does not affect the plot):
- Sounds impressive.
- I didn’t understand a word.
- Can you recreate it?
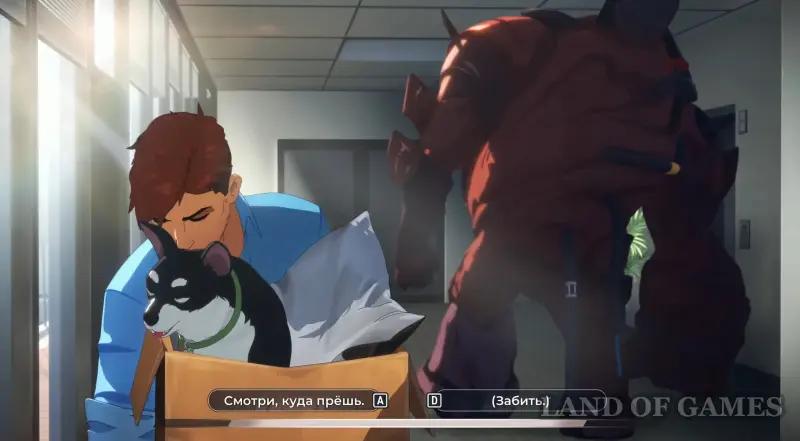
We will arrive at the office and exit the elevator, and in the corridor a Golem will accidentally hit us. How do we respond to this? (he will remember our answer).
- Watch where you're going.
- (Score).
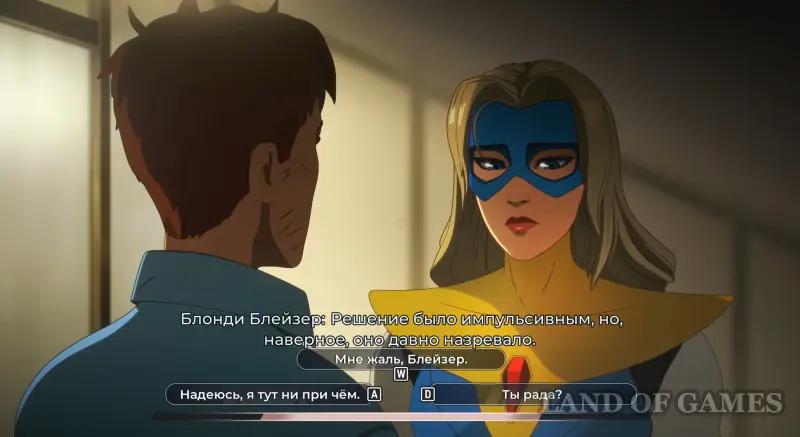
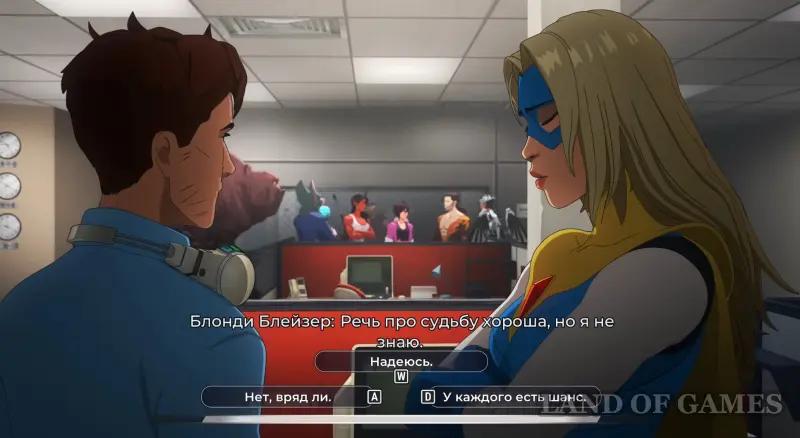
Then Blondie will appear Blazer, who wants to talk to us. We learn that she broke up with Fenomacho. She will also thank us if we previously refused to go to dinner with them in Tokyo (or vice versa, criticize us). Next we answer her (she will remember this):
- I hope I have nothing to do with it (let's improve relations with her).
- I'm sorry, Blazer (let's improve relations with her).
- Are you happy?
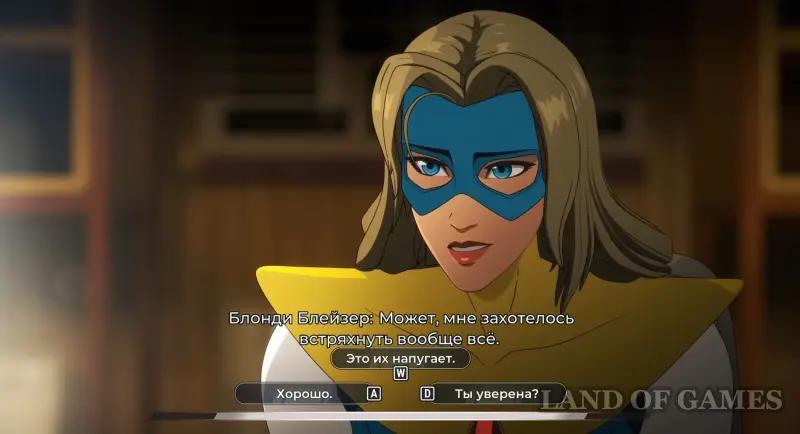
We learn that Blondie wants to expel one of our team members. How do we respond to this? (she will remember our answer).
- Are you sure? (let's improve relations with Blondie)
- This will scare them (neutral answer)
- Are you sure? (worse relations with Blondie)
After watching a short video, we will begin our next dispatcher shift. It will be different from the previous one, since we will have to help the heroes not only complete tasks, but also get out of various traps so that they avoid injury. Such situations will certainly occur when two characters work together due to sabotage.
Hero Sabotage Mechanic
As part of this shift, the superheroes we dispatch may be randomly sabotaged by their fellow workers as they move to the scene of an emergency. The sabotaged character will need to complete one attribute check, and it will depend on us which one.
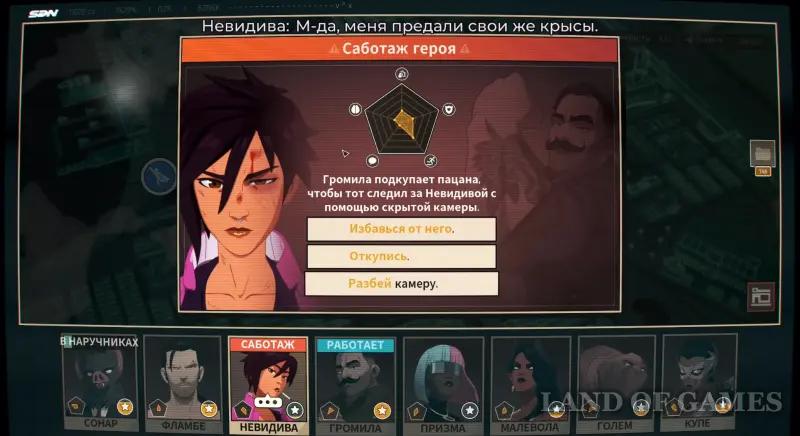
If you turn out to be so unlucky, then even his own comrade may interfere with your hero, if you assigned several characters to one challenge at once. If a skill check fails during sabotage, a member of your squad will be wounded, causing all of their stat values to decrease by one for the current shift. If he successfully passes the test, he will return back to headquarters without incident to rest.
The sabotaged participant will NOT be able to help an untouched comrade complete the request, which will affect the likelihood of successfully completing the task. In this case, the emergency situation may turn out to be dangerous, due to which the remaining team member may also be injured.
You won't be able to manually select which party members will be sabotaged on the way to a challenge. The only thing you will be able to do is to “reset” the task in order to select the hero with the highest chance of successfully completing the task alone. Having selected the first character, the game will automatically assign him a random partner, but you can change him by exiting the mission interface (ESC) and re-entering it and again picking up the first superhero.
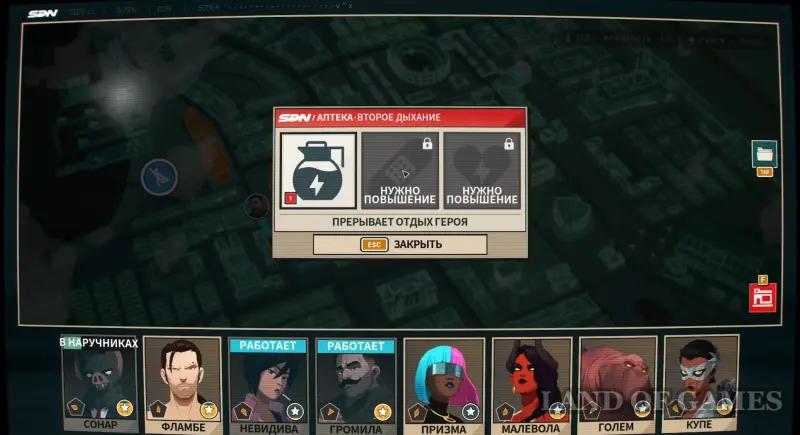
We will add that characters who commit sabotage will also need rest. If you urgently need them to fulfill requests, then use Second Wind (coffee pot) at the pharmacy to end their rest mode prematurely.
Changing the dispatcher SDS (correct choice)
Next we will look at all the challenges at this stage and tell you which heroes should be sent to them. We will also describe all the choices that arise as part of sabotage or completing tasks, indicating the requirements for characteristics.
Beach Cleanup
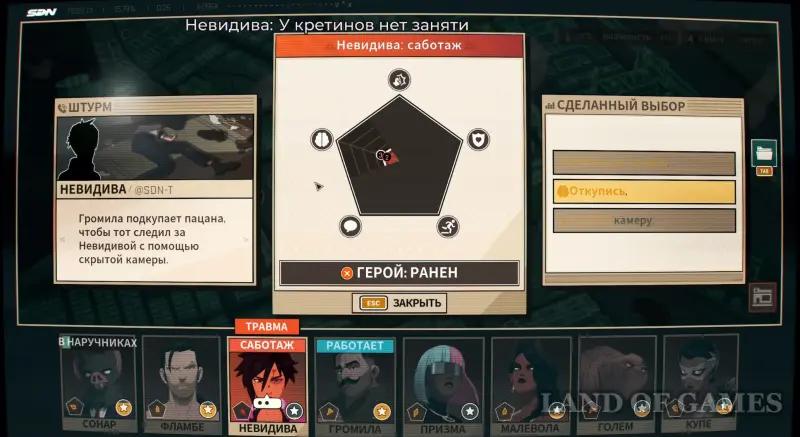
You can send Thug and Invisible to this task, but in this case you will have to pass the following Invisible checks during Sabotage:
- Get rid of him – for success you need 3 units of dexterity and above.
- Pay off – for success you need 3 units of intelligence and above.
- Break the camera – for success you need 3 units of fearlessness and above.
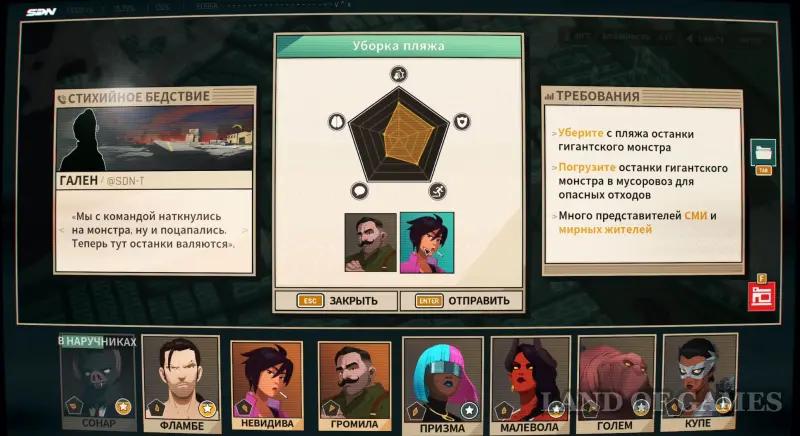
You can send Thug and Golem/Malevola on this mission, but in this case you will have to pass the following checks during Sabotage:
- Golem: try to get out – for success you need 3 units of stamina or higher; absorb concrete – for success you need 4 intelligence units and above; ask someone to help – for success you need 1 unit of charisma and above.
- Brute: cleanse the body – for success you need 1 unit of stamina or more; strong will and action – for success you need 2 units of intelligence and above; resist the urge – for success you need 4 units of fearlessness and above.
You can send Coupe and Golem on this task, but in this case you will have to pass the following checks for Coupe during Sabotage:
- Evade very, very slowly – for success you need 1 unit of agility and above.
Fight against drugs
You can send Sonar on this mission, but in this case you will have to pass the following checks during Sabotage:
- Be patient – for success you need from 2 units of fortitude and above.
- Close your ears – for success you need from 4 units of intelligence and above.
- Find the source of the noise – for success you need from 1 unit of agility and above.
You can send Sonar and Prism, but in this case you will have to pass the following Prism checks during Sabotage:
- Distract them with a song – 4 units of charisma and above are required for success.
- Hit them with light – 5 units of fearlessness and above are required for success.
- Make your way through the crowd – 3 units of stamina and above are required for success.

Suppression of drug trafficking
You can send Sonar (in the form of a mouse) and Malevola on this task, but in this case you will have to pass the following checks of Malevola during Sabotage:
- Fight your way to freedom – 4 units of fearlessness and above are required for success.
- Run – for success you need 3 units of agility and above.
- Play along – for success you need 4 units of fearlessness and above charisma and higher.
You can send Thug and Coupe to this task (should do without sabotage).
You can send Nevidiva and Golem to this task (must do without sabotage).
Problematic Party
You can send Brawler and Coupe to this task (must do without sabotage).
You can send Flambe and Malevolu to this task, but in this case you will have to pass the following Flambeau checks during Sabotage:
- Demolish the cell door – 1 unit of agility or higher is required for success.
- Reject thoughts and meditate – for success you need 3 intelligence units and above.
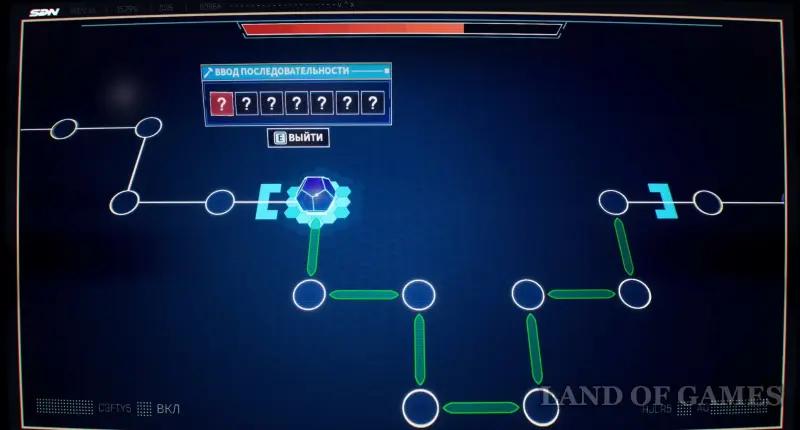
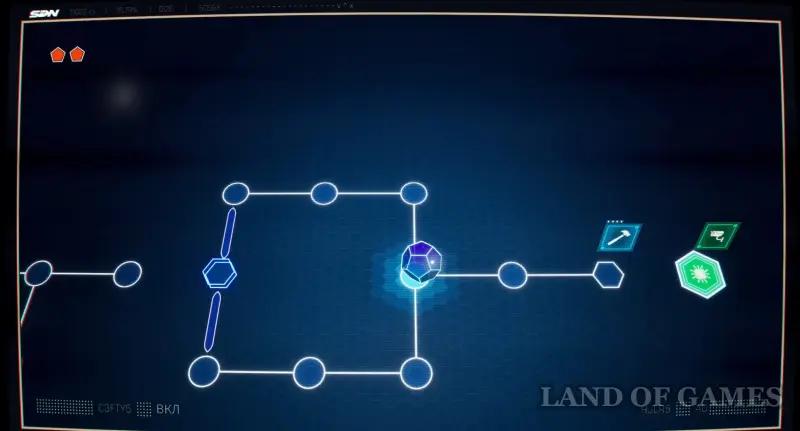
- Open the tank – you need to pass the hacking test.
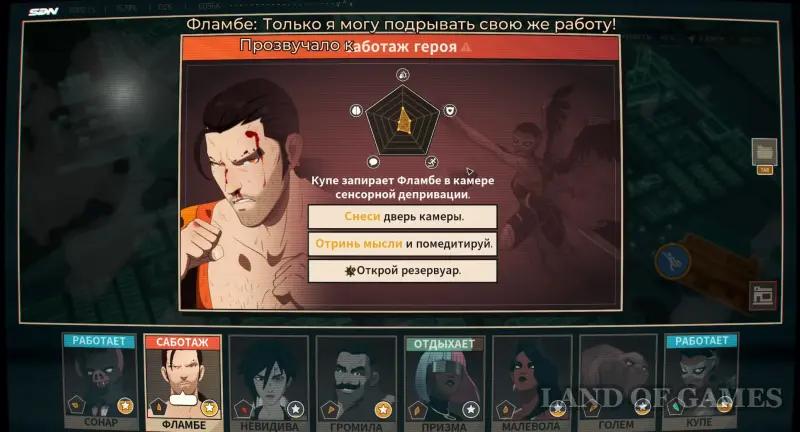
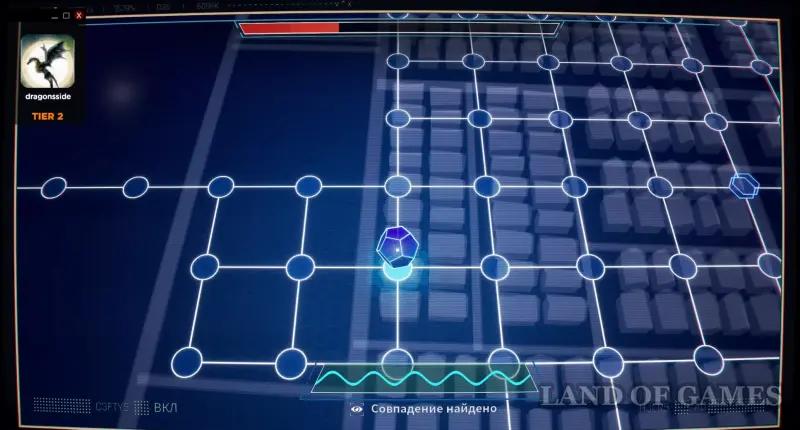
If you chose the hacking option, you will need to solve another puzzle with a cube and squares. To do this, you must first get the key with the correct sequence of arrows at the top and left, and then get to the green cell. The whole process is demonstrated in the gif below.
The case of the SDS fraudster
You can send Flambé and Prism(should avoid sabotage, since this duo worked well together).
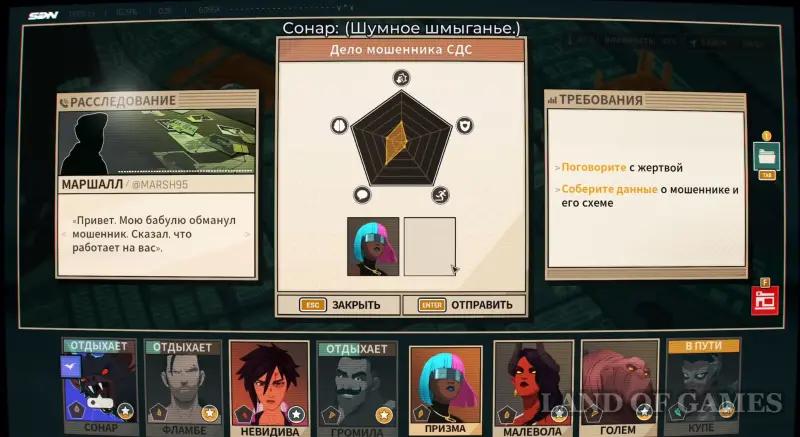
You can submit this task Sonar or Prism (or someone else with a high charisma/intelligence score).
Raid on a drug base
You can send Sonar and Malevola on this task (you should do without sabotage, since this duo works well together).
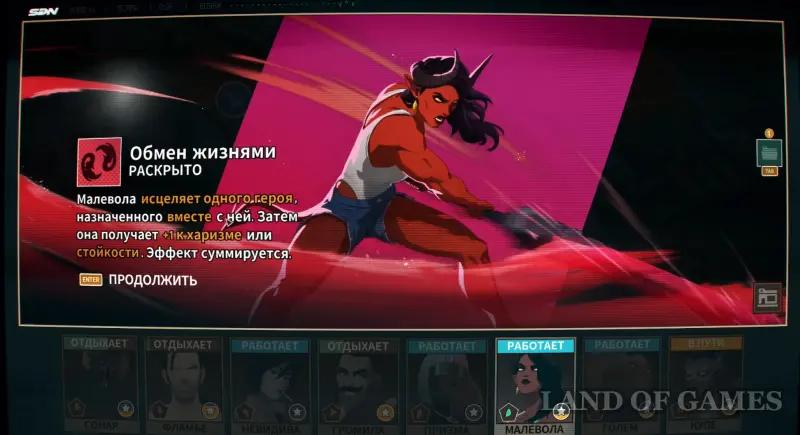
Note: Please note that Malevola has a unique skill, “Exchange Lives,” which can be unlocked by assigning her to a wounded hero. She will immediately heal this character and receive an increase in characteristics.
You can send Coupe and Golem to this task, but in this case you will have to pass the following checks during Sabotage:
- Golem: try to get out – for success you need 3 units of durability and above; absorb concrete – for success you need 4 intelligence units and above; ask someone to help – for success you need 1 unit of charisma and above.
- Coupe: dodge very, very slowly – for success you need 1 unit of agility and above.
You can send Malevola and Nevidiva to this task, but in this case you will have to pass the following Malevola checks during Sabotage:
- Fight your way to freedom – for success you need 4 units of fearlessness and above.
- Run – for success you need from 3 units of agility and above.
- Play along – for success you need from 4 units of charisma and above.
Landslide
The game will automatically select Sonar and Coupe, causing the Coupe to complete the following checks during Sabotage:
- Sail away on your back – for success you need 4 units of agility and above.
- Splash and drown them – for success you need from 5 units of fearlessness and above.
- Describe how you were carried away – it is unknown.
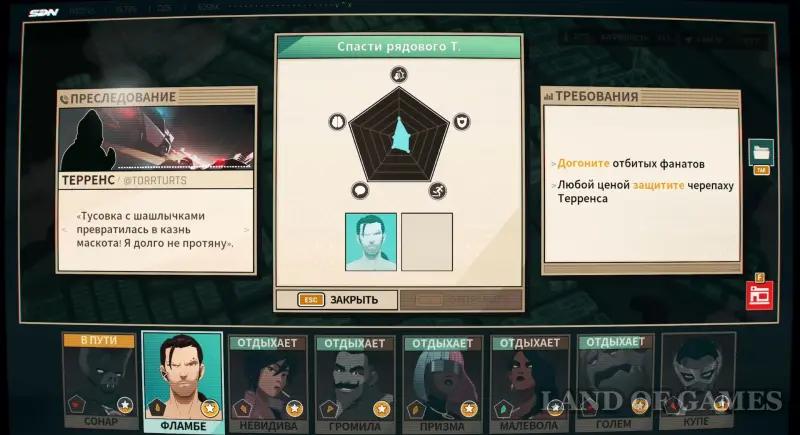
Save Private T.
You can send Flambé or Nevidivu to this task(or any other hero with high agility/toughness).
You can send Flambé and Prism on this task, but in this case you will have to pass the following checks for Prism during Sabotage (if she has not previously had checks):
- Distract them with a song – 4 Charisma or more is required for success.
- Hit them with light – Fearlessness 5 or more is required for success.
- Break through the crowd – Toughness is required 3 or more for success.
Hacking a scammer or Researching a clue (you can only choose one)
If you select Research hints”, then you will need to send Thug and Coupe there.
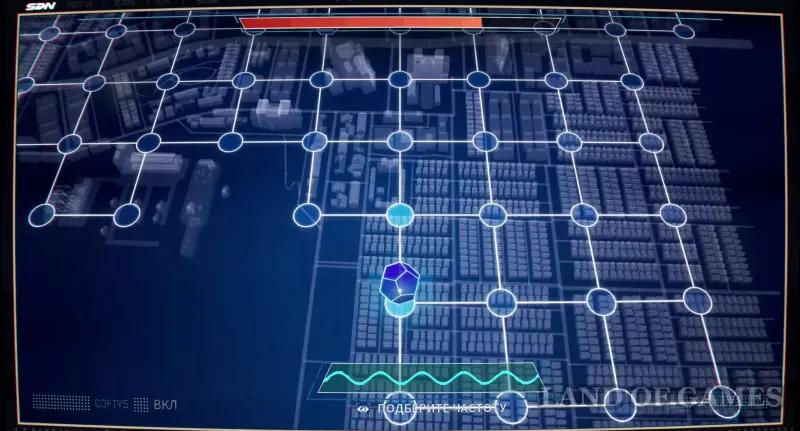
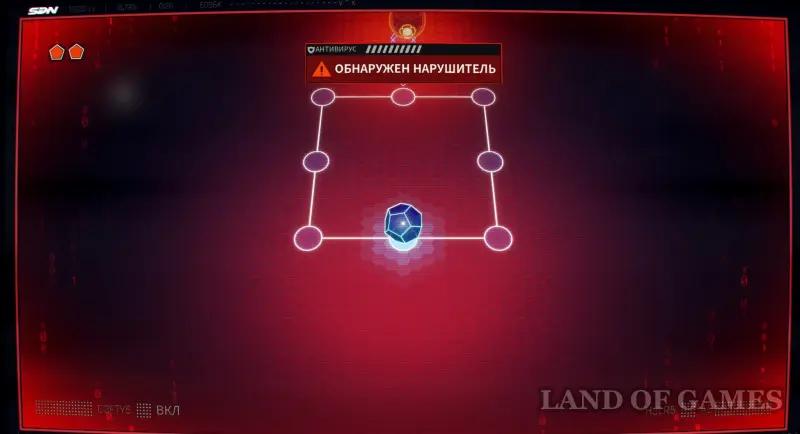
If you select “Hacking a scammer”, then you have to go through another hacking mini-game by moving the cube across the squares. Go to the right and unlock a huge field where you need to find the correct cells to resonate with the sound waves on the screen. In the screenshots below we showed their location.
Traffic on parking
You can send Sonar (not in mouse mode) and Malevola on this mission (should avoid sabotage, since this duo works well together).
Runaway Train
You can send Thug and Coupe on this mission(must do without sabotage).
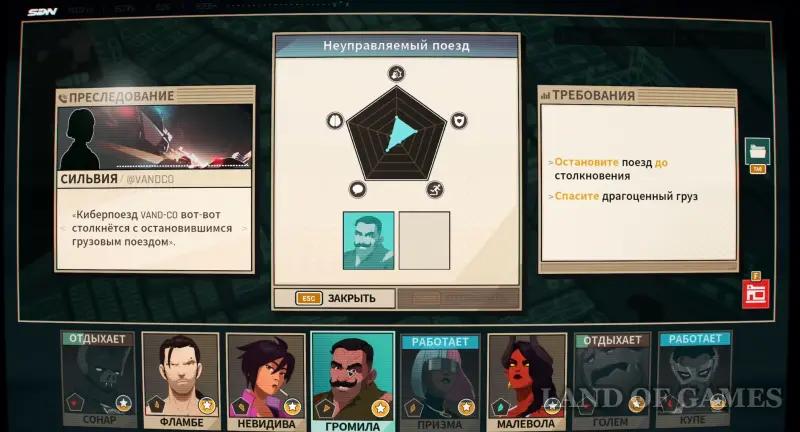
You can send Nevidiva and Golem to this task (should do without sabotage).
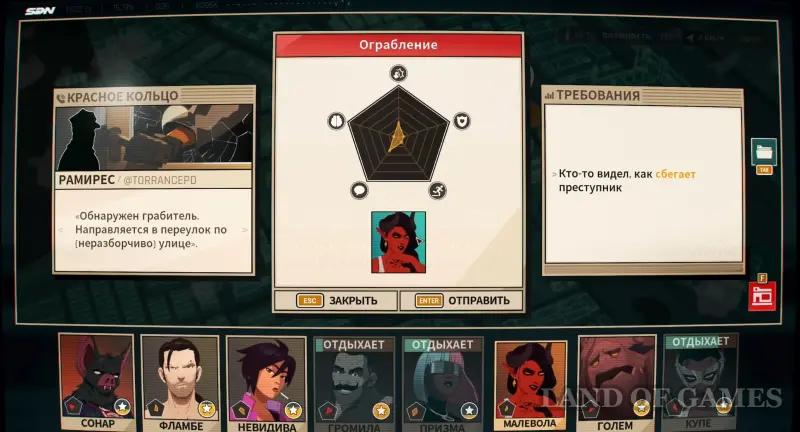
Robbery
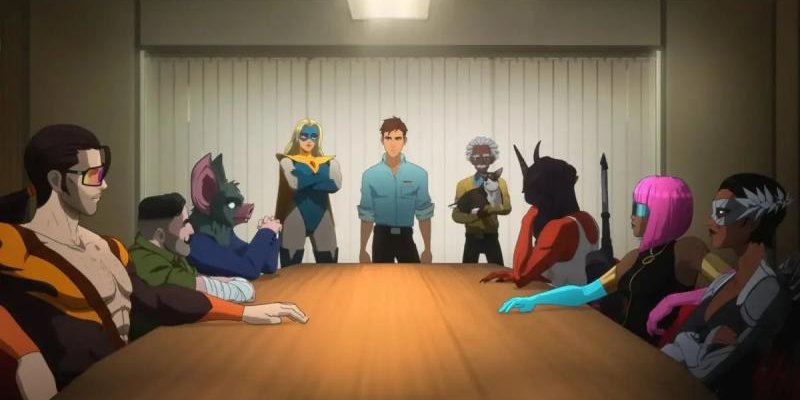
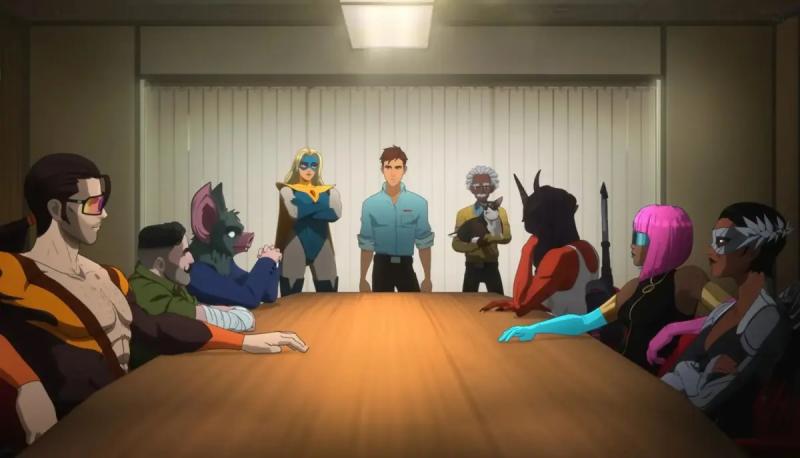
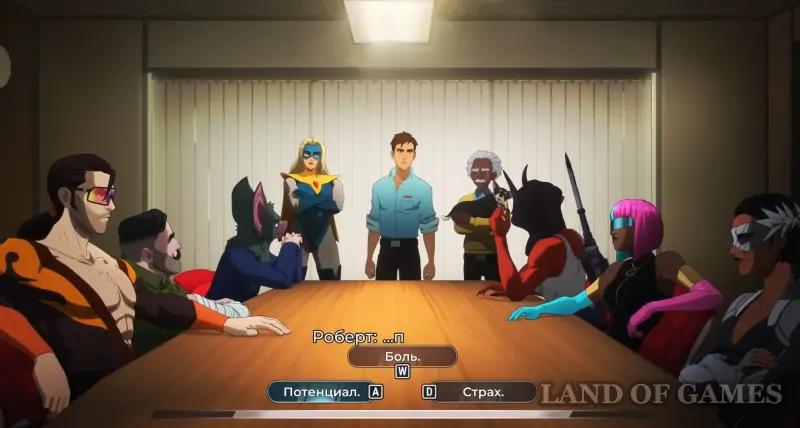
The game will automatically select Malevola. Then watch a short video where the demoness will confront Nevidiva. Next, we will decide to gather all our team members in a conference room. Here we have to make several important choices.
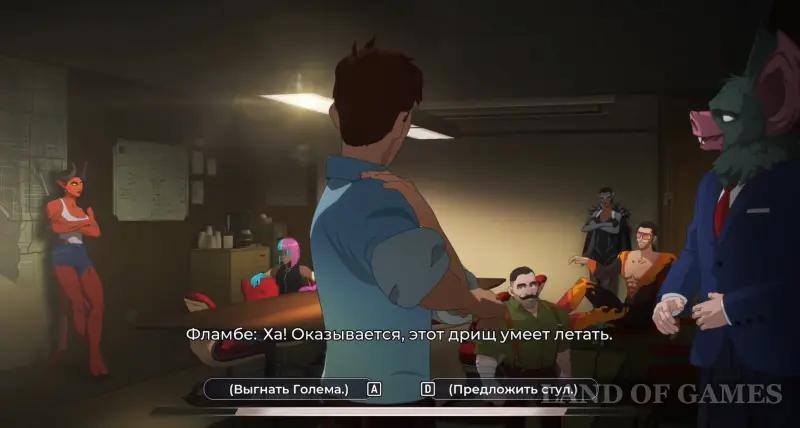
The golem will accidentally push us when it enters the room. What should we do? (he will remember this).
- (Kick out the Golem) – we will worsen the relationship with him.
- (Offer a chair) – we will improve the relationship with him.
When we look at them, what do we see? (they will remember this).
- Potential.
- Pain.
- Fear.
We talk about the phoenix and add (they will remember this):
- You are disrupting the work.
- You are a fucking pile of ashes.
- You are all phoenixes.
Second shift of VTS dispatcher (correct choice)
Having completed the meeting with the team, we will return to our workplace and begin the second shift, in which the characters will finally stop sabotaging each other’s work. Next, we will indicate the best heroes for certain tasks.
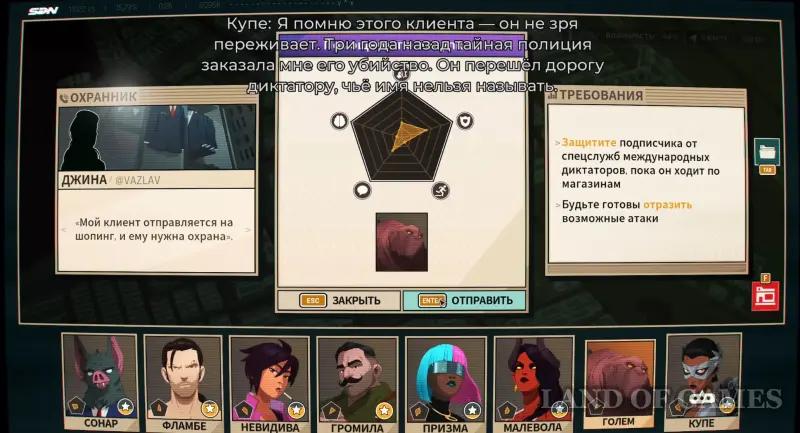
Shopping Assistant
We recommend sending a Golem or a Brute to the task, since you will have to protect the client from criminals.
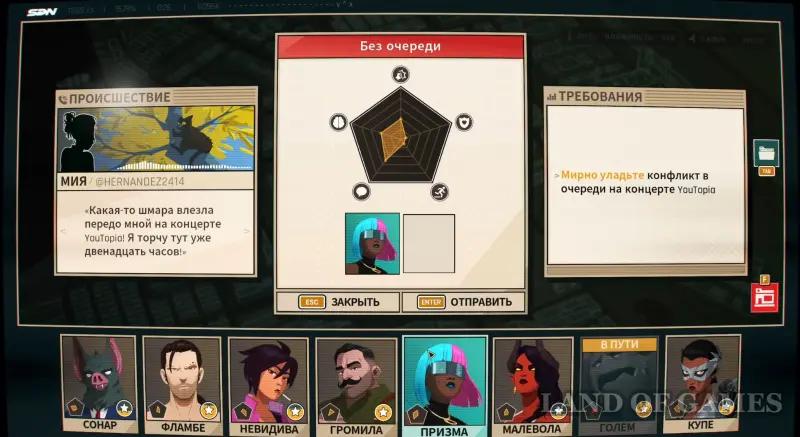
No queue
We recommend sending Prizma or Kupe on the task, and then select the following answer options:
- Cut the offender – available if Kupe is on the team.
- Show her the power of the star – available if Prizma is on the team.
- If she wants a fight – let him get it – unknown.
- Sing her a serenade – unknown.
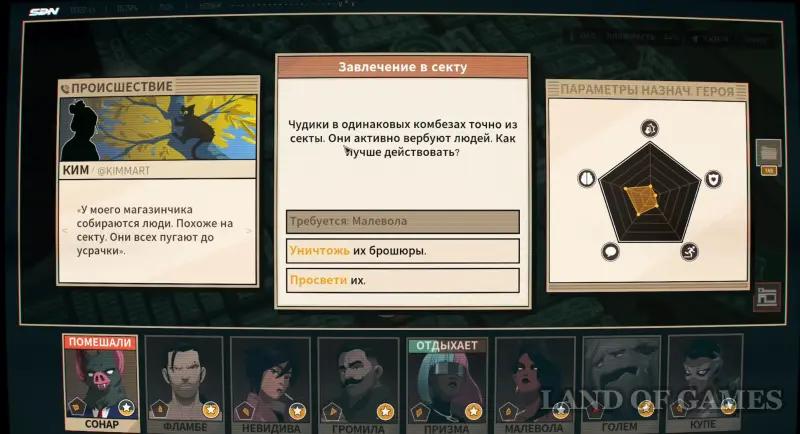
Lured into sect
We recommend sending Malevola or Sonar on a mission, and then select the following answer options:
- Persuade them to leave – available if Malevola is on the team.
- Destroy their brochures – unknown.
- Educate them – unknown.
- Resist brainwashing – unknown.
- Tell them about higher state of consciousness – available if Sonar is in the team.
Underground ring
We recommend sending Bruiser and Coupe or Flambe and Golem/Prism on the mission.
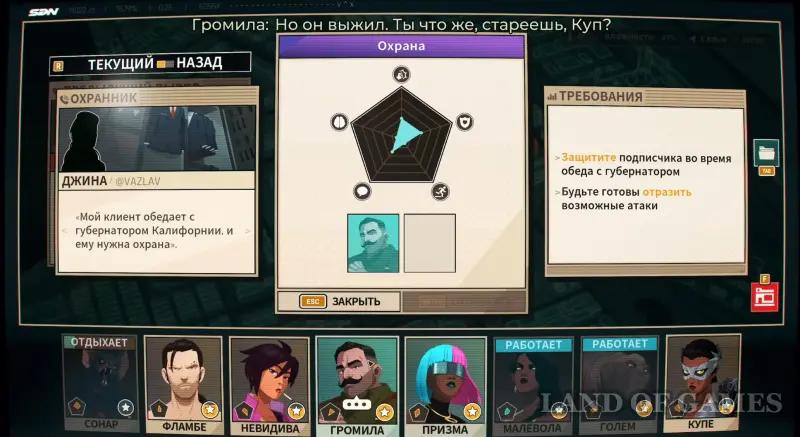
Security
We recommend sending Bruiser or Golem on the mission.
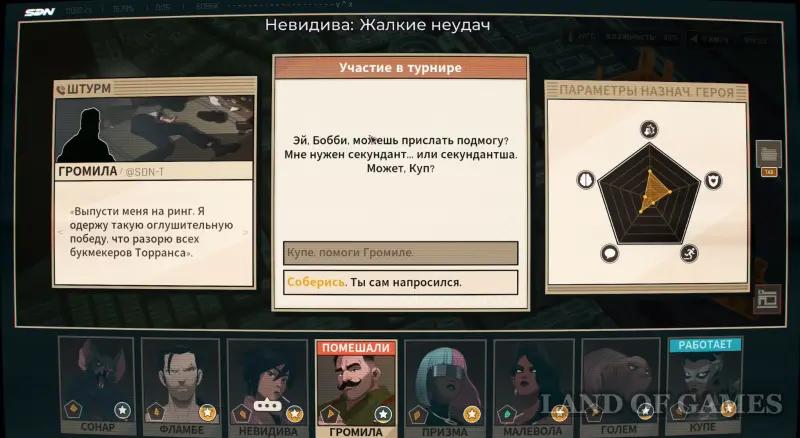
Closing the tournament or Participation in the tournament (The Brute will remember this)
If you select “Participation in the tournament”, then send the Brute to it, who, if successful, will receive 200% of experience points. However, he will need a second:
- Coupe, help the Brute – no skill check.
- Get yourself together. You asked for it – for success you need 5 units of stamina and above.
If you select “Closing of the tournament”then send Prism and Flambeau or Sonar and Malevola there. If successful, all team members will receive experience.
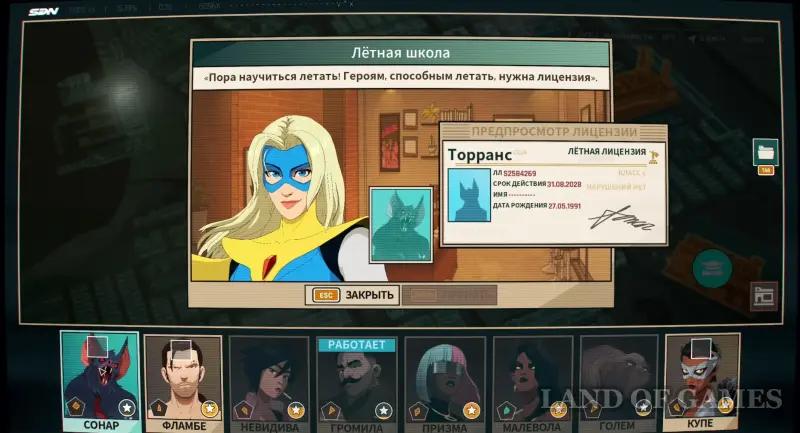
Flight School
We recommend sending Flambe, Sonar or Coupe on the mission. Will reduce the time it takes to move around the map. Note that you will have to kick out the Coupe or Sonar at the end, so take this information into account when choosing.
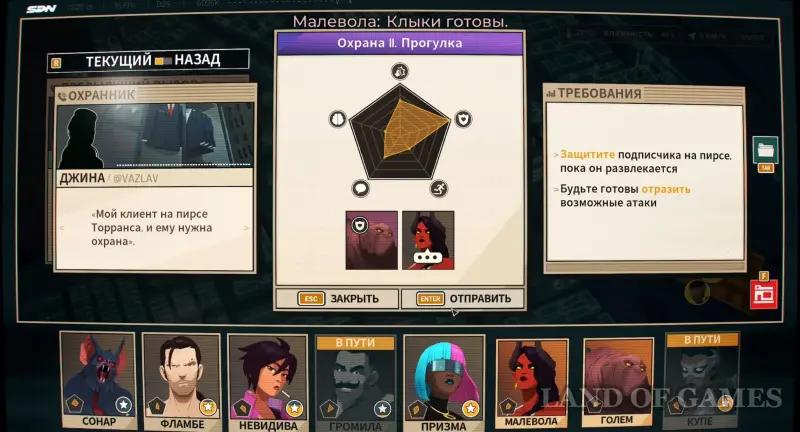
Security II. Walk
We recommend sending Kupe or Nevidiva or any other character with high durability/fearlessness on a mission, and then select the following response options:
- Disarm the killer – available if you have Kupe or Nevidiva in the team.
- Repel the killer – 6 units of fearlessness and above are required for success.
- Protect the client – for success you need 6 units of durability and above.
Debate with Stoiacello
We recommend sending Sonar and Malevola on a mission.
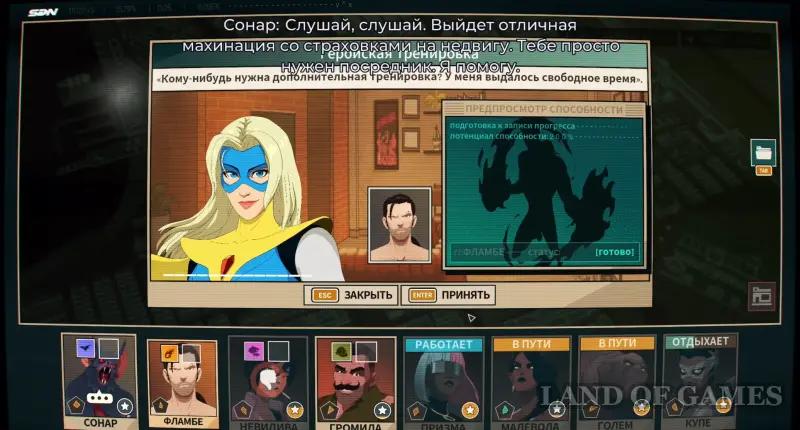
Hero Training
Choose any free character that you would like to improve at a given time.
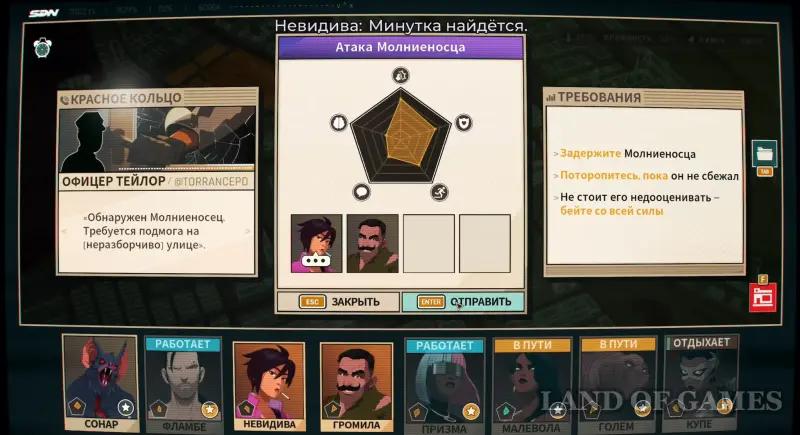
Attack Lightning Carrier
We recommend sending Coupe and Brute or Flambé on a mission to apprehend the supervillain.
Robbery bank
We recommend sending Flambe and/or Coupe on the task, and then select the following answer options:
- Repel the robbers – for success you need 7 units of fearlessness and above.
- Save the manager – for success you need from 7 units of dexterity and above.
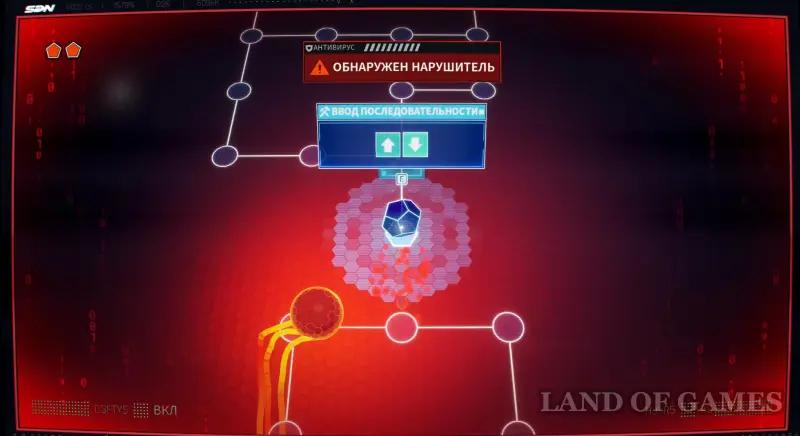
- Lock the robbers in the vault – you need to pass the burglary test.
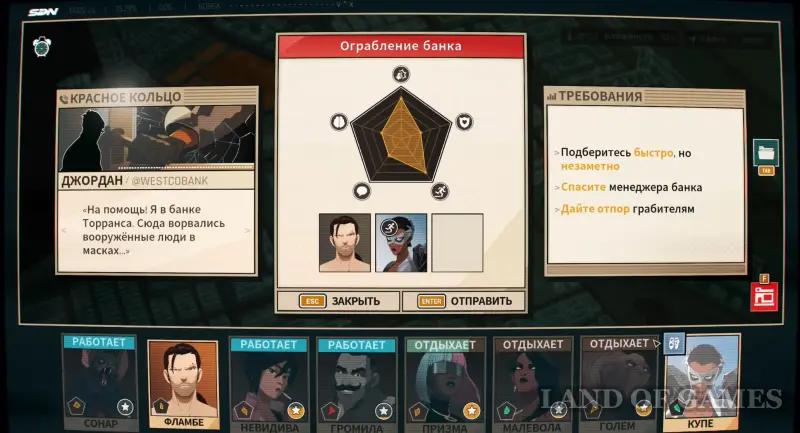
If you choose the last option, you will have to go through a short hacking puzzle. The main difficulty here will be that you will have to click on the arrows at random, since there will be no hints shown on the screen. Next we will indicate all the sequences for the hammers:
- Second hammer: Down, Right, Right and Up.
- Third hammer: Right, Right, Up and Right.
- Fourth hammer: Down, Right, Down, Right, Up, Right and Up.
This will end your second shift as a dispatcher, but Nevidiva will go somewhere.
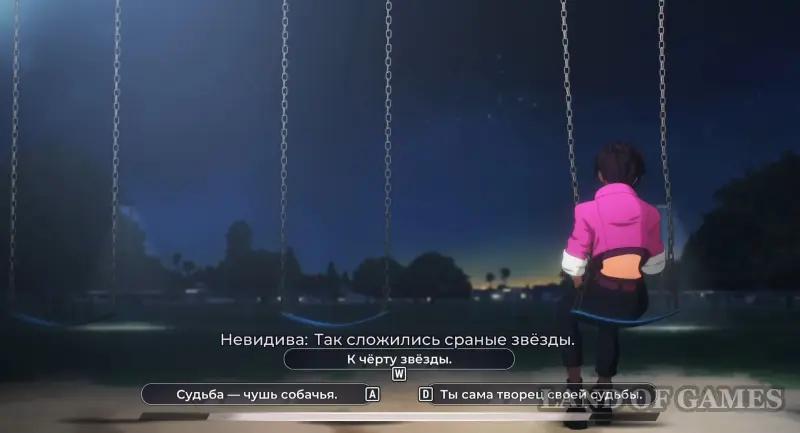
Help Nevidiva
We find Nevidiva on the playground. She will complain about her abilities. We answer her (she will remember this):
- Fate is bullshit.
- To hell with the stars
- You are the creator of your own destiny.
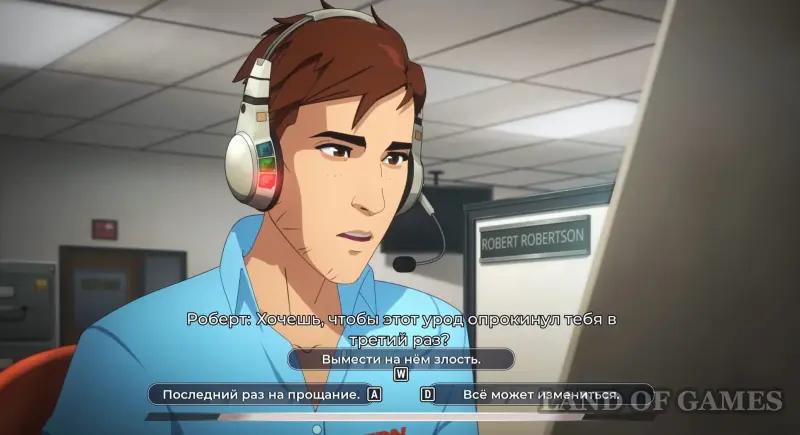
The Lightning Bearer will suddenly appear and we will offer You can't see it and grab it. We tell her:
- One last goodbye.
- Take your anger out on him (we'll get bad mentor points).
- Everything can change (we'll get good mentor points).
We'll start following Nevidiva in the jewelry store. We will need to perform some hacking tests. Let's start the first puzzle (we'll get good mentor points). Just move to the right and click on the arrows as usual, but this time you will need to do it quickly so as not to get caught by the antivirus (red sphere).
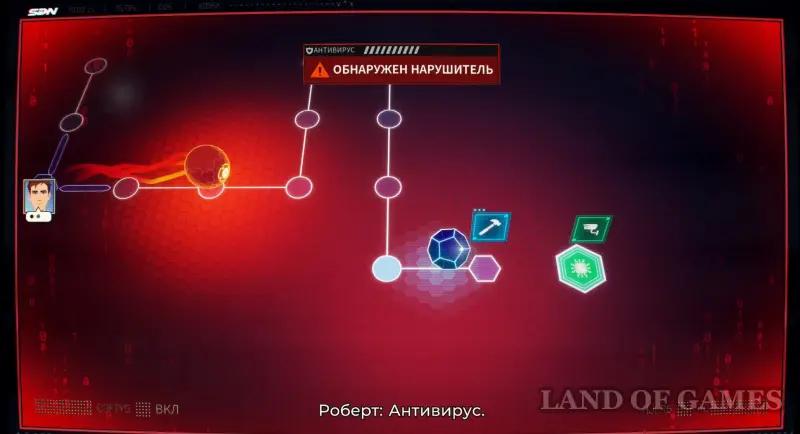
Next we beginsecond hack(we’ll also get good mentor points). Here, too, you will have to run away from the antivirus. To do this, after he appears, lure him into the second large square, which is located at the very beginning of the level (on the left), so that he does not have time to get to you while you are hacking the system on the right.
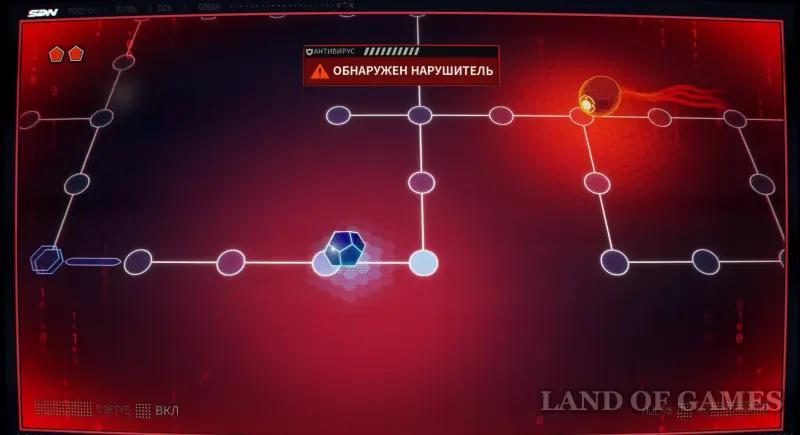
Then we take on the third hack(we’ll also get good mentor points). First, move down and stand on the very bottom edge of the square, waiting for the antivirus to arrive. Then we run upstairs and break the bridge, preventing the red ball from getting out. Now move to the green cell and complete the test.
Consequences: If we manage to successfully complete all three hacks, then we will be able to help Nevidiva deal with Lightning. Otherwise, the heroine will have to deal with him on her own. Nevidiva will remember this situation.
As a result, Nevidiva will be able to catch the criminal and drag him to the office. We'll talk to Blondie Blazer, who'll ask us what we think about it? We answer (she will remember our answer):
- No, it’s unlikely.
- I hope (we’ll get the points of a good mentor).
- Everyone has a chance (we'll get good mentor points).
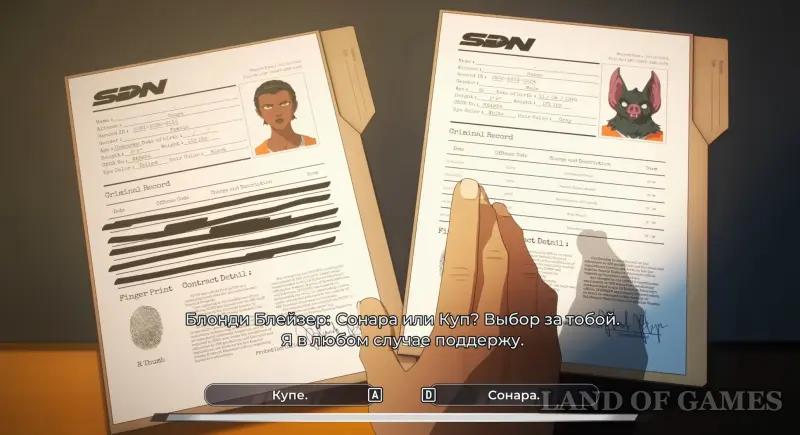
Whom to exclude from the team
Next, we go to Blondie’s office and decide who to exclude from the team (our decision will be remembered, and this will affect the entire further plot; plus, we will receive one of two achievements):
- Coupe
- Sonar
If we choose Coupe, we will see a cut-scene in which Robert will expel her and receive the Knife from her. We will worsen relations with Brute, who previously formed a good duo with Coupe. Plus, the secret achievement “But I supported Nevidiva…” will be unlocked.
If we choose Sonar, we will see a cutscene in which Robert will exclude him and receive Thread from him. We will worsen relations with Malevola, who previously formed a good duo with Sonar. Plus, the secret achievement “You'll be sorry, Robert” will be unlocked.
If we don't choose (that is, the timer runs out), the game will automatically exclude Sonar, and we'll watch the above video. This will be the end of the series, so let's look at the continuation in the fourth episode.