What makes a good BR player in Apex Legends
So, I don’t want to act like I am the end all opinion on this. While I would consider myself a top player, there are obviously better than me. There are also a lot of people putting in way more hours, and grinding all types of online tournaments and leagues.
With all that said, I wanted to share my opinion on two traits that make a good player, a good teammate, and what stats you should focus on to track your improvement. This is less about the obvious things, which you SHOULD practice (mechanical movement, aiming, etc.), and more about the intangible decision making process of a good player.
Prioritize Life
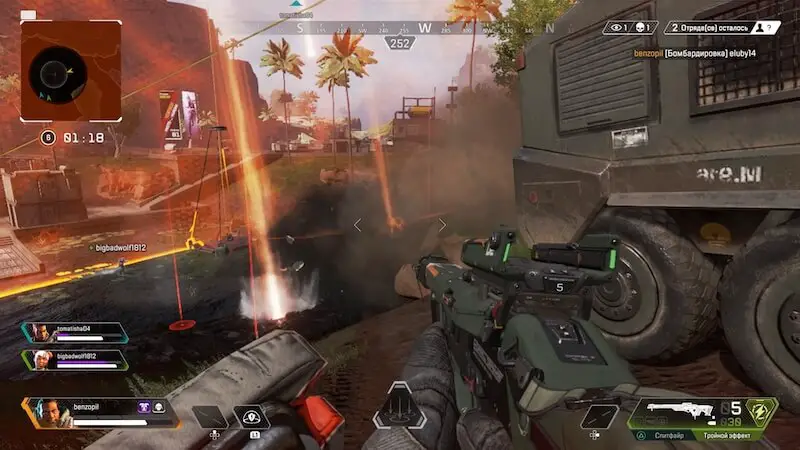
Battle royale is about staying alive right? This one is obvious. But I want to explore this concept a little deeper. If this guide is taken as a whole, there are a lot of things that build into an overall decision making strategy that is second nature to most top FPS and BR players. Prioritizing your and your team’s lives is probably the most important of all. So what does this mean?
Prioritizing life is about making decisions that keep you or your teammates alive. Take the following situations: Should you get that last shot that MIGHT knock down an enemy, or should you run behind cover and recharge your shields with a shield battery? Should you chase an enemy into a building when both of you are low HP? Should you ignore an enemy chasing your low HP teammate in order to secure a kill on a different enemy?
In most cases, the answer to these questions is the less risky option. Every fight is about optimizing your economy over your enemy. Think of it like a real time strategy game happening over the scale of a 5-15 second fight versus a 20-30 minute game. Is your enemy reloading? Do they have shields? Are their teammates separated from them? Every engagement should be a subconscious calculation of these types of things to help you make the right decision. Even though I said that the answer to the questions in the last paragraph were the less risky option, if you are following along you would realize there are situations where they can be the opposite. For example:
Should you get that last shot in that MIGHT knock down an enemy, or should you run behind cover and recharge your shields with a shield battery?
- No, don’t chase the enemy unless you are 100% sure you will get the knockdown without risking your life from their teammates shooting you, or the life of your teammates that might need help.
Should you chase an enemy into a building when both of you are low HP?
- This is probably mostly always a no, unless you know the enemy is reloading, alone, out of ammo, or you have some other type of economical advantage that outweighs the risk of you chasing him (like you have a teammate nearby to push too). Chasing kills is almost always considered a bad thing to do in any FPS. Time spent chasing an enemy that is no longer a threat to your team could be better spent helping your teammates with the other enemies in the middle of a fight.
Should you ignore an enemy chasing your low HP teammate in order to secure a kill?
- No, unless you don’t have to chase your target and can quickly transition to helping your teammate.
Things aren’t always black and white, and they never will be. Decision-making falls under the umbrella of game sense that some people just have, don’t, or don’t yet. It comes with experience.
The point of this section is that underlying all of your decision making, you should prioritize life. I don’t mean that you should always avoid chasing or killing enemies either, because dead enemies are the ultimate form of preserving your life. BUT, in those situations where things are hectic and there aren’t guaranteed kills/knockdowns to be had, stay alive. Heal yourself. Reposition. Help your teammates do the same.
You can always recover your teammate’s flags or re-engage when the fight is more in your favor, but you no longer control your destiny once you are knocked down, and immediately put your team at a disadvantage.
Prioritize Damage
Second in the decision making hierarchy is the prioritization of damage. Just like you have small economical metrics to “run through” in a 1v1, in a larger team battle, damage output is the most important thing. Even more important is focused damage. As we will discuss in the next chapter, team fights are about getting an advantage and quickly capitalizing on it. And the only advantage you should really care about is overall health pool of your team versus the enemy team.
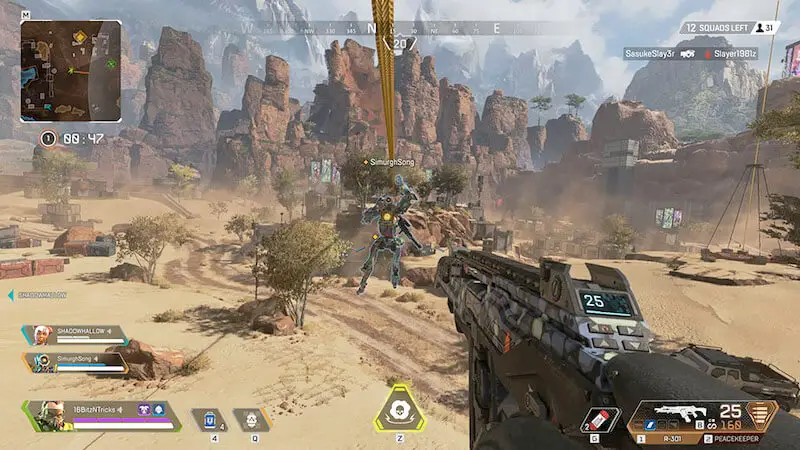
This time I am only going to focus on one example situation to elaborate on the point.
Imagine you get into a team fight and you get the jump on the enemy. You land some very good damage on the enemy before he realizes what is happening and immediately runs to cover (whether behind a rock, into a building, over a hill, etc). Instead of worrying about him getting away, shoot at his teammates who are equally unaware and standing in the open. This can all be in the first 5 seconds of a fight. Instead of trying to hit the harder shots on the fleeing enemy, go for the enemies who haven’t yet responded or are still sitting in the open. While you MAY knockdown the fleeing enemy, you can almost guaranteed inflict more damage on the others and give your team a massive health advantage to be aggressive and finish the fight.
As before, there are exceptions. If you can 100% knock down the enemy, you should always go for that, as having a man advantage is always better than a health advantage over another team. But, for the majority of situations you can’t, PUMP that damage, actively switch targets, and put the other team on the defensive.
Stats
So how can you tell if you are getting better? I personally think you should focus on your overall win rate and your ADR, or average damage per round(game). While there is plenty of reason not to overly focus on your stats, it isn’t good to pretend they aren’t important. Many players will try to discredit better players because of “RNG” of battle royale titles, or because they don’t get a chance play with premades. While there are elements of truth to those statements, having this mindset will only set you back. Good players overcome RNG over the aggregate of many games.
Better players will have higher ADRs, win more games, and get more kills — because they prioritize staying alive and doing damage. Better players will do this DESPITE the RNG elements of BR games. While I don’t mean to make you into a stat whore, and you shouldn’t be, you should try to keep track of these two stats to see if you are improving. Pay attention to them together as well. Winrate alone can be achieved by cheesy tactics like poverty looting and hiding all game. You can play conservatively and still have high kill games that doesn’t involve hiding from fights, but you can not achieve high win rates against better players by not learning how to do damage. This game borrows heavily from Fortnite where the team killing more enemy teams ends up with a huge gear advantage from cumulative loot of their enemies, so you don’t wanna be in the final team fight with white armor.
Note: Obviously there is more to being a good player than these two stats as well. Players have different styles, play different roles, and we shouldn’t take that for granted. Team synergy also plays a huge part in how well you can both pump out damage and stay alive.
Review
In summary, if you take away anything from this section it should be about importance of that quick decision making matrix that should always be playing in your head during engagements. Always consider who has the advantage and more importantly, if you are at a disadvantage, how to get out of it and reset the fight.
Rely on the traits above for what to prioritize in that moment, over time you will develop your own variations and the process should become as second nature as aiming, movement, and looting.
Life > Damage > Kills
I recommend checking out these communities:
Discord:
Apex.Pro — Currently seems to be the best “pro” scrim discord. This invite should work:
Subreddit:
https://www.reddit.com/r/Compapexlegends/
Compapexlegends — Competitive focused apex legends subreddit for following esports information, tips and tricks, meta content/discussion and questions
For stat tracking, and some “rough” leaderboards:
The TRN network now has some Apex stats tracking. Since there isn’t any public stats APIs yet though, the stat collection is rough. The leaderboards are equally rough due to lack of data. So take it with a grain of salt. Still, it is a good resource for seeing where you are — and I assume it will only get better as Respawn exposes more information.
https://apex.tracker.gg/
Note: Scrimming in Apex Legends currently consistent of synchronized queue drops so that you ideally get into the game at the same time as a group of other players. The idea is that you will have a more competitive game. Discord bots help organize the queue drops and provide information as to who all else is in the same game lobby as your team.
Stages of an engagement
After playing a few battle royale titles over the last few years, I have tried to summarize the stages of team fights into a simple process. Aggro -> Fight -> Closeout. Understanding and defining each stage, while inherent to most players, is still helpful to make you an overall better decision maker. As I mentioned in the previous chapter, there are a lot of recurring themes throughout this guide, so try to paint the bigger picture in your mind as you follow along. Also note that, while I am discussing this from the perspective of a team fight, THE SAME PRINCIPLES APPLY IN A 1V1 TYPE OF SITUATION. Forgive the caps lock but it is important to realize that the same decision making process that happens on an individual level should scale to your team’s decision making or for your team to make.
Aggro
The first stage of any engagement is what I call the “aggro” phase of the fight. It is also the most important because it sets the precedent for the next two phases. Engage the enemy team properly and you will win the fight without taking much damage, setting you up to loot quickly and move on. Aggro an enemy improperly and you may find yourself in a drawn out battle that leads to your team wasting resources, introducing the risk of being third partied (attacked by another team drawn to the fire fight noises), or worst of all — get your team killed.
So what is the aggro phase? In my mind, this phase of the fight is the culmination of recon to understand where the enemy team is, making visual contact with them, quickly identifying whether or not they are aware of you, and what you do with that advantage. As soon as the other team is aware of your presence, whether through visual or auditory clues, the aggro phase is over and you are now in a team fight.
Likewise, you may be the team getting “aggroed”, and not even get a chance to engage in this phase — being ambushed and going straight into a fight. The aggroing team always has the advantage for this reason, and you always want to be the aggroing team.
The most IMPORTANT thing about this phase of the fight is realizing whether you are the aggroing team, and QUICKLY AND ACCURATELY identifying if they have recognized your presence. Let’s look at an example of a typical team fight.
Say your team is coming out of a canyon onto higher ground over a city (like Cascades) and you see an enemy team running around looting the buildings. Your first reaction should be to begin moving in more of a stealth mode. This doesn’t mean you start hiding, you can keep pushing. Use trees, rocks, and other terrain to cover your push. You should also quickly identify if they recognize you. Do any of the players stop what they are doing and aim in your direction, or are they continuing to loot? One of the best indicators is if they are running AWAY from you. Usually this is the best chance to sneak up on an enemy team and do massive damage before they can react. It’s obviously harder to do vs better teams, but all types of situations can lead to momentary lapses in awareness which can give you the upper hand as an aggroing team.
So, you have found the enemy team and identified that they do not know you are pushing them. This next part is where I see the MAJORITY of new players making a huge mistake; they fire at the enemy too soon! You need to keep the traits from the previous chapter in mind. Don’t take a pot shot at a guy standing in a window of a building from long range. Even if you hit him, it’s going to be marginal damage before he goes behind cover, and now you have lost your aggro advantage as the enemy team can now react to your team. This mistake is not limited to long range pot shots either. Even if you are within shotgun range of your enemy, if they do not know you are there and you waste your shot on something harder to hit versus even 1-2 more seconds of repositioning or for your teammate to position to help, you are putting yourself at a disadvantage!
What is the better thing to do in this situation? Prioritize damage. It isn’t always going to be the same situation. Maybe you have a long bow or a kraber and you can snipe someone standing still for a brief moment as they loot a dead box. Maybe you can push your whole team up into mid range and engage with Wingman/ARs/SMGs/Shotguns. It’s going to be different for every situation, but the most important thing is to not waste your aggro advantage by taking risky shots, making unnecessary noise, or not being stealthy enough.
While there isn’t any single prescription that will account for the variables of all engagements, there are some things you can do to make your aggro advantage exponentially more worthwhile. COMMUNICATE! Ping or tell your teammates who you are engaging. Team shooting has been a very important aspect of competitive play in this type of genre since Halo games on the Xbox. 3 people focusing on a target is going to dispatch a full team much quicker than 3 people in 3 seperate fights. This is a lot harder to control for when the fight has started, as the fight can make things hectic and you can’t always predict your enemy, but when you have the aggro advantage, your team can position to take out one of the enemies quickly and basically start the fight with a 2 vs 3.
Don’t waste it. Get good starting damage. Follow up with grenades, follow up with aggressive repositioning to take new angles, put the enemy team on the defensive and minimize the damage you take in the process. But don’t forget to prioritize life. Just because you can sprint and slide past a rock to shotgun an enemy and knock them down doesn’t matter if you get knocked by their teammates and your team isn’t able to help you.
Note: Aggro advantage remains the same whether you are engaging an enemy team that is looting, or an enemy team that is fighting another team (also known as third partying). Make sure you are processing this information as you engage even in a third partying situation. Maybe you should go for the team that is winning instead of the team that has two guys knocked down? What is going to do the most damage and preserve your team’s life the most?
The Fight
Good players usually spend the least amount of time in this phase of the fight due to their ability to both Aggro better than average players and Closeout better than average players, but it is still worth talking about what this phase of the fight entails and how you can make better decisions during it.
Generally, I consider this phase to represent when both teams are on relatively equal footing (ie 3v3), each have some type of cover option, and no one is at a severe disadvantage yet (ignoring the aggro advantage). Your number one goal at this stage of the fight should be getting a knockdown on an enemy, or some other type of significant advantage such as confirming that you have done massive damage to a few of the players, forcing them to either retreat to heal or die — then proceeding to closeout the engagement.
So how do we get that advantage? Well, sometimes just good aim will do it for you. At the end of the day there are still mechanical skill advantages that can outplay even the best decision making. But, given equal footing, usually the most aggressive team is going to win. The team sitting inside a building while others push from all angles is usually going to lose. Buildings are death traps. Why? Because the attacking team always knows where the defending team is but you may not know where they are. They are allowed more freedom of movement while you are confined to an area. This same thought process plays out anywhere on the battlefield. I see many teams just hunkering down in their same locations that they begun the fight in, never repositioning or reseting the fight even when they are at a disadvantage. Better players will engage by picking an angle, trying to get good damage/a knockdown, and quickly realizing if it is going to happen or not before going back behind cover and choosing a new position to attack from. Generally, this looks like your team “enveloping” the enemy team before eventually getting an advantage and finishing them off.
The following series of pictures represents this concept. How the more mobile team in red overwhelms the less mobile team in blue.

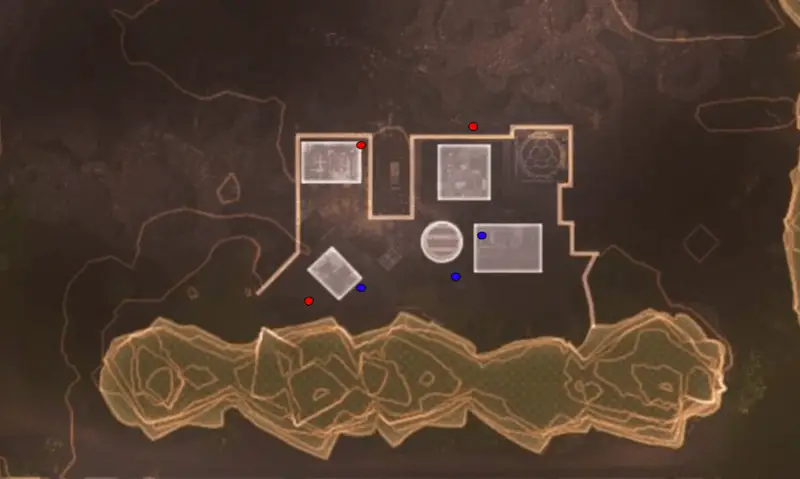

As you can see from that series of pictures, the more mobile team takes advantage of more angles, which pinches the enemy and gives the red team more “options”. For example, they have WAY more areas to retreat to than the blue team does just from the way they are pushing. Even if the blue team lands some good shots, one of the red players can counter the shots with their own flank or, worst case scenario, they can retreat quickly with different angles of covering fire. This is a process known as “resetting” the fight. Just like a sports team re-evaluating their strategy at half time, teams need to constantly be evaluating their advantage in a fight, and trying to reset if they aren’t winning. The process of resetting can sometimes be a personal thing, IE you retreating from your flank for quick cover and heals. Sometimes it can be an entire team thing, IE your whole team retreating to either heal, or re-engage from a different angle to get a more advantageous fight.
Let’s play out that concept with the same illustration by taking a few steps back and seeing what the blue team could have done to flip the fight in their favor by quick reactions and mobility.


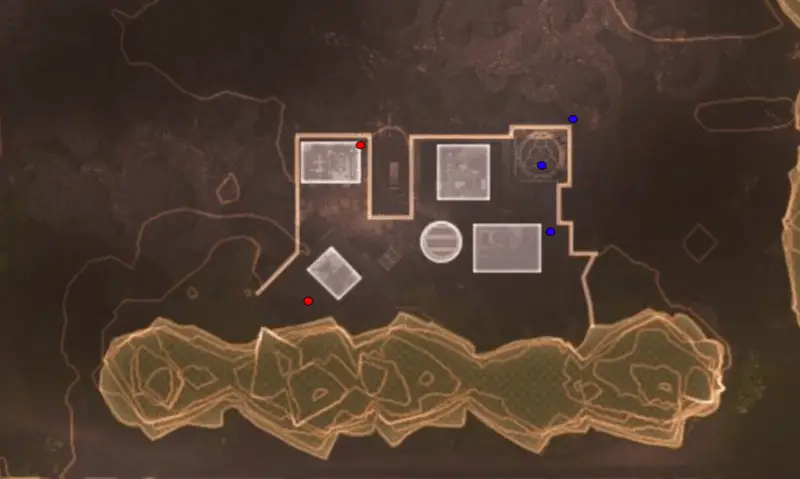
In this situation the blue team realizes that they are at a disadvantage and quickly “rotates” out, or resets the fight, in order to re-engage at slightly different angles, ultimately being the more mobile team and catching the red team off guard.
Now I get it, these are pretty simple illustrations for a VERY fluid concept that happens in a matter of seconds during actual games. This type of quick decision making is based on years of competitive mindset and building game sense, but understanding what you need to be doing is half the battle to getting better.
To summarize: The fight phase of an engagement is categorized where each team begins on somewhat equal footing, one team gets some type of real advantage (damage, knocked player, etc), and then steps on the gas and enters the close out phase. Your team should prioritize having an advantage through aggressive maneuvers and coordination OR proactive resetting of the fight and re-engaging at different angles (both individually and as a team).
Also remember: prioritize your life. Don’t chase kills. Sometimes just getting a knockdown and letting your team close out the other two enemies is better than trying to do it all yourself and ending up down and now at a team disadvantage.
AND MOST OF ALL DON’T BE THIRSTY. Magazine sizes are way lower in this game and you should only kill downed enemies when you aren’t putting you or anyone on your team at risk. Always prioritize live targets over knocked targets.
Note: There is a time and a place for eliminating knocked opponents. A few examples:
- Hot drop with low ammo, health, armor, etc. Safely killing an enemy in an early FFA situation is necessary sometimes.
- Pressuring the remaining enemy team to “come out of hiding”
In general though, leaving enemies bleeding out is the best decision during chaotic fights. You do not want to be the person who gets killed because you just emptied your clip into a downed opponent.
Closeout
The final stage of the fight is when you have secured an economical advantage over the enemy team, you eliminate them all, and MOST IMPORTANT, you loot them.
Sometimes this is easy; you knock one guy, knock another and kill the last one all in a matter of seconds. Pure execution by the superior team. I am not going to focus on that. I want to just touch on situations where closing out a fight isn’t easy, and more importantly, looting after the fight.
Ultimately, as an individual on a team, you want to focus on ending the fight while taking as little damage as possible. That means not chasing people solo when not necessary, waiting a few extra seconds for help when help is available, and other general “prioritizing life” type of decisions. Coordinate with your team through trading (will touch on later), use utility and grenades, or just overwhelm the final enemies with numbers and firepower.
Even before finishing the enemy team, your team should be thinking about the next threat. Third parties could be closing in fast because of your gun fire attracting them. Because of this, you should usually not jump straight into loot boxes unless absolutely necessary for healing items and fresh armor or ammo. Instead, heal up quickly while taking a quick look around to make sure you are safe.
Coming out of a fight with more health means less time healing. This also means less time looting, which results in a higher chance of being the aggressor on the next enemy team, vs being ambushed by a third party. Beyond that, you should be optimizing who does what after a fight based on the same principle. Don’t make your teammate with 20% hp and no shields resurrect your knocked teammate while you are at full health shopping for an extended heavy mag. One caveat to the last note: if you are still actively engaged by another team, the full health team member should probably be the one fighting off the enemies or helping to enable a retreat,otherwise the previous comment applies.
Note: Closing out fights can get tricky when in multiple party fights (ie 3 or more teams). The best advice is to communicate well with your team and focus on one team at a time if you have the option. Rotating as a team towards the target team and delaying the other teams or “fighting them off” at the same time. I have had many situations as Bangalore where I solo hold off a team with smoke grenades and my ultimate while my buddies finish off the first team we were fighting and heal. You have to be quick and remember to neutralize the other teams advantage if they have one whatever way you can.
On Looting
I reserved this part of closing out its own section because I think effective looting is the difference between average and above average or great players. Let me say this. Your goal while looting should be to get done AS FAST AS POSSIBLE. You are not at Walmart shopping aisle by aisle. The longer your head is stuck in a loot menu the higher chance you have of getting aggroed by another team. Further, upgrading from a blue stabilizer to a purple stabilizer doesn’t mean jack shit when you are starting your next fight with no shields because you were too busy changing out a Flatline for a Prowler, or trying to figure out if you want to use the triple take this game. There will be chances to loot, but do them smartly, and do them quickly.
I will touch more on this in the loadout chapter, but having a familiar and reliable loadout is partly to increase loot speed. It is why you see so many “pros” running similar weapons like r-301s, peacekeepers, and wingmans. It is because even with no attachments, these weapons can still be a very reliable gun for a skilled player. Keep this mentality with your loadout. You usually aren’t going to win or lose a game based on how kitted you are, but you will lose a game because you cared too much about looting at the wrong time.
In another vein, another way to speed up your looting is to not “over analyze” your loadout in the loot screen or while looting in the world. Grab the good rare items and drop them later if you don’t need them. It is way easier to drop unneeded loot, swap weapon attachments between guns, and other inventory management while you are running to your next location instead of standing still. Think less, loot faster, drop items without regret.
Putting it Together
So the summarize this chapter, games typically follow this pattern.
Aggro -> Fight -> Closeout. Rinse and repeat.
During the aggro phase you should focus on making the absolute most of your surprise advantage. For the fight stage you should be working with your team to get an advantage as soon as possible, and finally you should close out the fight as quickly as possible and reposition to either aggro the next team or avoid third parties. This doesn’t mean all fights will go quickly, you should still try to minimize risk, but you should be trying to do them as fast as they will allow.
Note: This is a very static analysis of a somewhat controlled team engagement. There are TONS of different types of engagements though: hot drops where you are in a massive free for all immediately, endless third parties that never give your team a chance to fully recover, and so on and so forth. But these principles still apply in those environments. Reset, get advantages, and loot quickly. It’s the same pattern whether a hot drop, a team vs team, or 1v1 fight.
Positioning & Awareness
The following section is less of a continual narrative and more of a bunch of individual opinions and strategies, things I think you should know.
Positioning
In my mind, good positioning is broken up into both the micro (individual positioning strategy during a fight) and the macro (overall team positioning strategy during a game).
Micro
- Get the high ground. If you are chasing an enemy through a city, start by clambering onto roofs and trying to shoot through windows before running into peacekeepers. Save the hyper aggressive push for guaranteed kills
- Use natural terrain. When you are moving out in the open, whether in a fight or not, make sure you are moving alongside canyon walls, rocks, behind trees, from building to building. Always try to push the top side of a hill, being above your opponent usually gives you a better angle to work with, where you can see their whole body but they can just see your head.
- Don’t stack on your teammates. You want to be in a position you can help them without being on their nuts. It’s more about “viewing lanes” than it is about physical proximity. Communicate with your teammates when you see they are getting overwhelmed, tell them to rotate into your vision from your position and bait the enemies into your fire.
- Further on teammate stacking, be aware when your team IS stacked too much and try to correct it, don’t expect other to always pay attention.
- As mentioned in the previous chapter, use different angles. If you peak over a rock and get a few shots off, run around to the otherside of the rock and push up to another cover option for your next shots. There is no guaranteed prescription for this, and you can’t always do it, but someone without movement options is usually going to lose. In many cases, even if you aren’t full health it is almost better to move to a new position to flank than it is to heal. I know this violates my “prioritize life” rule, but there are times when you have to understand the flow of battle and make these decisions.
- STAY MOVING. Opponents can’t see through walls (hopefully). Your biggest asset in a BR is the ability to catch enemies by surprise. You don’t want many true 1v1 duels. You want easy, cheeky kills because your movement mechanics are so much better than the opponents.
- Make frequent use of Wraith and Pathfinders repositioning skills. Don’t over plan it, sometimes just moving at all is better than the “perfect” reposition. The worst thing you can do is hold your ult and never use it because you feel like it would be wasted. Not using it is wasting it! Use them on cooldown when you engage enemies.
- Don’t be afraid to pull off MASSIVE flanks. Around canyons, around towns. If your team has confidence in each other, its OK to be relatively spread out. The most important thing is that if you are pushing out very far from your team, don’t overcommit. Make sure you are running the calculus in your head constantly. Always be evaluating escape plans if you get third partied while you are far from your team, or the enemies recognize your move and counter it.
Macro
These tips may be less important in the current pubstomping meta, but there still may be opportunities to use them and they are good to know.
- When aggroing enemy teams, once again try to choose the path from the high ground if you have the option
- Use redeployment balloons to actively land on an enemy team. If you are the aggroing team or the reacting team, it can be used to effectively mess up your enemies advantageous position. Just remember there is a few seconds delay to pull out your weapon after landing
- TREAT THE CIRCLE AS A TEAMMATE. Use it to your advantage. When you watch many good players streaming you will actively hear them talking about “zoning” enemies out of the circle, or gate keeping them. If you are engaged in a drawn out battle outside of the new circle while the old circle is rapidly closing, position your team between the enemy team and the new circle instead of pushing them directly. They will be forced into you and can’t avoid the fight.
- One classic strategy you will see many good BR players doing, whether consciously or not, is “wrapping” the circle’s edge. By playing the edge of the circle and pushing around it in either a clockwise or counter-clockwise rotation, you effectively sweep the circle for enemy teams. This gives you good security because you can usually be confident in not being ambushed from behind or from the circle side, leaving enemies only to be in two directions: in front and towards the inner part of the circle. Good positioning is the first part of the awareness battle. Note: This is way more useful in final circles than early circles.
Awareness
Once again, this is a series of topics, take each individually. Also, it isn’t focused on just “positioning awareness”, but things you should always be aware of in different contexts.
Pay attention to the deployment route
Recognize what path the deployment ship is flying in the beginning. Pay attention to where mass bulks of people are going near where you drop. These will be the teams you want to engage early to establish control on a portion of the map.
Remember the deployment route later in the game as well when circles require massive repositioning. How many teams should you expect from each direction? Usually at least one for every lootable area that more than one team lands at. Combine this knowledge with the “circle edge sweep” technique as a team to aggressively hunt out teams when there is no active firefights to pursue.
Know where your teammates are
Don’t be ignorant to how spread out you are, its ok to be out solo, but make sure you have a “zone of safety” in your mind in case you need to retreat. Short of random third parties, aggressive players can usually always retreat backwards down the same path they got aggressive on when things get too heated.
Further, communicate with your teammates when you can help them and they don’t know it. It is always better to have a teammate run towards you to bait an enemy into you than to run in a building where you can’t see the action
Know when you are losing
Another huge issue I see from newer players is they don’t know when they are in bad situations. How many times have you heard things like:
- “Oh shit there were two there”
- “Wow how did I die so fast”
- “Damnit, he had a peacekeeper”
- “I just got killed by a random third party”
The excuses are endless, but at the end of the day if you can’t take blame for your mistakes then you will always find excuses. What you should be doing is developing that game sense to understand when you are in a losing situation. This could be a 1v1 where you have missed too many initial shots. It could be a drawn out teamfight where a third party enters. Or it could be a head to head team fight where your team takes way too much damage to early. In all cases you need to be willing to hit the “oh shit” button, and try to reset the fight.
Take each example:
- 1v1 where you miss shots. The worst thing you can do is continue aiming down the sight, even strafing, a player aiming down the sites is an easier target. Crouch shoot. Quickly turn around and run to cover/slide away. Or even switch weapons and aggressively hip fire. DO ANYTHING but remain in that 1v1 shootout that you are already behind on.
- Third party enters drawn out teamfight. Your teammates are weak. Communicate this fact. Sometimes it’s ok to say “Hide, heal up, get in a house or something and stay tight”. When shit hits the fan you want to immediately go into a life preserving mode individually and as a team.
- Team takes too much damage early in a fight. This is similar to the last example, but back out and reset. Use abilities to slow the enemies down. Communicate with each other who is healing currently and who is able to trade some damage to the other team. In the most drastic of scenarios, do not be afraid to run from which you came and get as far away as possible. Good teams will chase you. Use that to your advantage, once you are able to heal up a bit or you have abilities come back off cooldown — turn the fight when they aren’t expecting it.
Treat no information as information
Similar to the last point. There is no excuse to “not expect” the unexpected. If you don’t know how much health or what weapons an enemy has, play slightly more cautiously until you know. This isn’t a drawn out process, it’s just a few seconds of mental alertness while being in a fight.
Look at the enemy, not the crosshair
Some of the best advice I received during my years of playing CS:GO was that you should be focusing on the enemies head, not your own crosshair. While most people think they may do this, the advice isn’t about doing it subconsciously. If you consciously think to yourself “look at his head” while you are in a duel, you will inherently focus more on the enemy player and it will slow down the fight for you — think of it as some new age hippy shit. There is no reason to freak out. Players like shroud stay cool calm and collected even in the most hectic situation. The worst thing you can do is to start spraying/spamming your weapon without deliberate aiming.
If you recognize that you are missing shots and so is your enemy, take a very quick (milliseconds) breather mid fight to consciously recognize you are missing. Stop shooting briefly and adjust your aim. Continue shooting. These mid-duel adjustments are things many newer players just don’t do.
And remember: dying isn’t the worst thing ever. If you play with teammates who are toxic about this, they aren’t trying to get better. Find a new squad. While you should always want to win, eliminate the fear of failure and you will have a new confidence in every 1v1 you take.
Keep up with zone control
Your team should constantly know what areas you have secured recently enough that they should be safe, where other teams are based on gun fire, and where other teams might have rotated because you haven’t been there in a while. When the zone is larger this is harder, but towards later circles you should be constantly checking how many squads are left, and doing the math based on where you know other squads are currently.
Know you can’t always help
If you hot drop into a city and get no guns or finish an opponent and have no ammo left, it’s okay to not help your teammates fight. You should be scrambling for ammo/health/whatever you need, even if you have to quickly sprint to a new town to do it. Getting knocked out is the worst thing that can happen, and very rarely will you running at an enemy and punching him going to win a fight.
But, there are times where punching will help. So don’t always rule it out 🙂
Pay attention to armor
Use the in game “stacking” damage indicator. It shows you what color armor the enemy has. Use this. Pay attention to your own armor. Knowing your enemies armor level and if there is any energy bars in it due to damage, is just as important as knowing their weapons, or if they are reloading.
Try to not be aggressive in early hot drops or fights if you don’t have armor yet. This is incredibly important. Try to use single cell energy repairs as frequently as possible during a fight, they only take a few seconds. Pick up armor off the ground during firefights if your current armor is depleted, even if it is worse rarity. You can always pick it back up after you win the fight.
Team Synergy & Trading
This section is less about finding a stable squad that you can build synergy with and more about how you as an individual can find synergy with anyone you play with. There are important concepts that you should be aware of in team-based shooters than you need to master to be a good player.
Focus fire
This is obvious, and I have mentioned before, but a team focusing on one enemy is more effective than a team in 3 seperate duels. When you have the opportunity, be specific with your pings and call outs.
“I am attacking Bloodhound” is better information than, I am attacking the guy on the right!
Communicate status
Alert your teammates to damage you deal. You may not be in a position to capitalize but they are. Let your team know that the Bloodhound has no shields, or you just head shot him.
Likewise, constantly communicate your status:
- “I just got wrecked, ducking out to heal”
- “They see me, I am repositioning”
- “I’m going on a long flank”
- “I’m safe right now but there is a guy below me”
And I get it, a lot of you probably do this already, but it’s still important enough to touch on. What you probably aren’t as good about though, is listening. Its a problem many people have in daily fast-paced life, let alone in a fight where you are possibly sliding, diving, shooting, and maybe dying. Being a conscious listener, paying attention to pings; you need to be able to recognize the value of this before you become a complete player. Do not let your team die because you were looting instead of listening to their calls for help. Likewise, if you need help urgently, communicate it urgently.
Trade
This is a topic that many CS:GO players understand, but I want to break it down into two different principles. Trading lives/knockdowns, and trading damage. Both are separate concepts and should be used. The latter will be used much more frequently.
Trading lives is pretty simple. You know where an enemy is, one of your teammates pushes with the hope to kill the enemy, but the expectation that they will get knocked down themselves. The plan is that their teammate will follow up the push and capitalize on the distracted player to get the “trade”. This is the most familiar trade from the CS:GO world.
Trading damage is a bit different, and it is more common in the Destiny and Halo genres than games like CS:GO with faster TTKs (Time to kill). With larger health pools and people having the ability to heal up quickly, many times it makes sense to work with your teammates to push enemies in an aggressive, but conservative way. Pay attention to what your team is doing and play off of that. If your teammate pushes and exchanges fire with an enemy, assuming he takes damage as well, he should have the opportunity to fall back while you simultaneously peek from a different angle to finish the enemy. This type of thing happens all the time in FPS games, so it isn’t always a conscious plan. BUT, if you make a conscious effort to play like this, and communicate the status, you will become an overall better player.
The overarching theme for both of these scenarios is that it is OK to bait your teammates! Just do it with purpose. Likewise, it makes sense a lot of the time to tell your team to bait you! Fights happen quickly, you want to make your opponent make mistakes. Sometimes the most dangerous person on your team is the one with no health remaining, running away from death, because those are the times that over aggressive enemies will chase and find themselves in a disadvantaged situation. Recognize these types of scenarios and turn them in your favor.
Loadout
We are nearing the end of the guide and I hope you have picked up on the overall theme I am trying to communicate: be a cerebral player. All of the previous sections in some ways are part of a bigger decision making strategy that all good players share, mostly learned through years of experience.
With that said, I wanted to quickly touch on weapon usage in Apex Legends and a quick weapon tier list. It is important that you understand that things should be flexible. Any weapon is better in the hands of a good player than a bad player. You shouldn’t always expect to run the same loadout, but having a consistent loadout is helpful for looting faster and having consistent duels. My general process is to run a similar weapon when possible (currently the wingman, for obvious reasons), and use my second weapon for variety. Sometimes I enjoy the Hemlock, sometimes the scout or longbow, sometimes a SMG or peacekeeper. Hell, sometimes I just keep the gun that got me out of a shitty situation in a hot drop scenario. If that Alternator earns its keep in the beginning of the game, I will sometimes keep it for the rest of the game just for the fun of it.
In general, you should prioritize having a dependable weapon. This is something that can compete at longer ranges, but be GOOD at mid range and can compete in close ranges. Right now this is the Wingman for most people, but other guns that might be ok: R-301, Hemlock, Scout, Spitfire, etc. Your dependable weapon is going to be the one that you feel comfortable winning duels with.
Your secondary weapon should usually be to add flavor or give you options during engagements. Maybe you want to snipe this game, maybe you want to run a scout so you can poke enemies from distance, or maybe you want a SMG or a Peacekeeper so that you can close out enemies faster when they are retreating/hiding to heal.
Try to carry at least one stack of grenades, you will know when you need to use them.
For healing items, aim for a good variety. A stack of syringes and single energy cells, plus a few medkits and energy batteries, and 1 phoenix kit, is a great loadout that lets you use different healing items depending on what you need.
Pay attention to your ammo counts. SMGs and ARs need more ammo reserves than Wingmans and Peacekeepers. No reason to run around with 350 rounds of heavy ammo just for your wingman, use the extra space for grenades and utility items.
Initial Weapon Tiers
As with the character tier list, this isn’t intended to be the end all discussion. Just a simple high level overview of what weapons I personally tend to have better results with. With that perspective, I am presenting them from a “dependability” context. Also, make sure to check out Mercules’ TTK weapon breakdown spreadsheet that I link to in the last chapter.
Most dependable
Wingman
- Very high alpha damage (aka how much damage one shot can do)
- Great for team shooting
- Competes in all ranges effectively with no damage drop off
- Doesn’t really need much upgrades to be lethal
- Good hip fire
R-301
- AR with great range
- Very easy spray control
- Good damage
- Good hipfire
Hemlock
- Insane bullet velocity, this thing shoots lasers
- Good in both single fire and burst fire mode, burst fire can even make wingman shooters question their decisions in duels
- Good hip fire
Peacekeeper
- Like the Wingman, doesn’t even really need upgrades
- Very high alpha damage
- Good for closing out fights/pushing aggressively
- Main drawback, especially if you are running with a Wingman, is it leaves you lacking at times in longer range fights — Even though it is top tier, this is still more of a “secondary” weapon
Mastiff
- Probably the best shotgun
- Impossible to miss with, basically a peacekeeper on steroids
- Fast fire rate
Situationally dependable
These are good secondary weapons or primary weapons if you don’t have other options yet, or they get kitted out well
Prowler with select hop up
- Insane DPS
- Probably the best “SMG” for close quarters
Scout
- Very good damage, incredibly easy to kill an enemy running at range
- Can be good in close quarters as well with extended magazine, try running it with a 2x for good results
EV-8
- While this auto shotgun falls off late game, it is way more forgiving than the peacekeeper. Use it to help clean up and close out fights
Longbow
- Probably the best sniper short of the Kraber
- Good damage
Kraber
- THE best sniper
- Capable of collateral damage
- 1 shot potential
- Can be a liability if you can’t aim though
R-99
- Arguably better than the R-301 for some people, I find it lacking at range though
- Great hip fire
- High DPS
Spitfire
- I treat this as a AR version of an SMG
- Incredible at spraying down a group of clumped enemies
- Good range
- Very good magazine size
- Could qualify as a primary weapon
Devotion
- One of the Highest DPS in the game
- Mainly limited by its hard to find ammo and ramp up speed, which is why this is relegated to more of a secondary weapon
Triple Take
- Insane bullet velocity
- Really good with low powered optics in the mid range, you can poke peoples faces for days
- Doesn’t burn through energy ammo like the devotion
- Biggest con is the hop-up charge time just isn’t very useful, I almost like it more without the hop-up
- I think of this gun as a more powerful scout, but weaker longbow (just with a higher rate of fire). Good for poking enemy teams at range
Flatline (changed recently)
- Moving this gun up a tier. After seeing Dizzy’s tier list I gave more of an effort to try it. I still think the Hemlock does better, the recoil is much harder to control at longer ranges. But at mid/short range this gun can do very good damage and is easier to control.
Least Dependable
Alternator / RE-45
- These aren’t terrible SMG options, but once again they are outclassed by others. Their small magazine size and damage leaves them desiring
- Fully kitted they become more of a threat, but as mentioned before, we don’t want guns that require fully kitting. If it happens, so be it, but you shouldn’t be shopping, you should be killing
Havoc (new)
- This gun doesn’t seem to be that great.
- Decent range and damage in full auto mode, but hard recoil and slower bullet velocity
- Turbocharge hop up makes this gun seem like a weaker Devotion when compared head to head
- In single fire mode with the select hopup, the charge time makes this gun seem not very attractive and the damage is not very rewarding for your patience and aiming
Shit Tier / Not Dependable at all
P2020 / Mozambique
- Use them if forced, but overall switch out these weapons when you get the chance
Pro Tips Mechanics & Extra
There are countless video examples of most of these on youtube, if the source I provide doesn’t do a good job. If the text descriptions aren’t enough, treat this section as just a starting point!
Turn off music volume
The ingame music plays when you are landing in the beginning of a match, and during hot drops this can impede your ability to hear people landing near you and their footsteps. It may last only a few seconds but this time is crucial.
Loot fresh armor vs repairing old
Usually when you kill an enemy you can loot their armor with full energy bars. Not sure if this is a bug or not but use it to your advantage. Don’t waste energy cells on your old armor just to upgrade it to a better one right after a fight. This goes even for armor of the same type. Swap your depleted blue armor for one out of a dead enemies loot box and spend less time looting/healing after a fight.
Pro tip: Do it in the middle of a battle! Energy cells take time, if you are in a fast paced battle (for example a hot drop), pick up armor off the ground/dead enemy even if its less rarity than your current armor. Some armor is better than armor with no energy bars. You can always go back and get the better armor recharged once the fight is won.
Shooting / Kicking Open Doors
This should be something everyone knows. It’s pretty straight forward. You can kick/melee doors open. After two kicks the door will be destroyed. This can be useful when knocked enemies are trying to block you in. You can also shoot doors open by aiming at the door handle. The latter is incredibly useful since you don’t have to be in melee range to open a door.
Destroy Caustic’s traps with no gas
Most people know you can shoot Caustic’s traps to explode them safely. But if you shoot the red part of the trap on the bottom, it will explode with no gas. Another reason he is lower tier.
Faster reloads
This is less of a pro tip and more of something to know. Guns reload faster when they aren’t completely empty. Reloading with 1 bullet left in the mag vs 0 is faster. Not the most useful information, but maybe it will strike you in a moment of need.
Slide jump
You probably have done this already, because it’s intuitive, but you can get much more distance on your horizontal jump at the end of a slide. Very useful for movement in a lot of situations.
Ignore fall recovery animation
If you time your melee right as you are hitting the ground from a long fall, say from jumping off a cliff or building, you can ignore the fall animation recovery time and get in the fight way faster. Try timing this slightly before landing so that your melee animation ends right as you are on the ground.
Fast Weapon Switch
You can eliminate weapon switch time by tapping your crouch button while selecting the new weapon (or cycling weapons). Its very easy and you don’t even need to crouch fully, just tap the button.
LEARNING AND MAKING THIS MUSCLE MEMORY is going to be a HUGE ADVANTAGE in fights. I would argue this is the most important mechanic to learn right now. I actually hope they don’t patch it out, but we will see.
For further explanation see this video
Double Kick Doors
Coordinate kicking blocked doors or doors with enemies behind them with a teammate. This will instantly destroy the door and surprise the enemy versus the normal two kick time.
Door Control
Aside from shooting handle/kicking doors, holding a door with your body can provide an invaluable delay. You can heal a bit in the time it takes someone to do two kicks, or on their first kick open the door and shoot them while they’re stuck in kick animation. You can do this while downed as well and sometimes delaying an enemy is of great help to your team.
Be active when you are downed
Sometimes you have to face the fact that you are knocked out. Instead of raging here are a few tips to help your teammates who are alive when the battle
- Trip up the enemy. Collision hitboxes are real. Walk into their legs, prevent them from strafing
- Use your shield for your teammate to crouch behind in between strafes/wingman shots/peacekeeper shots/etc
- KEEP PINGING! You can provide valuable information on enemy movement while downed, don’t forget the fight isn’t over
Glide further from hot air balloon
THIS HAS BEEN PATCHED OUT, WILL REMOVE FROM GUIDE IN A FUTURE REVISION
Heal hop
Heal hopping is the act of using momentum of sliding to start a source engine style bunny hopping chain. This is mostly only useful while healing to counteract the movement reduction of using healing/shield items. The general idea is to sprint, and start sliding. After starting to slide, press the healing button, continue holding slide and forward, and spamming jump while generating momentum by air strafing.
Wall jumping
This is the act of using your momentum into a wall and redirecting that momentum in a jump off the wall. I haven’t had much luck with this but here is a video explaining it:
Double pumping
Double pump with your Peacekeeper. This one seems too hard to pull off in battle, but could be worth practicing.
Loot Map
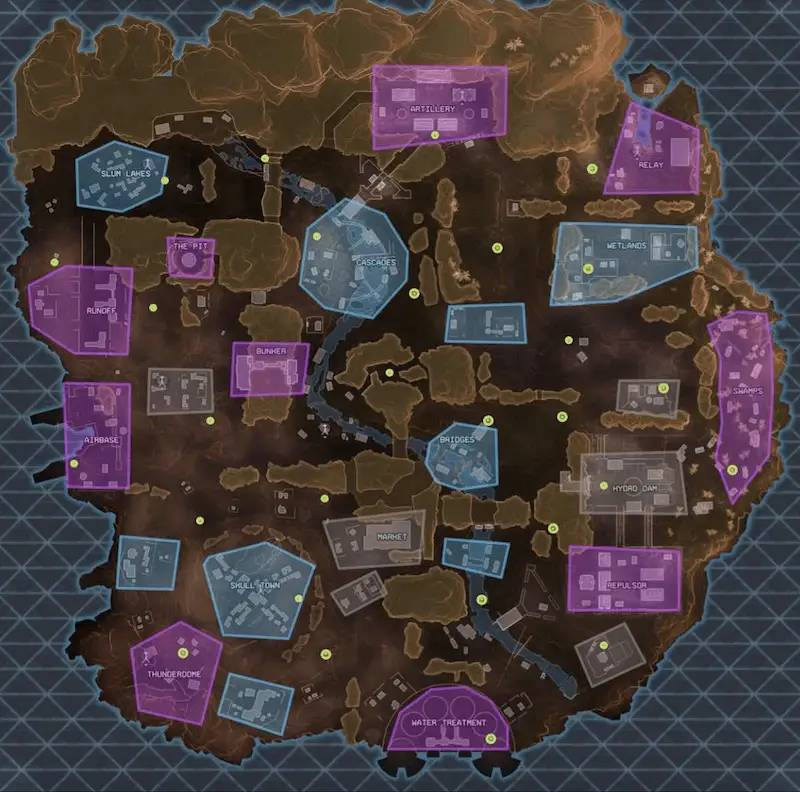
Character Tier List
Tier lists can become controversial, and I am not trying to make an end all/be all list. At the end of the day Apex Legends is more of a true FPS than a Moba/Overwatch style game where character compositions matter more. With that said, there are things about some characters which clearly out class others.
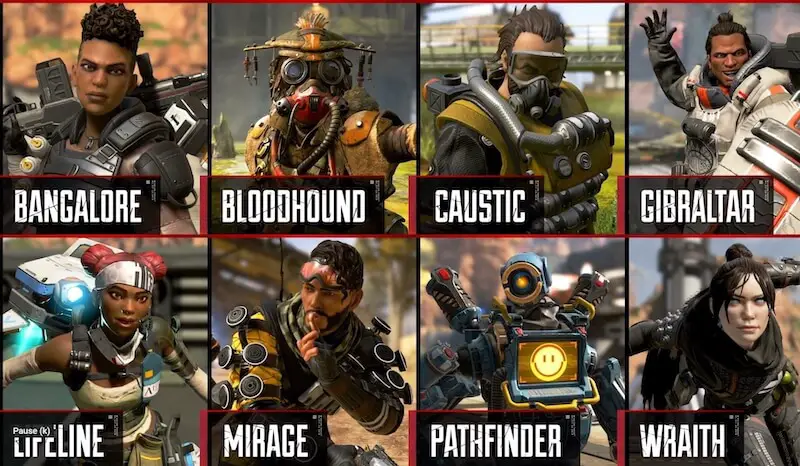
The following list is based on only two metrics: Hit box size (larger == worse), and general usefulness of skills for helping the team with either: preservation, or positioning. I find that simplifying the metrics makes us focus on what is truly important to a BR; ability to stay alive(because a knocked out teammate is a liability) and ability to control the battle via abilities and positioning so that you can CLOSE OUT on the fight once your team has even the smallest advantage.
S
Bangalore:
- Incredible movement with her passive. VERY hard to hit once she is engaged, even close range.
- Two smoke grenades on relatively low cooldown. INCREDIBLE offensive synergy with a digital threat scope in close range (with Wingman or Peacekeeper, or SMG)
- Her ultimate is mediocre to goodish, it is easy to avoid and sometimes can prevent your team from being offensive, but it does have its uses to zone enemies or help slow down or start a teamfight
- SMALL MODEL, HARD TO HIT
A
Wraith
- Ultimate is amazing utility for repositioning team for aggressive play
- Ultimate is amazing utility for repositioning defensively, AND you can move downed players
- Primary ability is a good “oh shit” button, most good players can account for it, but it is still a useful invulnerability to get behind cover and begin a healing process and get some breathing room
- SMALL MODEL, HARD TO HIT
Lifeline
- Not as offensive as the others mentioned so far, but her healing speed reduction and revive speed reduction is incredibly useful for a team
- Healing speed increase lets her play somewhat offensively, very easy to tuck away for a quick heal
- SMALL-ER MODEL, HARDISH TO HIT
AB
Bloodhound (moved up to a new tier)
- Good ult that synergizes well with Bangalore’s smokes, or COUNTERS her smokes
- His primary ability is very good at close quarter fights in cities/buildings,etc
- His main drawback is that his primary ability can sometimes screw you, as the mesh outline of players sometimes can obscure your aim in an intense close range fight. This sucks because it is usually when you need it most
- Ult provides 30 seconds 25% movement speed buff, this can be used to flank aggressively. Try not to use it and waste the time ADSing!
- MEDIUM SIZE MODEL, EASIER TO HIT
B
Mirage
- His primary ability is pretty good for quickly fooling enemies in the moment of a fight. Even better players who know it is coming can’t help but shoot at his decoy. It is just instinct. Use it too your advantage. Good for recon gathering as well, sending the decoy down hallways or out into the open to attract long range fire
- Very good oh shit button with his ultimate, while the decoys themselves aren’t as useful, the instant invisibility can help you reposition to heal, and provide a little extra chaos to a fight
- Overall, he isn’t bad, but his utility becomes less useful against better opponents, and he doesn’t have as good movement as some of the others
- SMALL MODEL, HARD TO HIT
Pathfinder
- Very good mobility with his grapple
- Very good team utility but also personal positioning ability with his ultimate
- Main drawbacks are his larger hitbox, and that Wraith’s portal is mostly better than his ultimate for team utility. I recommend playing Pathfinder somewhat greedily. Waiting for a perfect team usage of his ult will be harder to comeby, instead use it for your own personal aggressive and defensive play, if your team can use it — that is just a bonus.
- Second drawback is his ability to see the next circle isn’t entirely useful for combat, maybe when we see custom games with more slow methodical strategy among high tier players, it could be more useful?
- MEDIUM MODEL, EASIER TO HIT
Bottom Tier
I won’t spend as much time here. While these characters have some theoretical usage, they both suffer from the same problem: they are too big and easy to hit. I personally think the larger tankier characters should be given a bit more health or something like a regenerating portion of health, ala Overwatch.
Caustic
- Traps can be a nice offensive ability for stubborn teams camping in houses
- Traps can be nice to use defensively for people chasing you
- Ultimate has good synergy with Bloodhound and Digital Threat
- His biggest drawback is that his gas is almost as big of a hindrance to his team as it is the enemy. Slowing and obscuring vision for your teammates is not very good
- Another drawback is his traps can be detonated by enemies without even releasing gas
- LARGE MODEL, VERY EASY TO HIT
Gibraltar
- Mortar strike seems like a less good Bangalore ult
- Bubble shows half the map exactly where you are, it’s more of a place you die versus a place you defend
- ADS Shield (his passive) seems mostly useless vs good aimers. His model is so large it is easy to avoid, and the shield breaks quickly.
- LARGEST MODEL OF ALL, SHOOT ME!
Character Guides
One of the biggest requests I had was for character-specific guides. I want to do this in a way that is meaningful and not just regurgitating generic character tips. With that in mind, my goal is to play at least TWO HUNDRED matches with a character before creating a guide. With this baseline, I hope to have a better basis for providing my input as well as a good baseline of stats to work with so you know where I am coming from. The first up is the character I first gravitated to: Bangalore. I intend to create Wraith and Lifeline guides in the coming weeks, unless a new character takes my attention away in March.
This game is still primarily a first person shooter, and your positioning, aim, and mechanics still heavily outweigh any specific characters loadout. With that in mind, I want to create a guide template to keep these somewhat structured. It should help you with the approach to using the character, and provide some strategies for using their abilities, but it should just be the starting point for you learning and mastering them on your own. The following is the basic outline:
- Overview & Detailed stats
- Passive ability strategy
- Primary ability strategy
- Ultimate ability strategy
- Final Thoughts
If you are a high level player interested in providing a guide for a certain character, feel free to reach out to me.
Bangalore
Video Guide
Overview
First and foremost, Bangalore is a natural flanker. She has a small hitbox, highly mobile passive, and her primary ability affords her a very reliable escape mechanism. Her ultimate is an excellent zoning tool that can be used offensively and defensively. I personally think she is a must-have in a tryhard team, and probably the best “solo” character in the game currently.
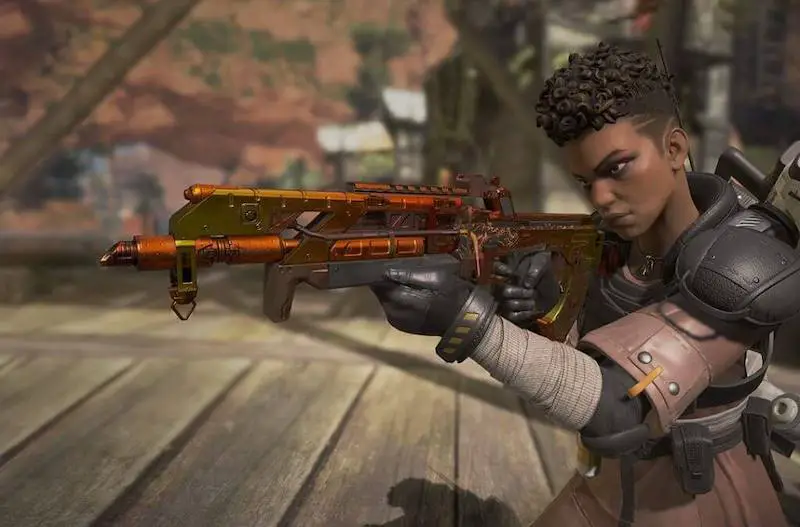
Now let’s look at her abilities and their details:
Passive:
- Provides a 25% speed buff for 2 seconds when Bangalore is hit, or shots are fired near her
- Seems to have a relatively low cooldown, may be as little as 5-7 seconds, I do not have the exact data on this though
Primary
- A smoke grenade launcher with 2 charges
- Smoke last 15 seconds
- Smoke can be seen through with Bloodhound’s ult and Digital Threat scopes
- Each charge has a 33 second cooldown respectively
- Smoke explosion on a target deals 10 damage
Ultimate
- Thrown grenade that marks a target location for a creeping artillery strike
- Damages and concusses enemies, can concuss your teammates and damage yourself
- Each strike deals 40 damage
- Concussion lasts 8 seconds
- Total strike duration is 8ish seconds
- Artillery explodes 2 seconds after flares
- Explosions last for 5 seconds
- 270 second cooldown
- Each “missile strike” is marked on the ground by an orange transparent missile, if you find yourself inside of a Bangalore ult, navigate accordingly and avoid standing on one before it explodes
- Her strike begins from the point that you throw your flare, and expands in a line out from this. The explosions follow the same expansion, center explodes first compared to outer missile markers
Passive ability strategy
Bangalore’s passive combined with her small model makes her one of the best characters in the game if we ignore the other abilities. While I don’t have the exact internal cooldown yet, this ability seems to proc multiple times in fights and provides the ultimate flanking and escaping tool.
The following summarizes how to get most value out of her passive.
- Push aggressively! I know that is an overall theme to this guide but, Bangalore makes this a very safe proposition. Sometimes I even push in the open against a known enemy in order to trigger a passive proc and push FASTER
- React quickly! If you are pushing into a bad position, or find yourself caught my an enemy, have an escape route and use the speed boost to get away and into safety. You can frequently retreat to heal or whatever else is needed
- While pushing, if taking fire use it to quickly reposition your attack during the proc. Even after taking damage your speed boost gives you a massive advantage for closing in on an enemy and securing good damage from an unexpected angle
- Use it for fast hip firing strafing. Make even more use of your speed boost in close quarters combat by limiting your ADS usage and hip fire with maximum strafe speed.
- Pull off MASSIVE flanks. When you get this proc don’t be afraid to go on a wide flank or circle and enemies position. Worst comes to worst you can use your smoke grenades to retreat if your flank doesn’t pan out
- Pair the speed boost with close quarter weapons like shotguns and SMGs. Be continually on the move from door to window or one side of a rock to the other, don’t hit from the same location twice. People get easily overwhelmed by her speed in close combat situations.
- You don’t even have to be hit to proc this. I don’t know if this is intended or what, but sometimes just having bullets go past me seems to do it.
You can’t really plan for the proc in most cases, it just an added bonus that works very well with the rest of her kit and people who naturally play aggressive. It also makes her INCREDIBLY hard to hit. Strafe, slide and run side to side as you try to escape enemy fire. See the following clip of me potatoing against a bangalore who makes good use of their passive proc.
The mobility is insane.
Primary Ability Strategy
Her smoke grenades are probably the most useful primary ability in the game currently. (I feel like I am repeating myself). The most important thing you can do is use this EARLY and OFTEN. While its defensive usage is pretty self-explanatory, aggressive usage of her smokes are what make Bangalore a huge threat. I will separate the strategies based on each case.
Defensive:
These are the obvious ones that most people think of, but we should touch on them anyway.
- Using smoke for cover to retreat from battle
- Using smoke for cover to revive a teammate
- Using smoke for cover to loot dead boxes
- Using smoke for cover to heal
- Use your smoke in combination with your ultimate to create a massive safe zone for retreats or tactical resets of the fight
These are self-explanatory and I assume even the newest players to Bangalore naturally will recognize some of these situations. However, The real skill cap from this skill comes in its aggressive usage though.
The concept of an aggressive smoke should be familiar to experienced Counter-Strike and Battlefield players, although they are slightly different in usage respectively.
In CSGO, we frequently see smokes used both for offensive pushes and defensive holds that usually cover chokepoints like hallways, doors, and narrow parts of the map. But, these smokes are usually used to “zone out” the other players. This is because a player pushing through a smoke grenade is putting themselves at a disadvantage in many cases to the players on the other side (outside of the smoke), as the other player can usually see the player moving through the smoke first.
In Battlefield, smokes are used to aggressively push positions based on a similar concept. Further, there is much more opportunity to “smoke out” an enemy position,rendering their defensive holding almost useless as they are now sitting in a smoke that they can’t see through while the aggressing team pushes up to the boundaries or the flanks of the smoke.
In both cases, the smoke is being used to zone the other players. With Bangalore, we have TONS of opportunities to use aggressive smokes with these same principles in mind. Using your smoke offensively gives your teammates who may not be playing characters who are naturally aggressive the opportunity to be aggressive AS A TEAM, while the enemy team recovers from disorientation. By the time the smoke fades/they retreat out of it, your team can be on top of them from a variety of angles and usually doing good damage to them in the process. In many cases, its is better to use an aggressive smoke EVEN if you are using it to be defensive. (The only exception would be if your team is desperately retreating, here an aggressive smoke on the enemy would just mean their vision is obscured only for the duration of how long it takes them to push through it.)
So the old adage applies here in regards to smoke usage: “A good defense is a good offense”.
Here are some more offensive smoke strategies/situations
- Use smoke to invade an enemy holding such as a building
- When smoking out an enemy, play the edges of the smoke. Playing the edge of a smoke is an IMPORTANT concept. The idea is that you are working around the less dense edges of the smoke looking INTO the smoke for enemy shadows/movement/sounds. Usually the player deeper in the smoke will have their vision more obscured. Further, once identified, there are many cases where you can push into a smoke aggressively to finish off a disoriented enemy player.
- Create a zone that allows your team to push the enemy aggressively
- Use offensive smokes as an “panic” button during a firefight when you are at a disadvantage
- Use it often! You have two charges and 33 seconds isn’t that long of a cooldown. I try to use both of my smokes early on in every engagement.
- And last but definitely not least, prioritize getting a Digital Threat! Being able to see through your own smokes is incredibly powerful. It exponentially multiplies the usefulness of offensive smokes. Likewise, if you start getting shot through your offensive smokes, recognize that they could have a Bloodhound or digital threat of their own.
You can apply these strategies from any distance as well as her smoke launcher has a very long range. The following clips highlight a few of these concepts:
The first clip is probably the best example of using smokes to create an offensive zone that your team can quickly be aggressive with. Notice how I play the edge of the smoke here, using the less dense edges to cover me while I look for players both in the smoke and leaving the smoke.
The second clip demonstrates me using my smoke as a panic button during a firefight when I realize that I was outgunned by 2 players. Then, instead of retreating and losing the damage I did, I play with the edge of the smoke to flank and finish the two players. Also notice how much Bangalore’s passive works to amplify the disorientation of the enemies with her quick movement.
Bangalore’s smoke is probably the best defensive and offensive utility currently in the game. It is also incredibly fun to get creative with. Just remember, smoke out your enemies from afar or up close and use the following seconds of cover to position on a flank they won’t expect.
Ultimate Ability Strategy
At first glance, Bangalore (and Gibraltar) have what sounds like the coolest ultimates in the game. Unfortunately, at least for Bangalore, this doesn’t play out to be as much of a threat as it sounds on paper. While you certainly can kill people with it, it is better to use it as a zoning tool (almost like a very large smoke) than as an offensive damage dealing tool. There are a few reasons for this: the damage is minimal, good players know how to avoid the explosions, and most importantly, it prevents your team from pushing as aggressively because of threat of concussion to your team. If anything, offensive Bangalore ults are more akin to a get out of jail card for the enemy team, giving them the cover they need to run away and reset the fight.
Given the above, there are two main situations that come to mind where her ult shines:
- The defensive ult
- The offensive REPOSITIONING ult
The defensive ult is what I usually find myself using the most. The area of effect is massive and it provides a great tool for letting your team to retreat, or tactically reset a fight to re-engage from a different angle. Along that vein, sometimes the line between a proactive defensive ult to reposition and an offensive repositioning ult can be a blurry line. The general theme being that you are guaranteeing a zone of control for a few moments, whether stopping an enemy push, or holding them to their current location, that allows your team to take advantage of reposition as needed.
Here are some defensive situations:
- Enemy team is winning the fight. Throw the ult on them/between you and their push. Retreat.
- Enemy team gets the jump on you or a teammate. Same thing as above.
- Control a third party. If your team is engaged in a fight and you get third-partied or pinched from a different angle, use your ult to quickly zone out the other team as you clean up the other fight and quickly prepare for the next one.
- You are separated from your team and need a super panic button to escape an aggressive enemy. Drop it between you and them and run
These are the majority of how I use Bangalore’s ult. I would much rather save it for one of these situations where I really need it and use her smoke to be aggressive than vice versa.
While I generally think you shouldn’t use it offensively, there are situations where it can be useful. It isn’t as much for the damage as it is for the zone control it provides you, and likewise, your teammates. If you drop an ultimate on an enemy team in a building complex, you have pretty good guarantee that they aren’t leaving before your team has the time to surround them from various angles or get into position for a coordinated push. The same applies for teams holding up in chokepoints, behind some rocks, etc.
Offensive ults are generally only useful at the BEGINNING of a fight before there is much risk of having a teammate caught in the crossfire. If the fight is already developed and you have done good damage or knocked an enemy, just finish it with guns and grenades. Save the ult for a potential third party or a future fight. The key to offensive Bangalore ults is to remember the positioning aspect: if your team doesn’t take advantage of the disorientation/defensive reaction of the enemy by getting wider/more aggressives angles on them, then you pretty much just created a momentary lapse in the battle that at best slows you down, and at worst draws attention from nearby third parties. With all of that said, it is still usually more beneficial to save the ult though, saving it for those situations where a team is dug into a position and your artillery strike will provide you with a chance to be aggressive where you otherwise couldn’t.
The following clip demonstrates how to “zone” a team. It also shows off that blurry line between defensive and offensive ult. In the example we reacted to the other team aggressively balloon jumping onto our overextended teammate. Given that we were all generally in the open compared to the enemy, I quickly recognized the danger and threw a “proactive” defensive ultimate. While it may not have been necessary in this situation, it provided my teammate the ability to reposition defensively as I positioned more offensively, widening our attack to “envelop” the enemy team with better angles. This flipped our position from being on the defensive to the aggressor, where we went on to win the game.
Final Thoughts
I think the gist of what I have learned about Bangalore has been covered in the previous three sections. I wanted to use this final word to put it all together and highlight the mindset I take into playing Bangalore, and some key takeaways.
First, her kit by far has the most offensive and defensive utility. If you are playing with a set team and find yourself as being the “aggressive one”, or want to solo queue and have higher chances of carrying your team: I would play some Banglore.
Second, USE HER SMOKES OFFENSIVELY AND FREQUENTLY. Learn to play around the edges of your smokes. It is super fun, do it!
Lastly, always remember that you have a great amount of control over the flow of the fight. Don’t be afraid of proactive usage of your abilities. Everything in her kit is useful, and combined with her incredibly small hitbox, is why I think she is currently the best in the game (as of posting this at least).
And don’t ult your teammates.
Note: If you are playing with a Bangalore you trust, prioritize giving them your Digital Threat.


