I’m a Free to Play (F2P) player who is relatively new to the game. When I started the game, I read many of the existing strategy guides, tips for beginners, and informative Reddit posts that were easy to find with a web search. Here are more tips that I didn’t see in the top search results or were not stressed enough.
Before you even start playing the game
In case you haven’t already encounter this tip or remembered reading it (human memory is terribly fallible), one of the most important and defining decisions is which civilization (civ) you pick at the start of the game. Find and read the recommendations in other guides and posts about which civ to start with based on your expected play style/strategy and desired starting civ commander. You’ll not only have to read about what each civ gets and which civ commanders are best, but also read about the different long-term strategies (generalized troops, cavalry specialty, barbarian hunting, etc.).
For example, F2P players like me won’t usually be leading the attack against cities (PvP) or holy sites. F2P will probably only be using one Legendary commander (or none at all) and 2-3 Epic commanders (one of which is your starting civ commander). F2P players will probably be concentrating on open field attacks against barbarians and player troops in transit, so pick a civ whose core commander and/or civ benefits aid that strategy. Also keep in mind that you can change your civilizations at least once, which means you can pick one civ to get the civ starting commander and early game civ benefits (like resource collecting), level your civ starting commander up, and then switch civs for the benefits of the new civ that are more appropriate to your long-term strategy (you are stuck with your starting commander despite switching civs). NOTE: If you didn’t read this until after you started playing, and you are still low enough level (only a few days invested in the game), you might consider starting over now before you invest more in the game, only to realize things are harder (or less efficient) because of your decision.
Read all the things
There are plenty of resources that teach you how to play. Do an Internet search for “Rise of Civilizations” and read all of the top results. You might also do searches for “Rise of Civilizations commanders”, “Rise of Civilizations tips”, “Rise of Civilizations beginner”, “Rise of Civilizations f2p”, and other such searches to learn the game rules, tips, and strategies.
Attacking Barbarians and Forts
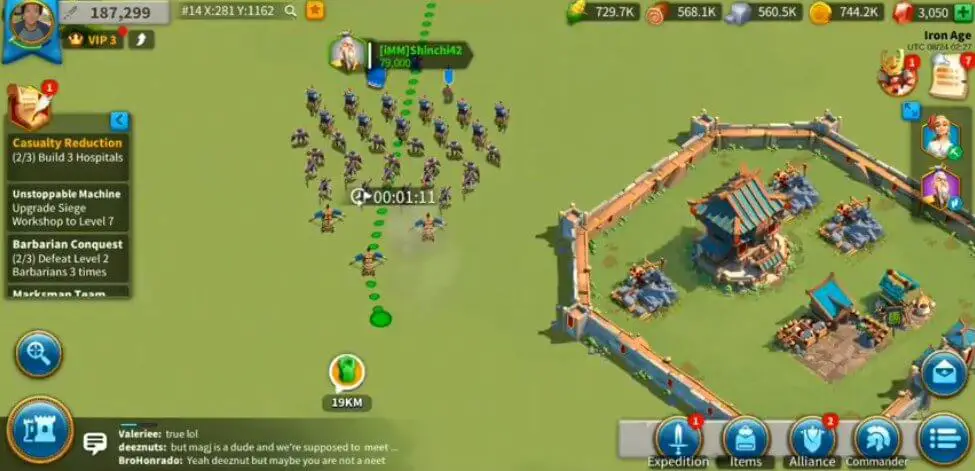
Once you join an alliance (which you should do right away), you can join rallies started by other players to attack barbarian forts. This is probably the best way to level up your commanders because winning Fort battles earn Tomes of Knowledge, the equivalent of Experience Points (XP) that can be applied to any commander. You’ll want to have enough Action Points (the green bar under your Governor icon) to join Fort rallies. However, you don’t want to waste Action Points, so never leave your Action Point bar completely full. Attack barbarians in the field until you’ve used up enough Action Points that you have room for them to accrue as time passes if no one in your alliance rallies against Forts. I usually take my bar down to half-way by attacking barbarians; you might choose to only go a quarter down. When the Action Point bar fills back up, I kill some more barbarians but leave plenty of AP for rallies. Note: You don’t earn XP rewards for attacking other players’ cities, so be aware of what kind of rally you’re joining. In fact, as a beginner, you should NEVER attack other cities unless your alliance leaders order an attack and you are attacking the same city as other troops from your alliance.
Barbarians also give XP but it is slower and less efficient than Forts. Also, the XP goes directly to whichever commander you use to attack those barbarians. At low level, attack whichever level of barbarians allows you to kill three mobs before you have to return to your city to heal. The third mob you attack before returning home often needs to be several levels lower than the other two mobs so that you survive the battle. Example: attack two level 10 barbarians and then a level 9 barbarian. Attacking multiple mobs close to home (without returning to your city between battles) saves Action Points (AP) because you spend fewer AP to attack another nearby mob while your army is already out in the field instead of returning home first. Be aware that barbarian mobs level 12 and lower are summoned close to your city while barbarians level 13 and above are found or summoned further away from home, sometimes MUCH further away, and cost more AP and time to attack for a small, but not insignificant, increase in treasure and XP. I’m sure there will be a breakpoint at which my army and commanders will be powerful enough, and need more XP, that attacking higher level mobs further from home will be more efficient than summoning lots of level 12 barbarians near home, probably around City Hall level 15.
City Planning and Building Placement
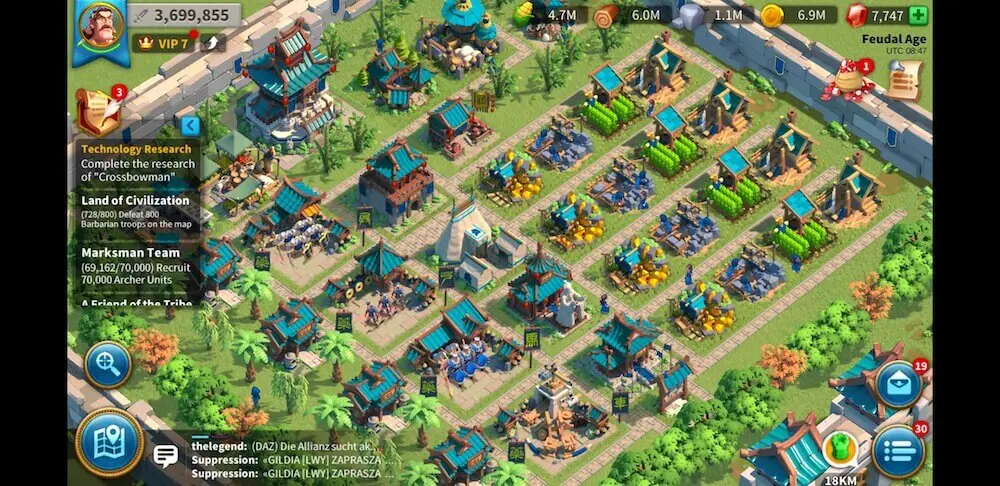
You are going to spend a lot of time clicking on buildings within your city. Whenever your city appears after closing the game for a period of time, the view always centers on a default position within your city. Your goal should be to place all the buildings you click on the most so they appear in the default view and so the icons indicating that action needs to be taken can be immediately seen. Buildings you don’t click on can be outside of the default view. For example, you only need one of each resource-producing building (food, stone, etc.) in view to click on while additional copies of those buildings can be out of view. Same for hospitals. You need one in view to do your business and the others can be out of sight so they don’t distract you. When you need to upgrade those out-of-sight buildings, drag your view over to them.
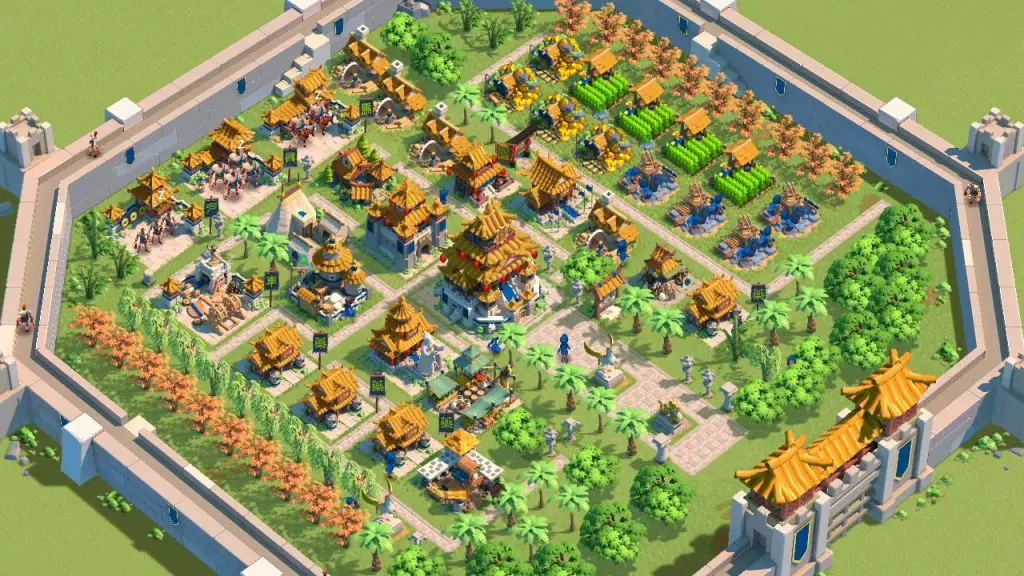
Not only that but when you click to select most buildings, like the Scout Camp, two or three buttons will appear below the building. If that building is too close to the bottom of the screen, the buttons may be partially covered behind the bottom row of tools (or the edge of your screen). Place frequently-clicked buildings (like Scout Camp and Hospital) near the middle of your central cluster so that the building buttons below are easy to access and activity icons above are easy to see. When Scout Camp no longer requires constant clicking because you’ve scouted the entire kingdom map (see below), move Scout Camp out of view and replace with another building that requires monitoring (for example, Blacksmith will now or soon be a frequent click point).
Trees and roads are decorations with no value to your game. To make room for easily moving and placing buildings, I took the practical approach, destroyed all the trees, and moved the paths to the outskirts of the city (in case I had a use for them later). Trees and paths are cheap to replace so you may destroy them guilt-free.
Scouting
Why micromanage your scouts? At the start of the game, the free stuff you get from the hundreds of villages and caves discovered by scouting are significant to early growth. Do you want free troops? Commander levels? Speedups? Yes, please, especially because I’m F2P and I need all the resources I can get. By managing your scouts efficiently and scouting as much as you can from the start, you find all these resources early in the game when the small rewards have a bigger impact on your progress.
Every time you open the game, send your scouts out. Whenever you get a message that your scout has finished exploring, immediately go to the Scout Camp and send that scout exploring again. If you wait until your scout returns to your city, you waste precious time (up to 20 minutes each way per scout when exploring the far reaches of the map). Every time a scout finds a village or cave, shown in your scouting reports, you want to click on the GPS in the report to zoom in on the village or cave and either click on the village or send a scout to explore the cave, both of which give you free stuff.
When you explore the map with your scouts, and discover Tribal Villages, you’ll want to claim your prize. In the Exploration Report, click on the telescope button to zoom in on the Tribal Village, click the village (with the pink gift package floating above it) to claim your prize and … do NOT click on the GREAT! button; it’s not necessary. When you see the prize and GREAT! button, click on the envelope icon to access other exploration reports, or simply click on the castle icon to get back to business; the prize will be sent to your inventory. It may seem trivial to skip one click but when you want to scout the map, attack barbarians, start new research, open treasure chests, and more during your 15 minute break at work, every little short cut saves you time and hand cramps. Especially when there are over 1800 villages to visit.
When you investigate a cave, which scout do you pick to send? The map will show scout icons on the edge of the screen closest to their location (or on the map near the cave). Next to each scout icon, you’ll see its distance from the cave. On the troop selection bar on the right side of your screen, click on each of the scouts and you’ll see that scout’s icon highlighted on the edge (or middle) of the map. Pick the highlighted scout that is closest to the cave, but not currently investigating another cave, and click on Send. Efficiency is key.
Your scouts will discover Kingdom Maps that can be used to uncover large areas of the map (instead of scouting those areas). I DO NOT recommend using Kingdom Maps. If you try micro-managing scouts and decide you absolutely hate it, the Kingdom Maps will help you cut down on the time spent scouting. However, it means you will have to spend more time finding all the villages and caves on the map of the kingdom so you can visit/investigate them for goodies. The kingdom map is large, zooming in and out is tedious, and you will still be sending scouts to the caves (micromanaging and wait time). If, however, you scout everything and NOT use the Kingdom Maps then, once you have scouted the entire map, any leftover Kingdom Maps will convert to 5-minute speedups. Since you will have to micromanage either way, it seems to me that using scouts instead of maps might require a little more effort but reward you with more goodies (speedups) in the end.
Resource Gathering
Collecting resources doesn’t have to be complicated. Send out troops to collect the resource you need. Done. Simple. But you can be more efficient and more strategic than that.
Clicking on the kingdom map button takes you from an internal view of your city to the external view. You can now click on the search button (magnifying glass) to find the resource you want. Click on the picture of the resource you need, adjust the slider to the level of resource (the higher the level, the more resources it contains) and click search.
TIPS GALORE
When you plan to continuously play the game for a while, or at least be monitoring the game/notifications, then pick the level 1 source [of resources]. Why? First, every time your troops return with resources, you get a reward. Instead of going to one level 3 source and getting one reward, you can go to three level 1 sources and get three rewards. Second, the longer your troops stay at a source, the more resources you lose if someone attacks you at that source. I’d rather keep revisiting a level 1 source, and only lose 50,000 resources when attacked, than spend 2 hours at a level 3 source and lose the 200,000 resources I collected by that time. If, however, you plan to be logged out of the game for a while, the higher-level sources are your best bet.
If you are in an alliance, you want to pick a source that is inside your territory (if practical) because then your alliance also earns resources from your gathering. A stronger alliance is a stronger you. One way to find sources inside alliance territory is to spend time moving around the kingdom map until you find a resource you need inside the borders of your alliance territory. Another way is to chain search. I’ll explain.
When you first search for a source of a certain level, your search will take you to the closest source that is not currently occupied by another player. Look to see if the source falls within the alliance border. It’s often a good idea to zoom out on the map a little to see where you are (but don’t zoom out too far or you won’t see as many details). If you don’t see the border and want to check if that resource is inside your alliance territory, click on the source and see if your alliance is listed as Owner. If the source is not in alliance territory, click the search button again, click Search again, and the game will find the next closest source of the same level. You can repeat the search for 4-5 different locations before looping back to the first location. If you can’t find a resource inside your alliance territory at the level you desire, you can either gather from an outside source or, preferably, search for a different level source that is located in alliance territory.
Resource Management
When I first started as a low-level player, my alliance came under assault from another aggressive alliance. Cities around me were being attacked – sometimes several times – yet I was left alone the entire time. How did I avoid the carnage? I was upgrading my city wall and towers to keep up with the city hall, which may have helped, but I don’t think that was the real reason. I believe my secret to avoiding attacks early in development was maintaining low resource levels … so low that it wasn’t worth the loss of troops for anyone to attack me. And even if I had been attacked despite my low resources, I wouldn’t lose as much and would be less likely to rage-quit the game. My three methods for maintaining low resources were delayed gratification, hoarding, and selective farming.
Delayed gratification means to NOT claim your quest rewards right away. Don’t worry, you won’t lose them. You also won’t lose the quest rewards hiding behind unclaimed quests. For example, you get a quest reward each time you level up a building to the next level. If you level your hospital from 1 to 2 and 2 to 3 on day one, but don’t claim the quest reward for hospital level 2 until three days later, you’ll still be offered the quest reward for hospital level 3 after claiming your reward for level 2. At one point, I had 80 active quest rewards waiting to be claimed, not including hidden quest rewards, but I didn’t claim them until I needed them to build, upgrade, or research a thing. Quest rewards can’t be stolen from you when you are attacked.
Hoarding means saving resource items and resource packs, both found in the Resources screen of the Items menu. You get free resource items and packs by scouting (see above), gathering resources with your troops, completing event quests, etc. You can, and ALWAYS should, buy resource items from the Courier Station every chance you get (purchase them with other resources, never gems) – converting stored resources into resource items hides them from attackers and allows you to gather more resources with your troops. I will use resource items if I do not have a quest reward that gives me the resource I need. Resource packs are best used when most or all of your resources are low because each pack gives you a random resource. I’ll open large numbers of resource packs at a time until my resource levels have reached the requirement of whatever building upgrade or technology research I want to start. Resource items and packs can’t be stolen from you when you are attacked.
Selective farming means only gathering resources that are low. Until I reached City Hall level 16, I tried to have no more resources stored in my city than what would fit in my Storehouse. If Storehouse capacity for food was 600,000, that was my collection limit, give or take 20,000. Of course, I ensured that my Storehouse was only one or two levels lower than the City Hall so I could always have as many resources as I needed on hand at one time. Not until City Hall level 16 have I found a reason to surpass the Storehouse limit. However, by that point, you should already be with, or you should move to, a strong and active alliance that will protect from invasion and help you avenge attacks upon your city.
VIP 6
To pay or not to pay, that is the question. As Shakespeare rolls over in his grave, let’s discuss whether or not you should spend gems to upgrade you VIP to level 6. Each level of VIP gives you some benefits, such as boosts to resource production and building speed, but each VIP level requires more points than the last. At VIP 6, you get a permanent second building queue. Have two buildings upgrading overnight instead of one? Yes, please.
Summary answer: Use all your gems up front to get VIP 6 as soon as possible if you want the fastest ramp-up speed, spend zero gems and let freebies eventually take you to VIP 6 so you can spend gems on other goodies, or let freebies take you part of the way and then spend gems when your building speed gets slow enough to become frustrating. If you can wait until the More Than Gems event comes up on the calendar then you’ll probably get the most bang for your buck. However, your goals and your frustration level will probably be more of a deciding factor.
Completely unscientific analysis
You get free VIP points every 24 hours if you click the VIP daily chest (more if you do so on consecutive days). You also earn free VIP points as occasional rewards in the game. You can reach VIP 6 for free, if you want, it just takes time. However, VIP points can also be bought with gems. Since gems are a rare and precious resource that can buy other nifty things, you must decide how to spend them wisely. When my City Hall was level 14, my VIP was level 4 due to free points. At this point, I decided to spend gems to buy VIP points up to go from VIP 4 to VIP 6 because most buildings were taking longer to upgrade at higher levels (12 hours, 18 hours, or more) and I didn’t want to fall behind my fellow alliance mates.
FYI, since I’m F2P with zero money invested in the game, I don’t want to become a burden to my alliance. Instead of paying cash for high-end commanders, I’ll settle for ramping up my economy as fast as possible (using two building queues, high-level gatherers, and anything that boosts resource gathering) and providing alliance support (building and reinforcing alliance buildings, providing alliance resources by farming within alliance territory with my boosted gathering setup, etc.).


