


KingsRoad is a free-to-play, browser-based, action RPG by Rumble Entertainment. It can be played in a browser on a PC or a Mac, or on a mobile device. Associated with the game are the KingsRoad Forums1. On the forums, you can find official announcements and guides designed by advanced players. Some of the material in this guide, I created. But much of it was compiled from the work of the many gifted and generous contributors to the forums. You should definitely be reading the forums on a regular basis.
And one other important word of advice. Or perhaps a warning. KingsRoad changes all the time. Prices change, rules change, items change. It is the kind of game where long-term planning is quite natural. Yet, because of the constant changes, such planning is sometimes futile. Even the creation of this guide may be a fool’s errand, since it could be completely out of date in just a few months time.
Nonetheless, a guide like this is needed. Beginning players need a comprehensive overview. And advanced players need a unified reference, complete with links. I hope that one day this guide can serve these purposes.
Guide for beginners
How to spend gems
Although KingsRoad is free to play, you may choose to buy “gems” for real money. You can then use these gems to buy items in the game. Gems are also given away for free on a regular basis through achievements and other means. So even if you never spend a penny on this game, you will still accumulate gems. This section will help you avoid spending gems on the wrong things.
As a beginning player, you should spend gems only on storage space. About once a week, storage goes on sale for 50% off. Only buy storage on those days. As of today (May 12, 2016), you can have at most 690 spaces in inventory and 690 spaces in vault, for a total of 1380 spaces. Do not reach the limit. Sometimes a bundle will appear in the shop that includes some storage spaces. If you are already at the limit, then you will not be able to collect that bundle. I personally aim for about 90% of the limit.
Once you’ve built up your storage, you should try to build a buffer of about 5,000 gems. An unexpected sale might pop up, and you want to have gems just in case. After storage, some reasonable things to spend gems on are:
- Weekend festival bundles that contain Elixirs of Item Find
- Reopening Valor Lockboxes (on days when Valor is 50% off)
- Reopening Dragonstone Lockboxes that you get on event bonus days (Sundays)
Do not spend gems on Event Tokens. It is much more efficient to buy tokens with gold.
Eventually, you will want to spend gems on re-socketing your farming gear. But this is an advanced topic for advanced players.
How to earn gems
- Daily achievements – 5 gems from playing the arena once every other day – 5 gems from playing 3 maps in a party (do this with arena) – 5 gems from using 2x queen blessings – 20 gems from doing 4 Keira quests (do the 8 hours over night, 3 hours during breaks in the day and 1 hours while playing) = 32.5 gems daily
- Tournaments – 5 gems x8 from playing platinum (random average – not accurate) = 40 gems daily
- Leaderboards – 15 gems from event 401st+ every other day (save score boxes to use each day if you don’t want to use tokens) – 15 gems from tournament 201st+ every other day = 15 gems daily
- Events – 15 gems every time you get an item from the event (all are sold at some point) – 65% chance of item, 5 tokens from keira daily, ~12 tokens from free boxes daily, 27 tokens from shop bundle and voucher weekly = 13.5 gems daily So far that’s 101 gems each day as an average, but there are some more ways you can get gems.
- Weekly extras – Gem lockbox each week on Friday – 10 gems from socketing and fusing a tournament score jewel each week – 10 gems from socketing and fusing an arena star jewel each week – 250 gems from daily login rewards over 15 days – A few gems in tournament and arena score milestones – A few gems in personal guild score milestones
- Other (optional) sources – 5 gems for running the event once each day (this is not necessary to get on the leaderboard for the score reward) – Gem lockbox for 3 event runs on first week Monday, also another for 3 runs on bronze (430k gold for 1 box + about 10 gems from rewards) – 5 gems from playing the arena 9 times (I usually get this each day anyway) – 2 or 10 gems from selling fusion runes which you get regularly in tournament evo boxes – 10 gems average from each event run (i.e. every 360k gold you farm) – Extra tokens can be gained from the bonus box in event runs on Sunday (if you’re planning to do lots of runs on one day for the items then Sunday is the best day to do it) – Higher leaderboard positions give more gems and some can be reached just by leveling up the free score jewels (fusion exp can be gained while solo gold farming and old score jewels will give LOTS of fusion exp to new ones) – I’d go for this if you’re playing a lot each day – The higher quality brilliant prisms sell for gems. Efficiency-wise it’s better to sell them because you can get the fusion exp much easier than the amount of gems they give. They sell for a decent amount but they are worth keeping for some quick fusion exp if needed for a festival. They can save a lot of time and help out when you are rushed, despite being more efficient to sell All in all I get about 150 gems average each day or about 1000 gems a week.
Item Enhancement Medal
After completing the item evolution tutorial, you will receive the “Item Enhancement Medal”. It is extremely important that you never sell or trash this item. When it is fused and evolved to its highest level, it will give +20% Additional Gold Find. Additional Gold Find is one of the most important statistics in KingsRoad.
Traveler’s Appearance Set
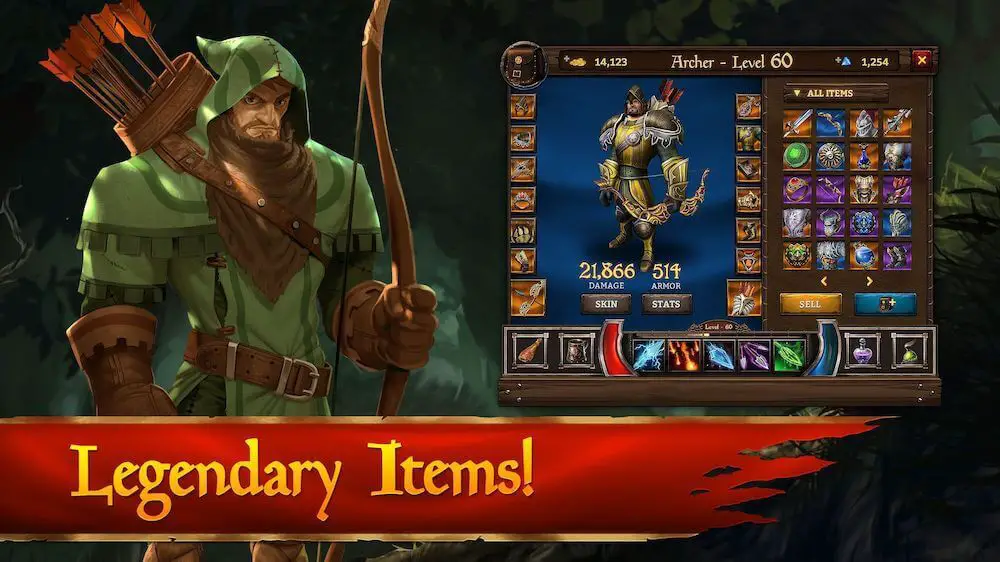
The items that you can equip come in three categories: equipment, appearance, and trinkets. When you first start playing, you will only be collecting equipment and trinkets.
The Traveler’s Appearance Set is a set of eight appearance items. It is not a strong set of items, but it has one special feature. If you equip three items from this set, you receive a +5% Move Speed bonus. Move Speed is also one of the most important statistics in KingsRoad.
How to get the Travelers’s Appearance Set
In KingsRoad, every player has three characters: a Knight, a Wizard, and an Archer. You can only get pieces of this appearance set if one of your characters is between Levels 35 and 43. If all three characters are above Level 43, then you can never get this set.2
When one of your characters is between Levels 35 and 43, go to the shop. You will be able to buy a lockbox that contains one random piece from the Traveler’s Appearance Set. You only need to buy lockboxes until you get three different pieces. But make sure the Traveler’s Boots is not one of those pieces! Later in the game, you will find appearance boots that give you another +5% Move Speed bonus. You want to be able to combine the two bonuses. Also note that the weapon and offhand are class-specific. You may want items that any of your three characters can use. If so, be sure that your three pieces do not include the weapon or offhand. This should not be too hard, since those are the least likely pieces to come out of the lockbox.
Guild Skills
You should join a guild as soon as possible. Once you are in a guild, you will start to accumulate Contribution Points. These points can be used to advance any of the skills that your guild has unlocked. Once you spend a Contribution Point, you can never get a refund. Your choices are permanent. So you need to think carefully before spending those points.
Building your characters
Every player has three characters: a Knight, a Wizard, and an Archer. LordFrigid has posted three excellent guides on how to build these characters:
- Building your Wizard4
- Building your Knight5
- Building your Archer6
LordFrigid designed these guides for characters that have already reached Level 60. But even for beginning players, the guides can provide something to aim for.
Understanding UTC
You will often read important announcements in KingsRoad. For example, you might read that all tournament scores are doubled between 4 and 5 p.m. But KingsRoad is played all over the world, so times and dates are meaningless without a time zone. The time zone used in KingsRoad is UTC. (It is not actually a zone, but a standard.) The way I remember how to convert from UTC is this. UTC is the same as the time in England, except it doesn’t follow daylight saving time. I am on the East Coast of the United States, so England is 5 hours ahead of me. But right now, it is May, so I am on daylight saving time. That means UTC is 4 hours ahead of me. So for me, in the example above, tournament scores would be doubled between 12 p.m. and 1 p.m. If I read that a special event starts on Thursday at 0:00 UTC, then it will start at 8 p.m. on Wednesday for me.
In KingsRoad, the day always goes from 0:00 UTC to 23:59 UTC. You will often see one-day sales, and it is important to know when they start and end. Limited time content always starts and ends at the change of the day. For me, the day always changes at 8 p.m. This is when I can log in and see what’s new in KingsRoad.
It is important that you learn to convert UTC to your local time. It isn’t hard once you get used to it. If you’re still confused, I recommend that you search online for other helpful resources. Don’t ignore the issue. You don’t want to be surprised when something you were counting on ends before you expected it to.
Gold farming
Why is it so important?
Your Power Score reflects the strength of your character. As you defeat the story maps, you will collect items that increase your Power Score. With a high enough Power Score, you will qualify to play in the Dungeons. There you will find even better items and your Power Score will grow even higher. In time, you will be strong enough to play in events. (Events are discussed in Chapter 3.)
Events form the foundation of KingsRoad. You need to play in events to be strong enough for all the other content in the game. Events come in four tiers of increasing difficulty: bronze, silver, gold, and platinum. The bronze tier rewards you with items of Legendary quality. The silver tier gives you Artifact quality items. Gold gives Relic quality, and platinum gives Mythic quality.
To play an event, you must use Event Tokens. The bronze event costs 6 Event Tokens, silver costs 9, gold costs 12, and platinum costs 15. Event Tokens are given away for free in several different ways. But you will not get enough free tokens to play the event as many times as you need to. That means you will have to buy tokens. Tokens can be bought using gold or gems. But, as mentioned before, you should never buy tokens with gems. It is much more efficient to buy them with gold. But they are expensive! This is why gold farming is such an important activity in KingsRoad.
Maps and bonuses
The way to get gold is to run story maps in Champion mode. Each time you kill an enemy in a Champion map, one or more piles of gold will fall. Each pile will contain a certain amount of gold. You want to increase both the number of piles that fall, and the amount of gold in each pile.
Look in the “STATS” section of your Inventory screen. At the bottom, you will find a statistic called “Additional Gold”. This is short for “Additional Gold Find”. This statistic boosts the amount of gold in each pile.
There is a second statistic that is not visible on the STATS screen. This is “Additional Gold Drops”. This statistic will increase the number of piles that fall.
Each Champion story map has a certain amount of “base gold” available. This is the amount of gold you could get if you had no Additional Gold Find and no Additional Gold Drops. The table below shows the base gold amount of each of the last four Champion story maps. These numbers are taken from The_Prophet’s Gold Farming Guide1,2. Periodically, Adamar’s Sanctum will have a “1.5x bonus”. On these days, Adamar’s Sanctum has a base gold of 2970 × 1.5 = 44553.
| Map | # Map name | Base gold |
| 21 | Adamar’s Dungeon | 5016 |
| 22 | The Battlements | 3721 |
| 23 | Inner Circle | 4593 |
| 24 | Adamar’s Sanctum | 2970 |
The forumla for using the base gold to determine the actual gold you could get is the following:actual gold = (base gold) × (1 + add. gold find) × (1 + add. gold drops)
For example, suppose you have +250% Additional Gold Find and +75% Additional Gold Drops. If you collect all the gold in Adamar’s Dungeon, you will get 5048 × (1 + 2.50) × (1 + 0.75) = 30919 gold
Boosting Additional Gold Find
Party bonus
If you run a map in a party, instead of alone, you get an automatic +25% gold find.
Item Enhancement Medal
You can get +20% gold find from your Item Enhancement Medal. To get the full +20%, you need to fuse and evolve the item to its limit. Item fusion and evolution is done with Magnus, the Blacksmith, who also runs the Forge. Save your Item Enhancement Medal in your vault or inventory and equip it whenever you farm for gold.
Gold find dragons
At the time of this writing (June 24, 2016), there are three dragons you can get that will increase your gold find. They are Lucrix, Fortuna, and Auric. Keira, the Apprentice, gives Lucrix claws. You can buy Fortuna claws in the shop after using the Dragon Token Bank. Right now, Auric claws are available through festival achievements. It is unknown how we will get them after the festival.
Lucrix has four gold find skills, Fortuna has six, Auric has five, and each skill can be increased from Level 1 to Level 100. Each skill gives a different amount of gold find per level. For example, when you first get Lucrix, his only skill will be Bounty. Bounty gives +11% gold find per level. Suppose you used your Training Scrolls to bring Bounty to Level 7. Then Lucrix would provide you with +77% gold find whenever he was with you in a map.Lucrix and Fortuna have a cooldown of 23 hours, so you can only use them once a day. Presumably, so does Auric, though I have not yet verified this. If you have both Lucrix and Fortuna, then you can have 2 gold runs per day that are boosted by dragons. This can be an amazing advantage if the dragons are powerful. For example, Fortuna with all skills at Level 100 gives a whopping +6000% gold find. If you get both of them leveled to the limit, you are in great shape. They could help you get a million gold every day with less than 5 minutes of farming. If you also have Auric, your gold situation is even better.
Once you have your dragons leveled up a bit, you may find yourself having to decide which skill to level up. It requires both scrolls and silver to level up dragon skills. It can be quite expensive at the higher levels. With limited resources, you want to level up the skills in an efficient order. One way to do this is to use the Gold dragon spreadsheet4. Instructions for using this spreadsheet can be found in Appendix A.
Gold find trinkets
About once a week, there will be a special at the forge which says, “Jewelry will have +gold find”. When you use the forge, you get an item of some random type. If it is a ring, a charm, or a necklace, then it will have Additional Gold Find. The amount of gold find it has is random, with a max of +30%.
You should use the Fine Forge until you get two rings and two charms, both with a gold find of at least +25%. Unfortunately, the Fine Forge will not produce necklaces. For this, you need to use the Epic Forge. You could use the Epic Forge over and over, hoping to get a necklace by chance. But an alternative is to buy an Epic Necklace Blueprint from the shop for 140,000 gold. This is the method I recommend.
When you finish, you should have a set of 5 trinkets that gives you a gold find of a little under +150%. Save these in your vault or inventory and equip them whenever you farm for gold.
Crescents
You can boost your gold find by socketing crescent-shaped jewels. Crescents can be hard to come by, so grab up every one you can find. Fuse and evolve them as much as possible, giving priority to your strongest jewels. You do not want to waste evolution material on weaker crescents. For more on jewel fusion and evolution, see the links in Section D.1 of the Appendix.
Crescents can only be socketed in appearance items. There are 9 types of appearance items: weapon, offhand, chest, cape, helm, shoulders, gloves, boots, and banner. You get the first 8 from events and the 9th from tournaments. (For more on tournaments, see Chapter 4.) This means you can socket up to 9 crescents at once.
Later, you will want to re-socket your appearance items to improve this upper limit. But that costs gems and is expensive, so only advanced players should be concerned about this.
Boosting Additional Gold Drops
Elixirs of Item Find
Elixirs of Item Find come in 3 varieties. The basic Elixir of Item Find lasts for 30 minutes and provides you with +150% Additional Gold Drops. It will also increase the rate at which other items drop. In chat and in the forums it is called a “loot potion”, or “lp”. The basic Elixir of Item Find will sometimes drop from killed enemies in story maps.
The Greater Elixir of Item Find lasts for 45 minutes and provides +200% gold drops. Unlike the basic elixir, everyone in your party gets the +200% gold drops. It will also increase the rate at which other items drop. In chat and in the forums it is called a “group loot potion”, or “glp”. You can sometimes get glps as a reward from Achievements or Leaderboards. They can also be bought for gems in the shop. But if you want to buy one with gems, it is more efficient to wait until you see it as part of a weekend festival bundle. The Solstice Elixir of Item Find is the same as the Greater Elixir of Item Find, except it lasts for 90 minutes. It is also sometimes obtained as an Achievement reward.
Frozen Relics Trinket Set
The Frozen Relics Trinket Set is a set of 5 trinkets (2 rings, 2 charms, and a necklace). It can be obtained from the dungeons. When you equip all 5 trinkets, you receive a bonus of +75% Bonus Gold Drops. You should try to get this trinket set as soon as possible. Store it in your vault along with your other gold farming gear.
You cannot wear both the Frozen Relics Trinket Set and the gold find trinkets you crafted at the forge. You must choose between the two sets. The forged set boosts your gold find, and the Frozen Relics set boosts your gold drops. It can be a rather complicated mathematical puzzle to decide which is the best choice. But a good rule of thumb is the following. Take off all your trinkets and check your “Additional Gold”. If it’s more than +100%, then the Frozen Relics are your best choice. (If you’re using an Elixir of Item Find, then it must be more than +400%.)
It takes a long time to build up +100% gold find without wearing trinkets. So beginning players are usually better off with their forged trinkets. There is one important exception. If you are farming with Lucrix or Fortuna, it is easy to have more +100% gold find. In that case, use the Frozen Relics.
Advanced topics
Move speed gear
The faster you move, the more gold you get per minute, and the more you can milk out of an Elixir of Item Find. Eventually, you will get Appearance Boots that are Artifact quality or better. These will give you a bonus of +5% move speed. Also, you should have obtained 3 other appearance items from the Traveler’s Appearance Set. These give you another +5% move speed. (This set was discussed in Section 1.3.) But to really beef up your move speed, you need to head to the dungeons. The exact combination of dungeon items that you want will depend on the class you are using.
Re-socketing an appearance set
By default each appearance item can hold only one crescent. By re-socketing, they can hold up to three crescents each. A full re-socketing will triple the number of crescents you can equip. This will let you wear 27 crescents at one time. But re-socketing costs gems, and a lot of them, so this is a long-term project. Here are the steps involved:
Gather your gear
Get a full legendary appearance set that you will use for farming. You want legendary because it is the lowest quality available, so it will be cheaper to re-socket. You actually won’t need the boots, so you can skip those.
Get appearance boots of artifact quality or higher. They will be more expensive to re-socket, but you want them for the move speed bonus.
Get an epic banner. You want epic because it is the lowest quality banner capable of holding 3 crescents.
Do the re-socketing in order of cheapest to most expensive
- Repeatedly re-socket the banner until it can hold at least 2 crescents.
- Repeatedly re-socket each legendary item until it can hold at least 2 crescents.
- Repeatedly re-socket the banner until it can hold 3 crescents.
- Repeatedly re-socket the boots until they can hold at least 2 crescents.
- Repeatedly re-socket each legendary item until it can hold 3 crescents.
- Repeatedly re-socket the boots until they can hold 3 crescents.
Solo farming ideas
If you farm in a party, you will develop your own unique party dynamics. But if you farm solo, you may need ideas to get you started. Remember, you want to be efficient when you farm. But keep in mind the difference between in-game efficiency and overall efficiency. In-game efficiency means getting the most gold in the least amount of time. Overall efficiency is not so cut-and-dried. Overall efficiency is a concept that includes your life outside KingsRoad. If your gold farming affects your work or family, then you don’t have overall efficiency.
For my own personal overall efficiency, I find casual solo farming works best. In this section, I will tell you some of the things I do when I farm with my wizard. These ideas may help you to develop methods that work for you.
Farming with dragons
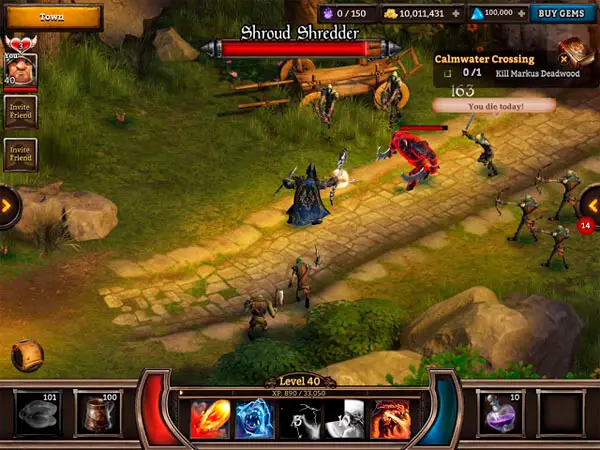
Once a day, I take out my gold find dragons, Lucrix and Fortuna. I take each one on a run through Adamar’s Dungeon. I try to make sure I get every ounce of gold out of the map. To do this, I have to be careful about the following:
- The Mini Bombers and Crazed Sappers will blow themselves up if you don’t kill them in time. Don’t let them do this.
- Do not kill the Shroud Reanimators too soon. Give them time to reanimate all the enemy corpses in the area. But more importantly, don’t let your dragon kill them. Retreat if you need to. Your dragon will follow you.
Auto-farming
Sometimes I will load a map, press the AUTO button in the lower right-hand corner, and let the AI do its thing. While the AI is running the map for me, I am doing other things. I check back periodically to return to town and reload the map. Keep in mind that the AI will not collect all the gold in the map. How much gold it collects will presumably depend on many factors. It may depends on your move speed, your attack speed, and the skills you have assigned to your five slots. I tried autofarming many different maps. I kept records of how much gold I collected each time. Through this process, I determined that, for me, the most gold came from Inner Circle. So when I autofarm, I run Inner Circle. But your situation might be different. You should check for yourself.
Semi-autofarming
Semi-autofarming is like autofarming, except I pay a little more attention to what’s happening. Unlike manual farming, I don’t need to be 100% attentive, and can still do some other things. But I need to be more attentive than straight autofarming. When semi-autofarming, I also run Inner Circle, and I look out for the following things:
- If mana get low, I use a consumable. For me, Honey Wine works best.
- If I see an item worth grabbing, I pause auto mode, grab the item, then resume auto mode. Items I might grab are jewels, potions, cupcakes, and epic gear (for item fusion).
- I watch for the AI to reach the bridges. The AI slows way down at this point, so I shut it off. I drop a drake on one bridge and cross the other with Flame Armor. I approach the nearest mob of enemies and turn AI back on.
- I watch for the AI to reach the end of the map, so I can return to town and reload as soon as possible.
I will use semi-autofarming when I’m running an Elixir of Item Find. I also use it when I need to gather some items, such as potions or item fusion material. But if I’m running a long glp, I usually don’t even have time for semi-autofarming. Then I just do autofarming and try to check on it often, so I don’t burn too much of the glp sitting at the end of the map. From the standpoint of in-game efficiency, this method of using a glp is terrible. But for my life, I find it works best for overall efficiency.
Events
Events are the primary means for getting items that boost your Power Score. Events come in four tiers of increasing difficulty: bronze, silver, gold, and platinum. The bronze tier rewards you with items of Legendary quality. The silver tier gives you Artifact quality items. Gold gives Relic quality, and platinum gives Mythic quality.
Each event lasts for two weeks. As of the time of this writing (May 26, 2016), a new event just started. By playing the current event, you can win an 8-piece Appearance Item set. Each time you complete the event, you will receive a Set Lockbox. When you open the box, you will receive a random reward. The reward might be one of the 8 pieces from the Appearance Item set, or it might be a handful of Dragon Stones. If you collect enough Dragon Stones, you can use them in the shop to buy any missing items from the 8-piece set. When the current event ends, a new one will begin immediately. The next event will reward items from an 8-piece Trinket set. Two weeks after that, an event will begin that rewards items from an 8-piece Equipment set. The event following that will offer Appearance Items again, and the cycle repeats.
To play an event, you must use Event Tokens. The bronze event costs 6 Event Tokens, silver costs 9, gold costs 12, and platinum costs 15. Event Tokens are given away for free in several different ways. Once a day, you can collect a free event bundle1 that contains 5 Event Tokens and a Premium Event Token Lockbox. Upon opening the box, you will receive a random number of Event Tokens. You will most likely get 10, but you may get more. You can also get 5 free tokens per day from Keira, the Apprentice.
To get more tokens, you should use gold to buy Premium Event Token Lockboxes from the shop. The full price of one box is 360,000 gold, but it is possible to get a discount. To get the discount, you need to get a Crown.
Crowns
Crowns come in several different qualities. Here we will discuss only four: Common, Superior, Epic, and Legendary. A Crown will also have a Star Level between 1 and 5. To get the best discount possible, you will need to buy a Common 1 Crown and evolve it to Legendary 5. The Common 1 Crown costs 50 gems in the shop.
Unlike other items, Crowns do not need to be fused. You can perform consecutive evolutions without any intermediate fusion. Crown evolution requires gold and two evolution materials. Those materials are Blue Mystic Spirits (BMS) and Tarot Cards – Wizard (TCW). The following table lists each Crown type and the token discount it offers. It also lists the amount of BMS, TCW, and gold needed to evolve it to the next level.
| Crown type | discount | BMS | TCW | Gold |
| Common 1 | 5% | 10 | 10 | 5 000 |
| Common 2 | 6% | 10 | 10 | 5 000 |
| Common 3 | 7% | 10 | 10 | 5 000 |
| Common 4 | 8% | 10 | 10 | 5 000 |
| Common 5 | 11% | 10 | 10 | 5 000 |
| Superior 1 | 12% | 10 | 10 | 5 000 |
| Superior 2 | 13% | 10 | 10 | 5 000 |
| Superior 3 | 14% | 10 | 10 | 5 000 |
| Superior 4 | 15% | 10 | 10 | 5 000 |
| Superior 5 | 18% | 10 | 10 | 30 000 |
| Epic 1 | 19% | 10 | 10 | 30 000 |
| Epic 2 | 20% | 10 | 10 | 30 000 |
| Epic 3 | 21% | 10 | 10 | 30 000 |
| Epic 4 | 22% | 10 | 10 | 30 000 |
| Epic 5 | 25% | 15 | 15 | 75 000 |
| Legendary 1 | 28% | 15 | 15 | 75 000 |
| Legendary 2 | 32% | 15 | 15 | 75 000 |
| Legendary 3 | 36% | 15 | 15 | 75 000 |
| Legendary 4 | 40% | 15 | 15 | 75 000 |
| Legendary 5 | 45% | N/A | N/A | N/A |
To get evolution materials, you must play the Battle Coliseum. There you will earn Honor Tokens, and these can be used to buy BMS and TCW from the shop.
My advice is to put off buying Event Tokens as long as you can. In the meantime, hoard gold and Honor Tokens. Stock up on BMS and TCW whenever it goes on sale. When you can no longer wait to buy Event Tokens, buy a Common 1 Crown. Evolve it as far as you can and spend the rest of your gold on Event Tokens.
Managing your token stash
Some people who play the events live paycheck-to-paycheck. They are always out of tokens, waiting for the next free bundle. Or they’re desperately trying to farm enough gold to buy a single token lockbox. Out of frustration, they may even give in and spend their precious gems for a quick fix. If you play this way, you’ll always be struggling to pay the bills. In other words, the event will often end before you can collect all the items. You’ll constantly be frustrated when that one run you worked hours to pay for gives you a seventh pair of boots.
What you need is a savings account and a budget. The savings account will be a stash of Premium event Token Lockboxes (PTBs) tucked away in your vault. The budget will be a certain amount of gold that you will set aside every day for tokens. But like any budget, you have to stick to it. Even when you are lucky and you get the full set in, say, 10 runs, you have to continue to set aside gold for the future. That doesn’t mean you buy tokens every day. In fact, you only want to buy tokens when you have a good crown discount. But you must always know how much of your gold is earmarked for tokens and not dip into it.
Before you can even start budgeting, you have to build up your stash of PTBs. At first, you may have trouble farming enough gold to build a good stash. If this happens, try playing every other event for a while. During the events you’re not playing, just save up your gold, preparing to buy a bulk of premium token boxes. When you’re skipping an event, don’t forget about the daily event bundle. You need to collect this, so you will need to keep your loose Event Tokens below 35. To do this, just play the bronze event as needed. You will also get some extra Dragon Stones and some gems from selling the items you get.
So how big a stash do you need? Well that depends on many things. Which event tier are you playing? How much gold are you able to set aside for tokens? And how many times do you want to be able to run the event? You need a bigger stash to play platinum than to play gold. The more gold you farm for tokens, the smaller a stash you can get away with. If you haven’t got the complete set after 40 runs, are you willing to give up on the event? If so, then you need a smaller stash than someone who won’t give up until 50 runs.
One way to manage your stash size is to fly by the seat of your pants and use trial and error. Just build as big a stash as you can and see how it works for you. If you find yourself running out of tokens, then make adjustments. Try to improve your gold farming, or rebuild a bigger stash than you had before. If that doesn’t work, then you may need to reduce the number of runs you make or drop down an event tier.
Setting up your budget
This workbook has three sheets, but you only need to worry about the first sheet, “budget”. In Cell B2, you enter the date and time that you started budgeting your tokens. For best results, if using Google Sheets, you should enter the time in Pacific Time.
The next thing you need to do is decide on a stop-loss. After a certain number of runs, if you haven’t got the complete set, you need to give up and cut your losses. How many runs will that be? For me, it is 50. For you, it may be something else. Whatever your stop-loss is, enter it in Cell B3.
Next, enter into Cell B4 the number of PTBs you have in your vault. You enter this only once, at the time you set up your budget. This is your initial stash size.
After that, decide how much gold you are willing and able to put toward tokens. Enter that amount, in gold/day, into Cell B5.
Finally, enter the cost in tokens of each run into Cell B6. I have entered 15, because I am playing the platinum tier.
These five numbers are the foundation of your budgeting plan. Once you have entered them, you will see your risk of ruin in Cell B8. This is the probability that you will eventually run out of tokens. Obviously, you want this as small as possible. How small you want it is a matter of personal preference. I like mine smaller than 0.1%, meaning I want my stash’s chance of survival to be greater than 99.9%.
Sticking to your budget
Now that your budget is made, you will have to stick to it. The hard part will be remembering how much of your gold is earmarked for tokens. The workbook can also help with this. In Cell B10, enter the discount offered by your current crown. In Cell B11, enter the current number of PTBs you have in your stash. In Cell B12, enter the current number of the smaller event Token Lockboxes you have. And in Cell B13, enter the current number of loose event Tokens you have. Finally, in Columns C and D, keep track of the number of runs you have made for each event since the start of your budget. In KingsRoad, you can see how many runs you have made in the current event by looking under Achievements. Make sure to include the runs you have made in the current event, even if you plan to run more later.
Once you have done this, the spreadsheet will return two important numbers, in Cells B16 and B17. In Cell B16 is the number of PTBs you ought to have, according to the budget. And in Cell B17 is the amount of gold you should have earmarked for tokens. Keep in mind that you may not buy tokens for some time. When you do buy tokens, you may have a better crown discount. If that happens, then you will need less gold than what is shown in Cell B17.
The workbook is read only, but feel free to download a copy in order to make adjustments to the numbers.
Also, this budgeting system assumes that your goal is to get a complete set of items from the event. In other words, it assumes you will stop running the event once you get your set. If your goal is different, you can still use the workbook, but you will have to adjust the “backend” sheet.
Which tier to play
On the Event Board, you can read the required Power Score and the recommended Power Score for each tier. If you do not have the required Power Score, you cannot play that tier. If you do, then you can. But just because you can, it doesn’t mean that you should. The recommended Power Score is a decent indicator of when you should play a particular tier. But it can sometimes be misleading. For a better indicator, look to your Damage. If it is at least half the recommended Power Score, then you should be ready for that tier.
If your damage is too low and you still want to play that tier, then you can use potions. Your main priority should be to use Elixirs of Damage and Avoidance. But Elixirs of Cooldown Reduction and Mana Regeneration would also help you. You will also want to bring along rejuvenation potions and/or cupcakes.
Which dragons to use
Which dragons to conjure in an event is a matter of personal preference. But you want to be sure your dragons are strong enough for the tier you’re playing. As a rule of thumb, your dragons should be Level 30 for bronze tier, Level 45 for silver, 60 for gold, and 80 for platinum. But in general, this is not so essential. If your dragons are a little weak and one dies, then you can conjure another one in the middle of battle.
When to play
Sometimes you don’t have a choice of when to play. For example, you may need to use up some Event Tokens right away so you can collect the daily event bundle. But as far as possible, you should only play the event on Sundays. When you play an event on a Sunday, you get an Event Bonus Lockbox. This lockbox can reward you with more Event Tokens, or with a Dragonstone Lockbox. (It can also reward you with some less desirable items.) Do not open the Dragonstone Lockbox when you get it. Instead, save it in your vault. The game only allows you to own 150 Dragon Stones. But there is no limit on Dragonstone Lockboxes. When you are desperate, you will be glad to have that stash of Dragonstone Lockboxes.
In fact, you should try to concentrate most of your runs on the second Sunday of the event. Remember, you cannot collect the daily event bundle if you have too many Event Tokens. This will compel you to play the event almost daily. If you get the full set of items on the first Sunday of the event, there will still be 10 days left. You will end up making many unnecessary runs in the event. It is better to avoid this situation and save your Event Tokens.
Tournaments
After the first time you complete The Lost Hills story map, you will be able to access the tournaments. Each tournament lasts for two weeks and runs alongside its corresponding event. The tournament will start first, on Tuesday. Then the event will start two days later, on Thursday. Successfully completing the tournament will earn you a primary reward and a secondary reward. The primary reward is an item you can equip. If the event is rewarding equipment, then the primary tournament reward is a belt. Belts are also equipment items. If the event is rewarding appearance items, then the tournament rewards a banner. Banners are also appearance items. And if the event is rewarding trinkets, then the tournament will give you a trophy, which is also a Trinket. The secondary tournament reward varies. It could be a rare jewel, for example.
The tournament consists of nine maps. Each map can be played on one of four difficulty tiers: bronze, silver, gold, or platinum. On the first day of the tournament, only Map 1 Bronze will be unlocked. You must complete bronze to unlock silver, silver to unlock gold, and gold to unlock platinum. On the second day, Map 2 Bronze will unlock. This pattern continues with the next bronze map unlocking with each new day.
When you complete a tournament map, you receive a reward lockbox. When you open the box, you might receive a special tournament jewel. Each map offers its own unique jewel, so there are nine jewels to collect. The quality of the jewel you receive depends on the difficulty tier of the map you played. Bronze maps give Superior jewels. Silver maps gives Epic jewels. Gold gives Legendary, and platinum can give either Artifact or Relic.
The jewel you receive will be Level 1, but you can fuse it up to Level 5. If you collect all nine jewels and fuse them all up to Level 5, then you can receive the tournament rewards. The quality of the primary reward will be the same as the quality of the jewels you collected. If you receive a Relic quality primary reward, it can be fused and evolved to Mythic. Other qualities cannot be changed.
Every time you play a tournament map, it costs you 10 Valor, regardless of the difficulty tier. Valor regenerates automatically over time at a rate of 10 Valor every 3 hours. You can have at most 30 Valor at any given time. If your Valor reaches 30, Valor generation will stop until you use some Valor.
If you have the time and the Valor, you can receive several rewards from the tournament. But you are only allowed to collect three of each reward at each quality, for at most 15 possible rewards.
Why you should play tournaments
The obvious reason to play tournaments is for the rewards. For each item type, Equipment, Appearance, and Trinkets, there are nine possible items. Eight of these are available from the events, but one of them can only be obtained from the tournaments.
Playing tournaments can also help you and your guild place on leaderboards. Even if this is not important to you, it may be important to your guild. Many guilds will remove members who do not score enough. If your guild owner removes you, you will lose your Guild Skills.
But the most important reason to play the tournament is that it is fun. When you play the event, you will play the same map over and over again for two weeks. With the tournament, you have nine different maps. Also, most players will be able to play the tournament much more often than the event. And you don’t have to farm any gold to play the tournament.
Which tier to play
In general, you should play the same tier in the tournaments as you do in the events. Be aware, though, that there is a wider difficulty range in the tournament tiers than in the event tiers. The bronze tournament is easier than the bronze event. But the platinum tournament is harder than the platinum event.
Tournament strategy
Throughout this strategy section, I assume you can complete each tournament map without dying. If you cannot do that, then drop down a tier, or rethink your plan of attack in the map that’s giving you trouble.
It is actually not too hard to earn the rewards from the tournaments, with one exception. If you are playing platinum, and you want the Relic reward instead of Artifact, then you are in for a challenge. If this is your situation, there are two excellent guide on the forums that can help you:
Successful Strategy to play Tournament being a 100% free player.
Here, I will only discuss strategies related to the lower tier tournaments. You can also apply them to the platinum tournament when you just want an Artifact reward. Since obtaining the reward is not difficult, I will focus on efficiency and scoring. Sometimes the secondary reward is something valuable. It could be a crescent that boosts your gold find, for example. In that case, you may want to collect several tournament rewards. To do this, you will need to be efficient. Scoring is important because of the Tournament Achievements. The more you score, the more rewards you collect from these achievements. High scores can also earn you a place on the daily leaderboard.
Don’t let your Valor fill up
You want to generate as much Valor as possible. Valor generation stops when you are at 30 Valor. It takes 9 hours for your Valor to go from 0 to 30. Try to time your playing so that you spend as little time as possible with 30 Valor.
Take advantage of bonus lockbox days
The last four days of the tournament, Days 10 through 14, are bonus lockbox days. On Day 10, if you play Map 7, you will receive a Tournament Bonus Lockbox. Inside the bonus box could be many things, including other boxes. You could get a Valor Lockbox, or a Premium Tournament Jewelbox, for example. The Valor Lockbox contains at least 10 Valor, maybe more. And the jewelbox contains one random tournament jewel from one of the nine maps. When you open a jewelbox, you are guaranteed to get a tournament jewel.
On Day 10, you should only play Map 7. You may be tempted to play a different map, because you are missing a jewel. But resist the temptation. You will most likely get your missing jewel from the bonus jewelboxes. And in the meantime you will collect Valor Lockboxes and many other jewels that you will need for fusion.
On Day 11, Map 8 has the bonus box. Only play Map 8 on Day 11. And on Days 12 through 14, it is Map 9 that has the bonus box. You should only play Map 9 during the last three days of the tournament.
Save your Valor Lockboxes
Beginning players usually open every lockbox they get, right when they get them. But if you open a Valor Lockbox, your Valor might go over 30. You will then need to use that Valor right away. Otherwise, you will stop generating Valor. It is better to save those Valor Lockboxes for a time when you really need them. Typically you will not need to open any Valor Lockboxes to get the tournament rewards. But if you are trying for several rewards, you may want to break into your stash of Valor Lockboxes.
Sourse: KingsRoad Player’s Guide by Doctor Agon